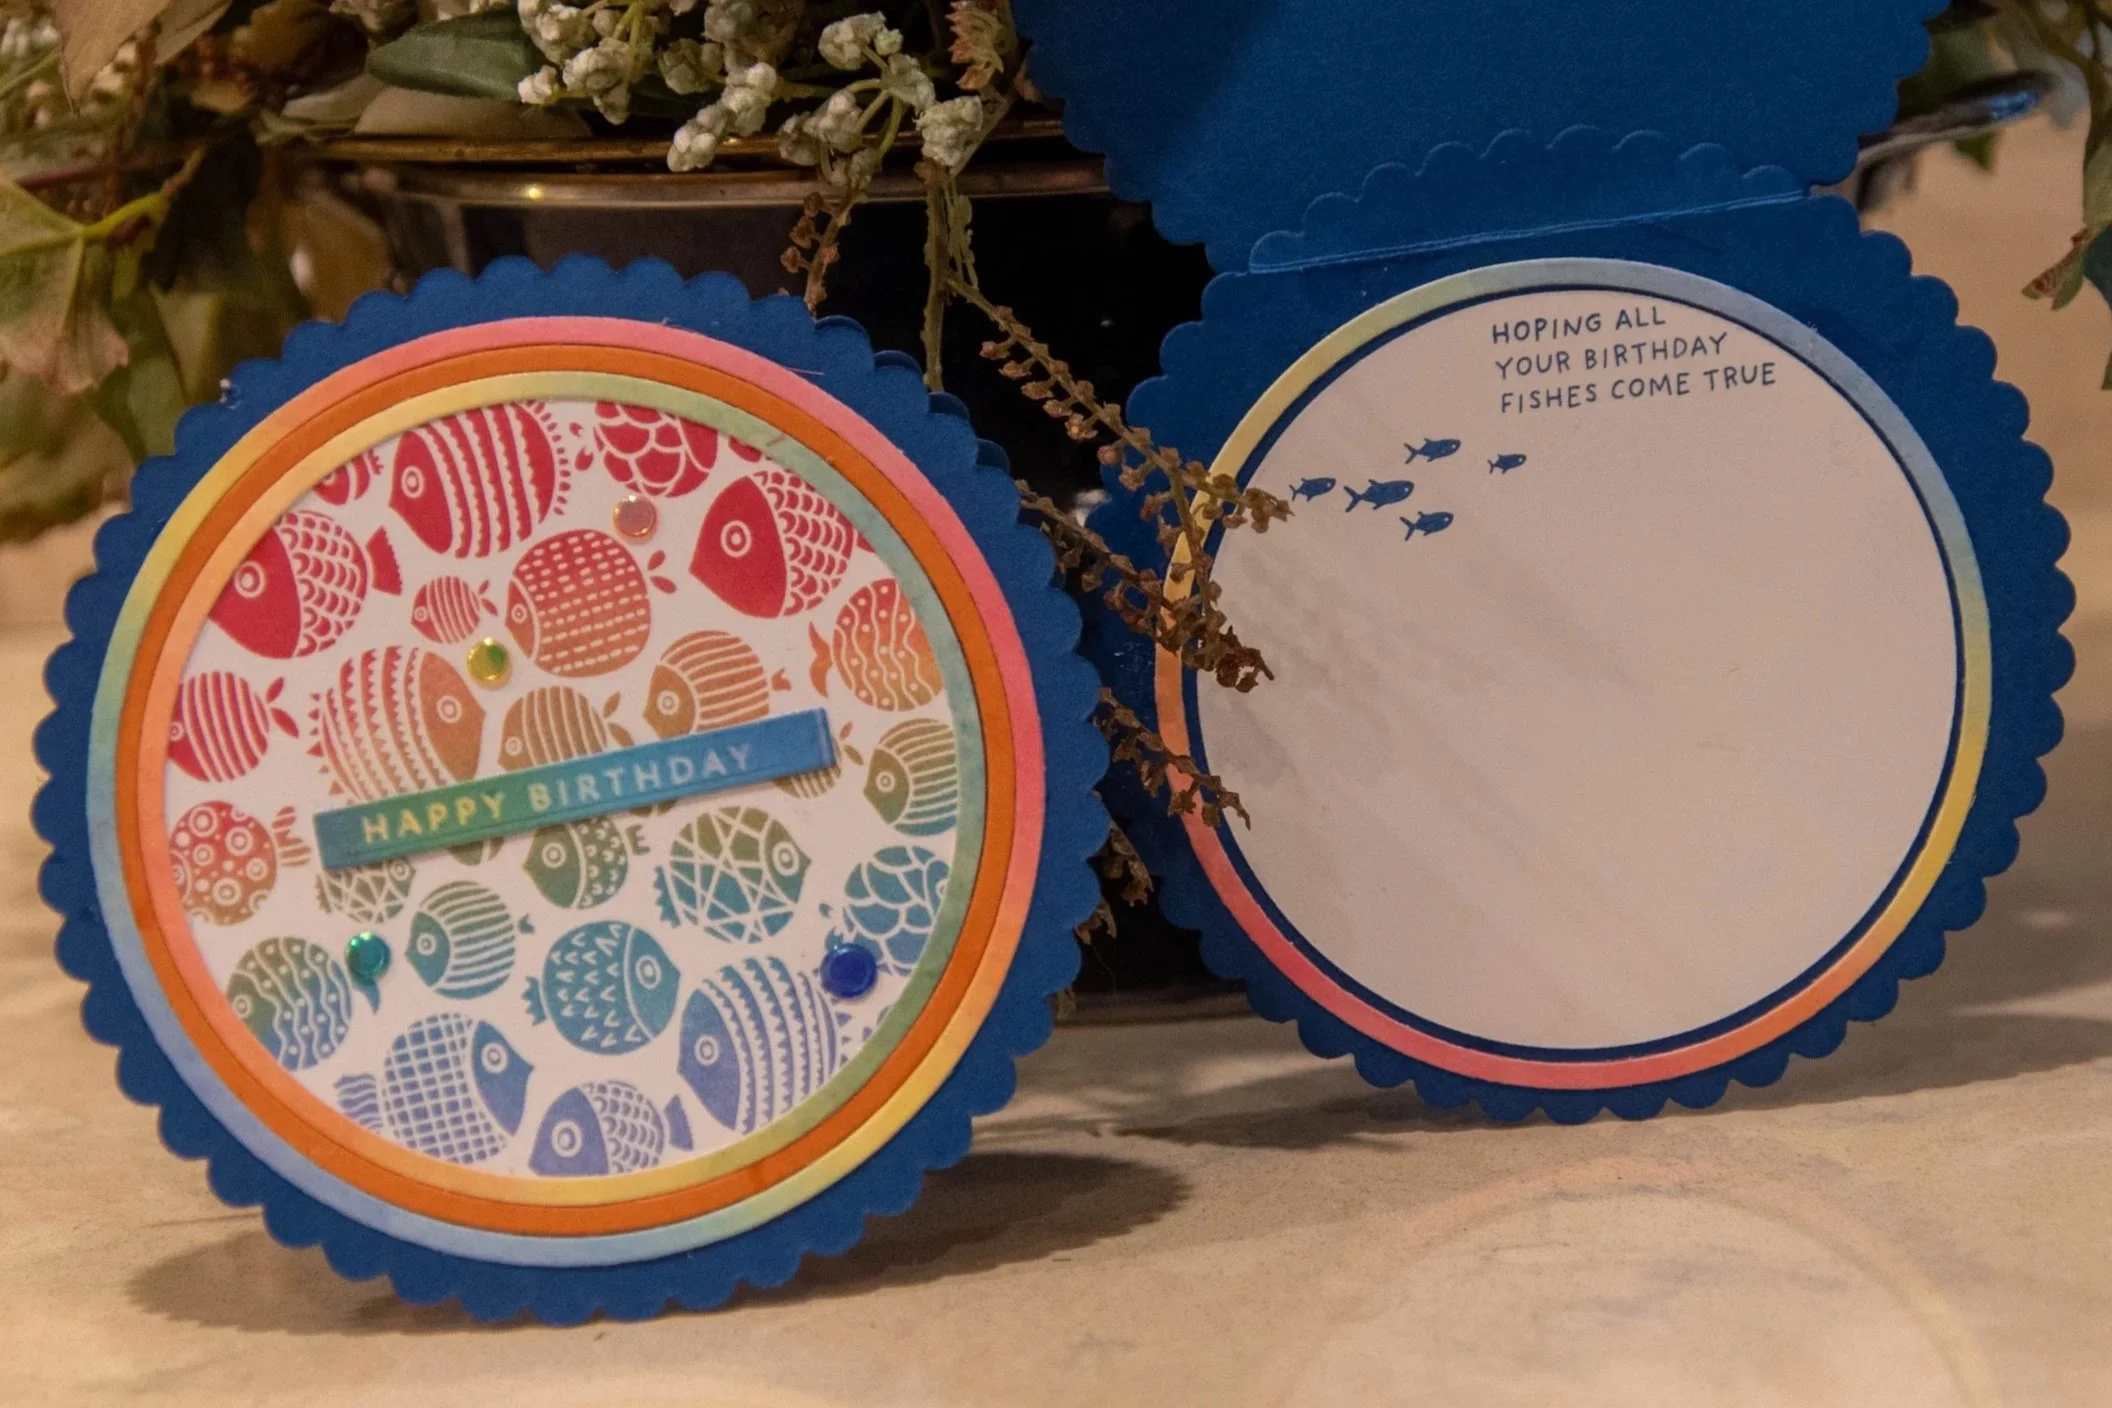
Birthday Fishes
I smiled when I received this BetterPress kit in August 2025 because these fish are so cute. I knew it wouldn’t be too long before I incorporated the school of fish into a card. I opted for a bright happy color theme resulting in a rainbow of fish. The rainbow colors made me think of birthday parties so this design was a candidate for a birthday card but first, I wanted to check my stamp stash to see if I had a sentiment that would pull in the birthday and fish theme.
My husband had built me a database for my craft inventory so I can look through my massive stash with a few good search words. It worked! I found “Hoping All Your Birthday Fishes Come True”. This sentiment came from a stamp set that is 6 years old. What was even better is the stamp set came with its own school of fish stamp. Perfect!
I rarely have a complete design in my mind when I start working on a design. The card muses start working as soon as I pick up the focal element. The design process is my favorite part of card design. I never know how it is going to turn out but I am always happy with the finished product.
This card is a circle shaped card 4-3/4” in diameter. The list of products used on this card are listed at the end of the page.
Step by Step Instructions for making this Card.
Make the Circle Card Base
1. Make the card base with the Blueberry Bushel Card Stock for a Scalloped Circle card, using the Scalloped Circle Die. This design results in a circle card 4-¾” diameter (See Card Basics).
2. At least a 4”x4” Hammermill white square for the fish image on the front panel.
3. At least a 4”x 4” Hammermill white square for the interior of the card.
4. (2) 1/2 sheets of Hammermill premium color copy cover – white paper. Used for the rainbow ring.
5. ½ sheet of cardstock (Any of the following colors Red, Orange, Yellow, Green, Indigo or Violet.
There are five panels that need to be cut for this card.
Cut the Card Panels
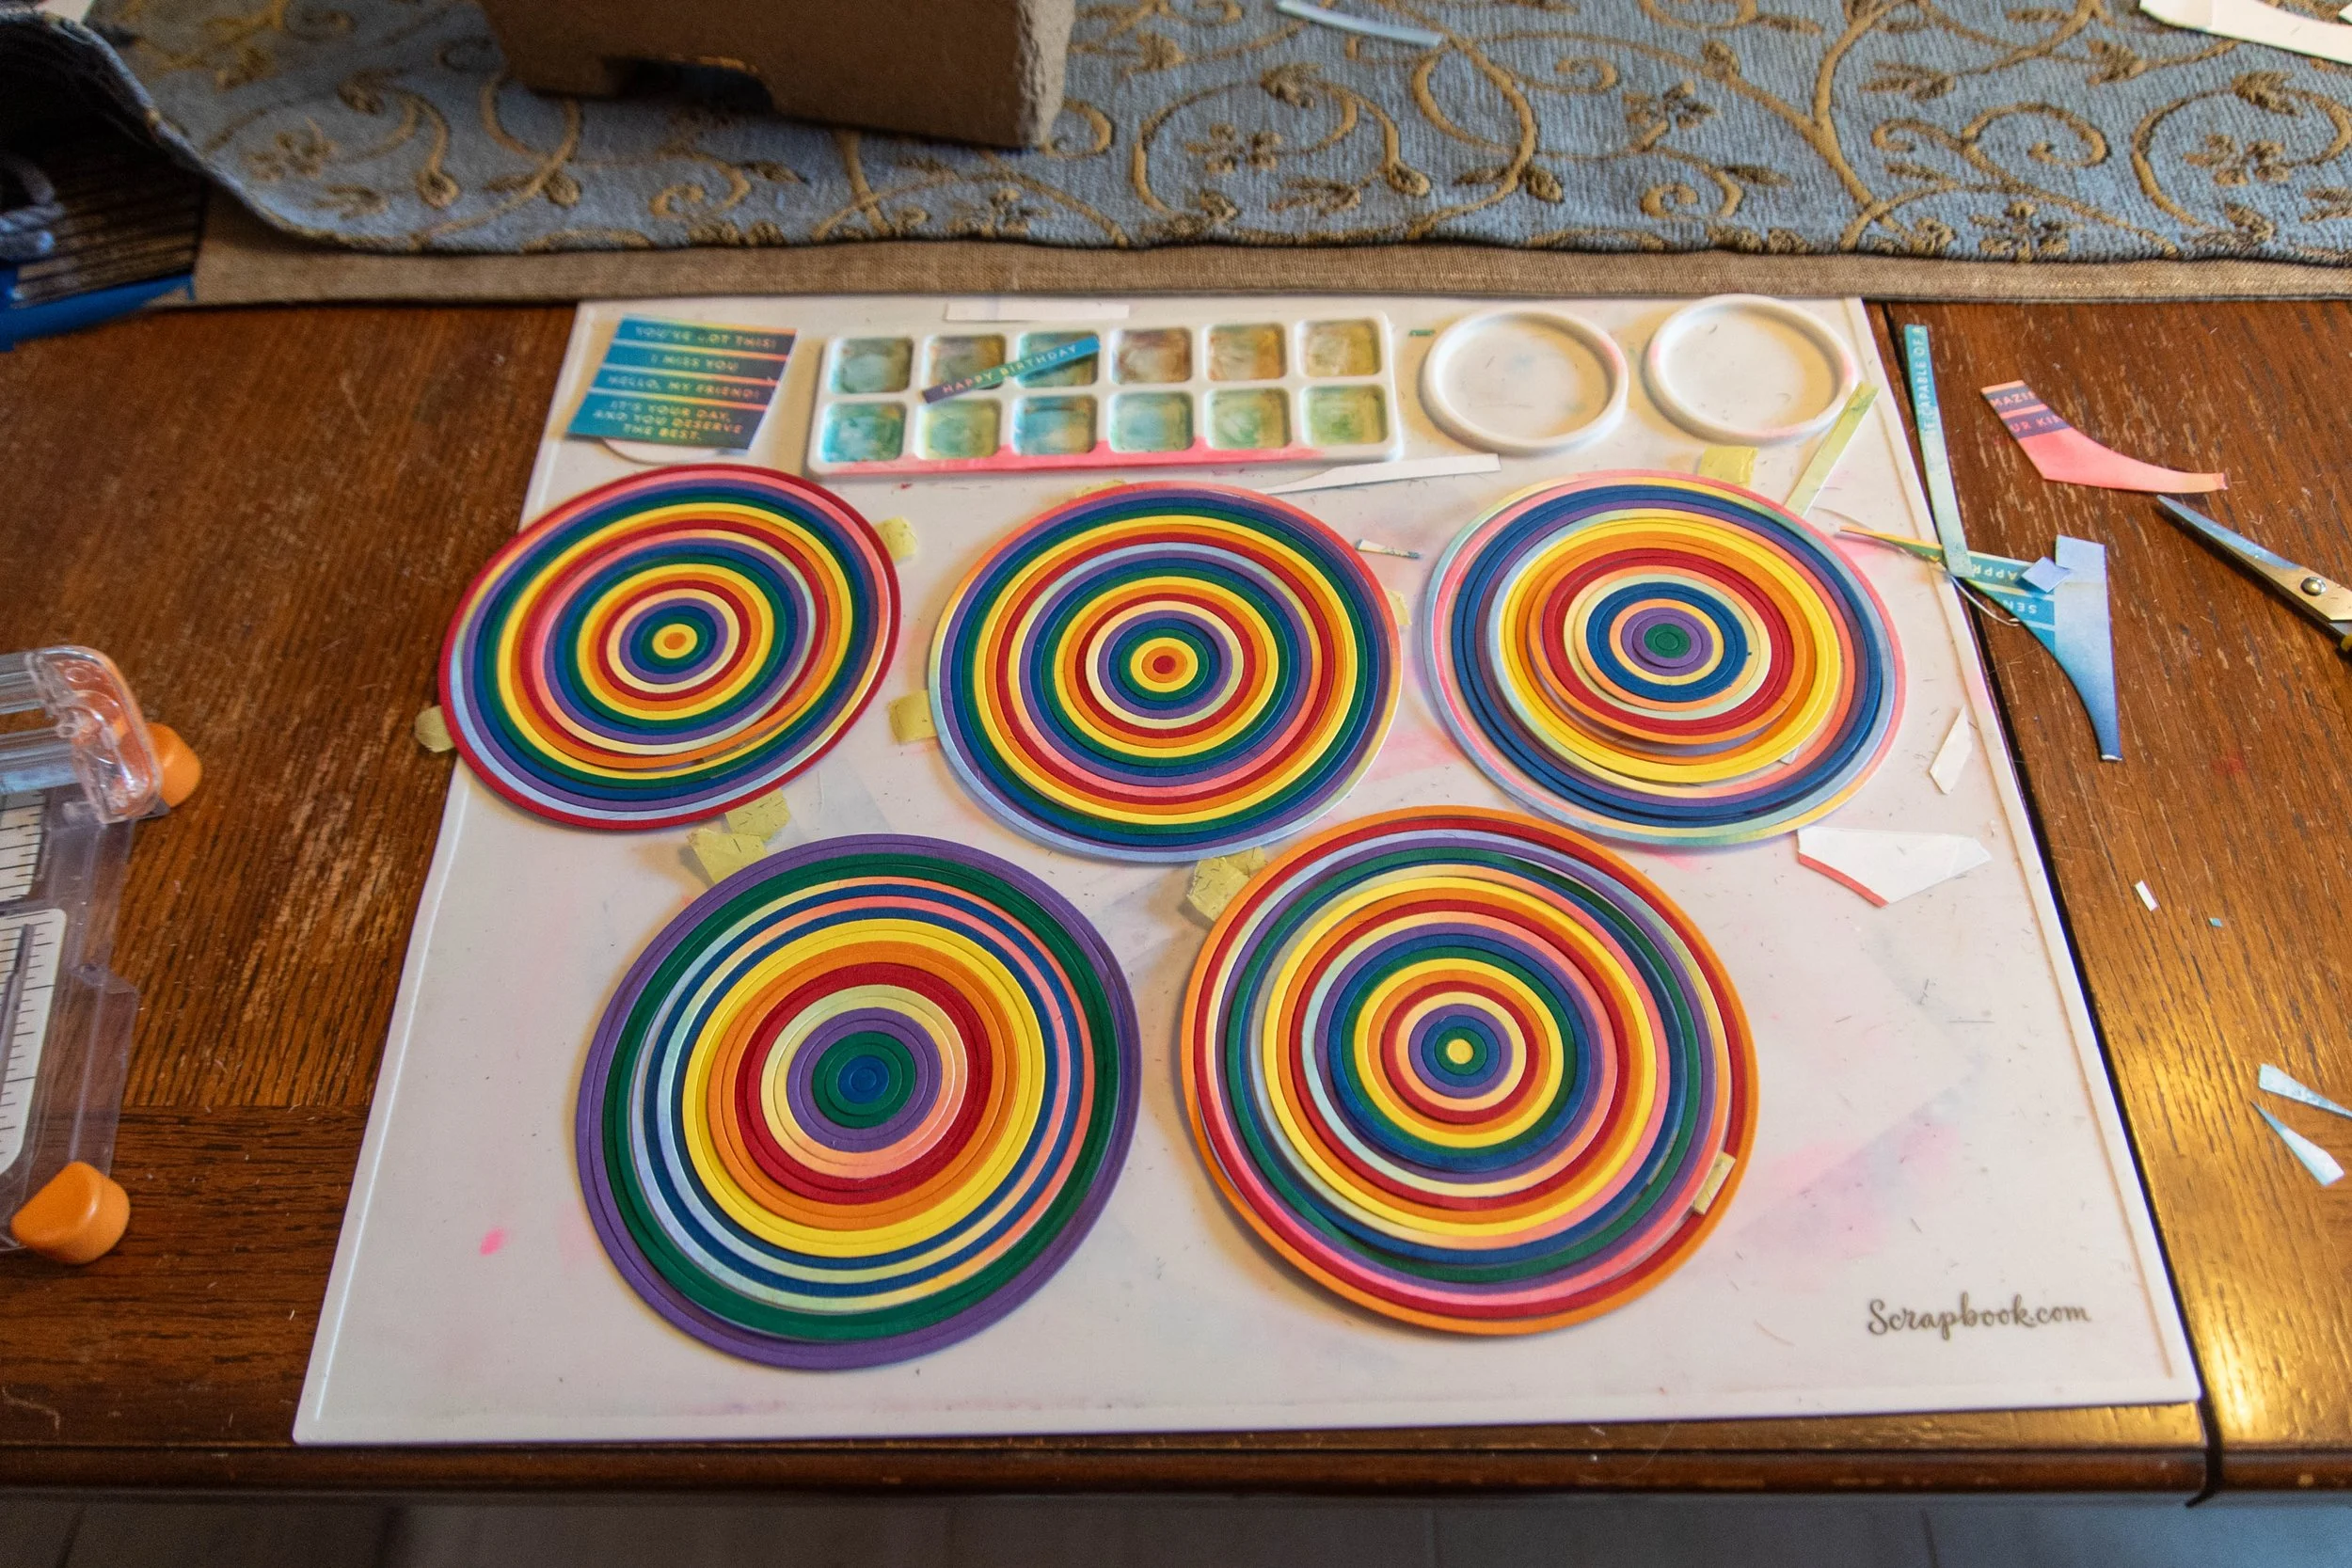
Cut Out the Rainbow Rings
I choose to make rings that would be placed around the focal image to be cut from a rainbow blended image. Rings from this image provides a soft halo around the image. I also included one ring from cardstock that represented one of the Rainbow Color: Red, Orange, Yellow, Green, Indigo or Violet. This ring is sandwiched between the rainbow rings.
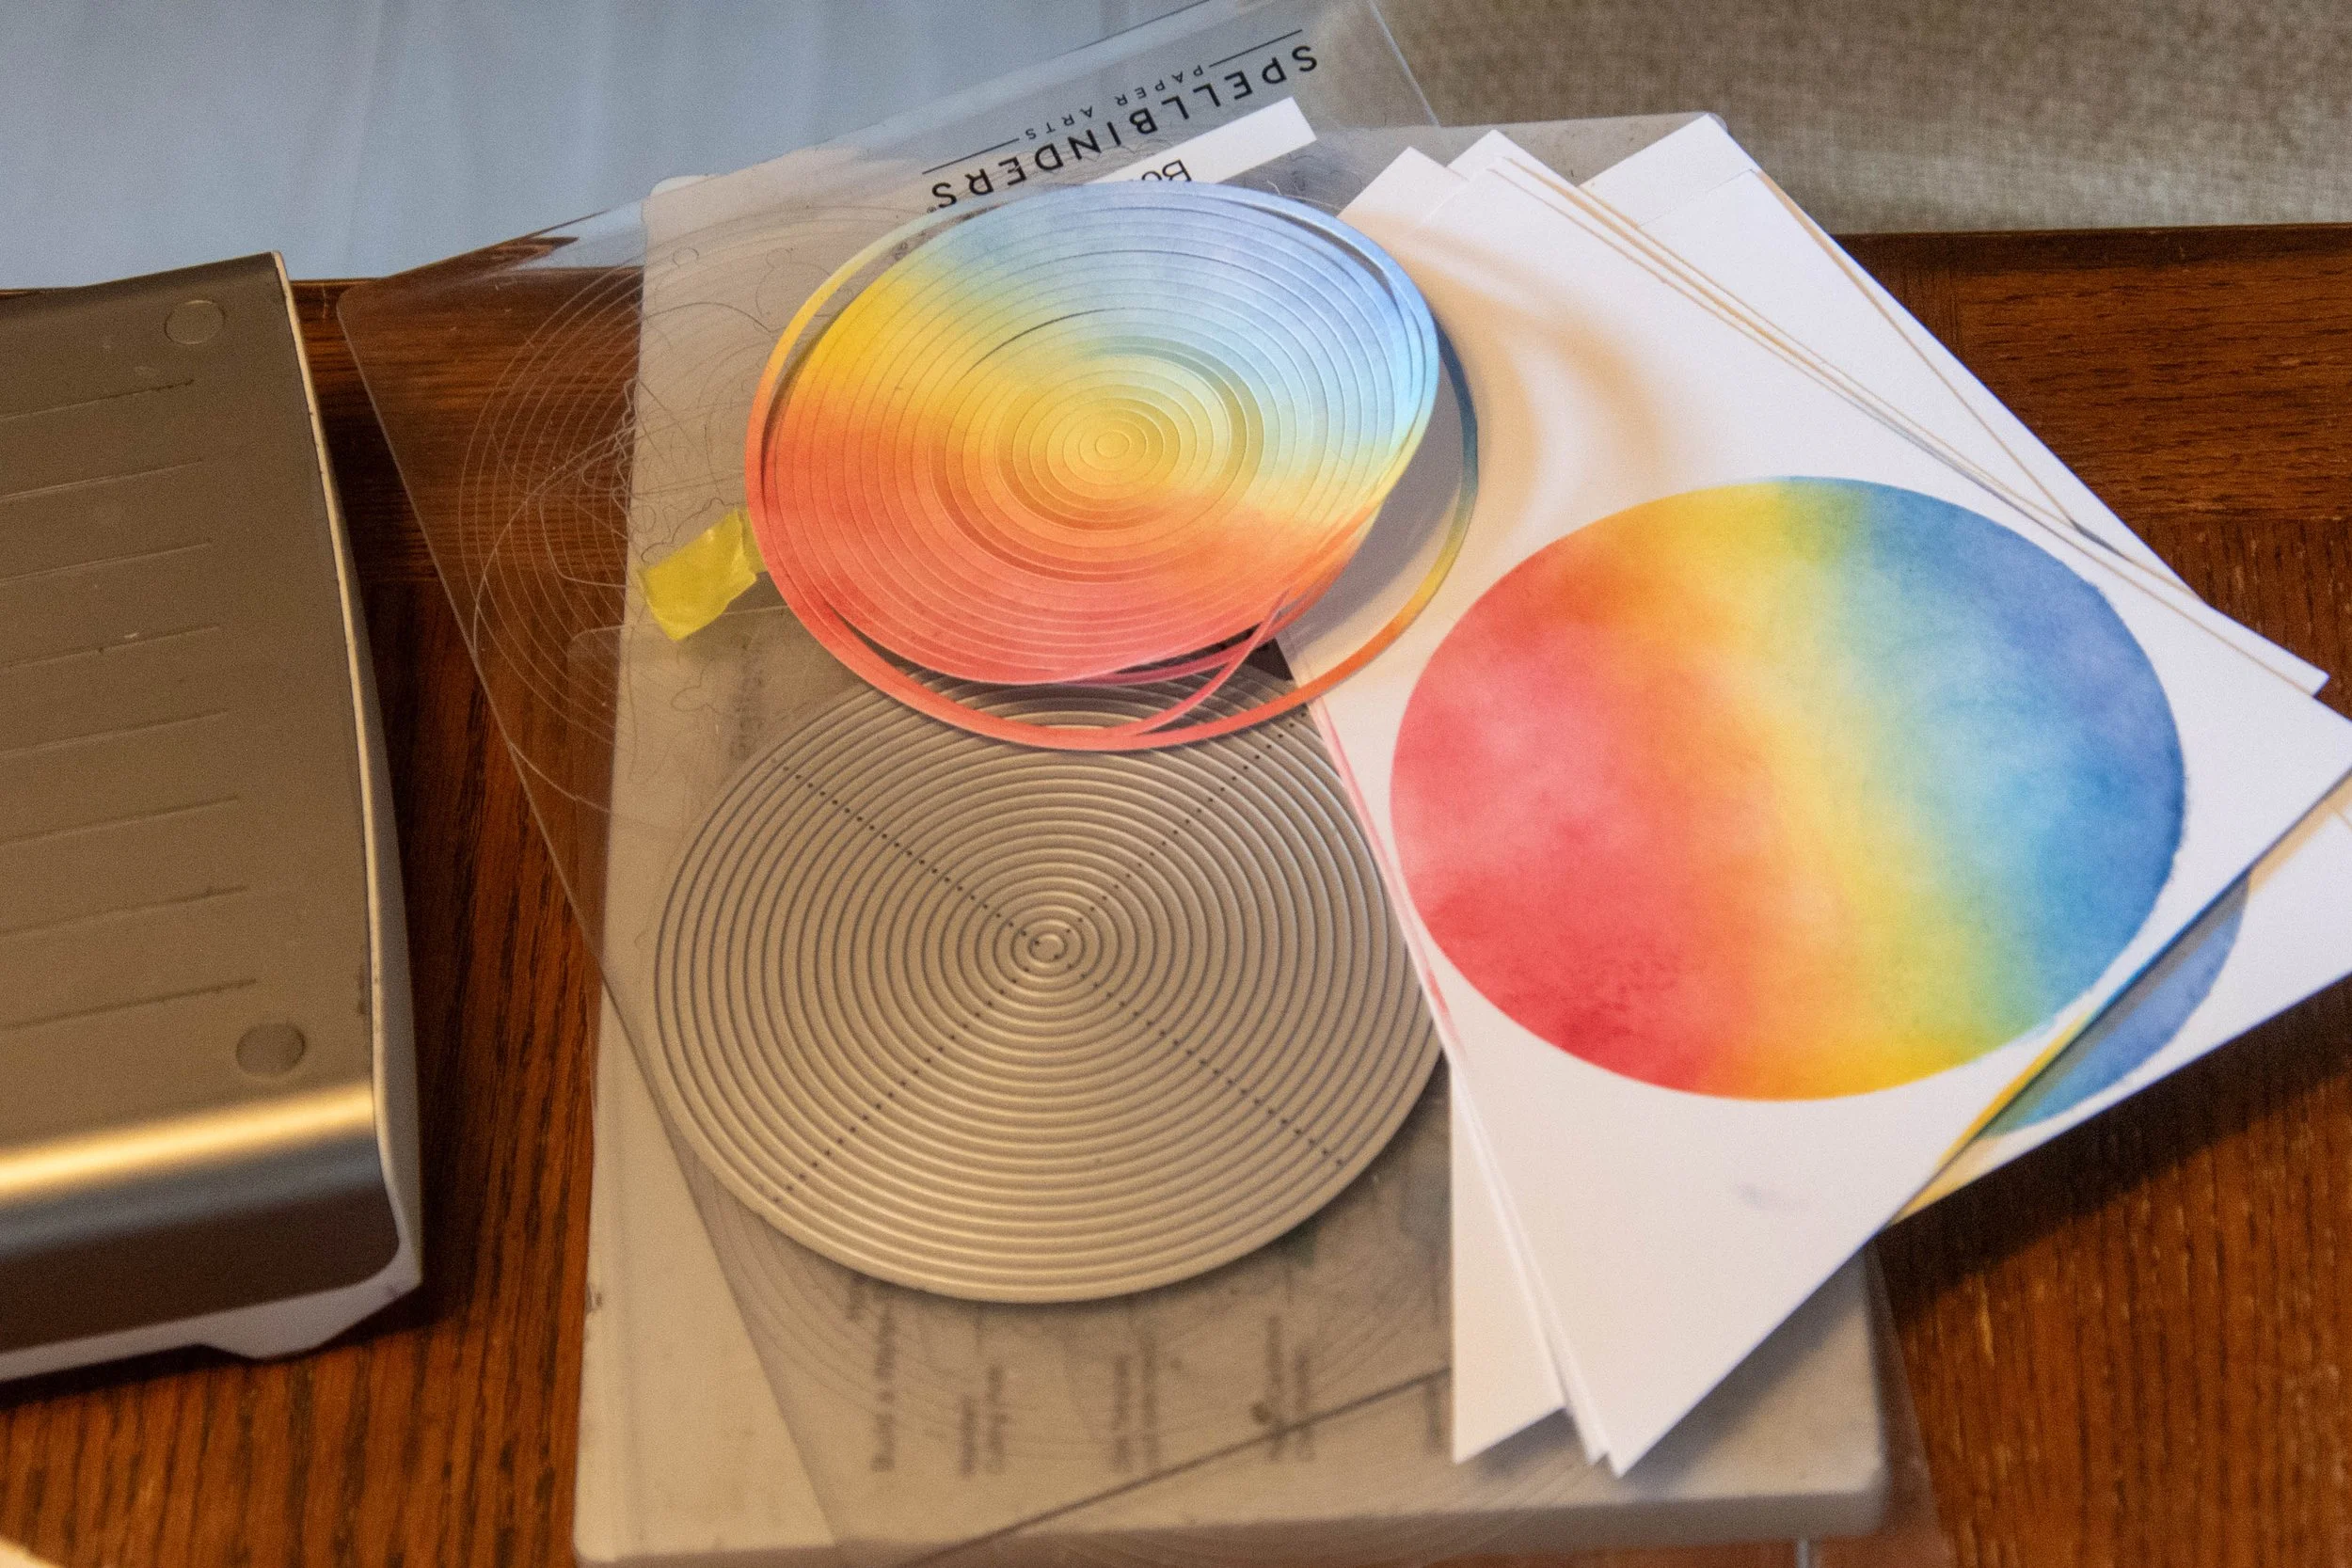
6. On the two ½ sheets of Hammermill paper use blending brushes to blend red (real red), yellow (dandelion delight), blue (azure afternoon), and indigo (starry sky) inks from the top to the bottom overlapping and creating a rainbow pattern covering the whole sheet.
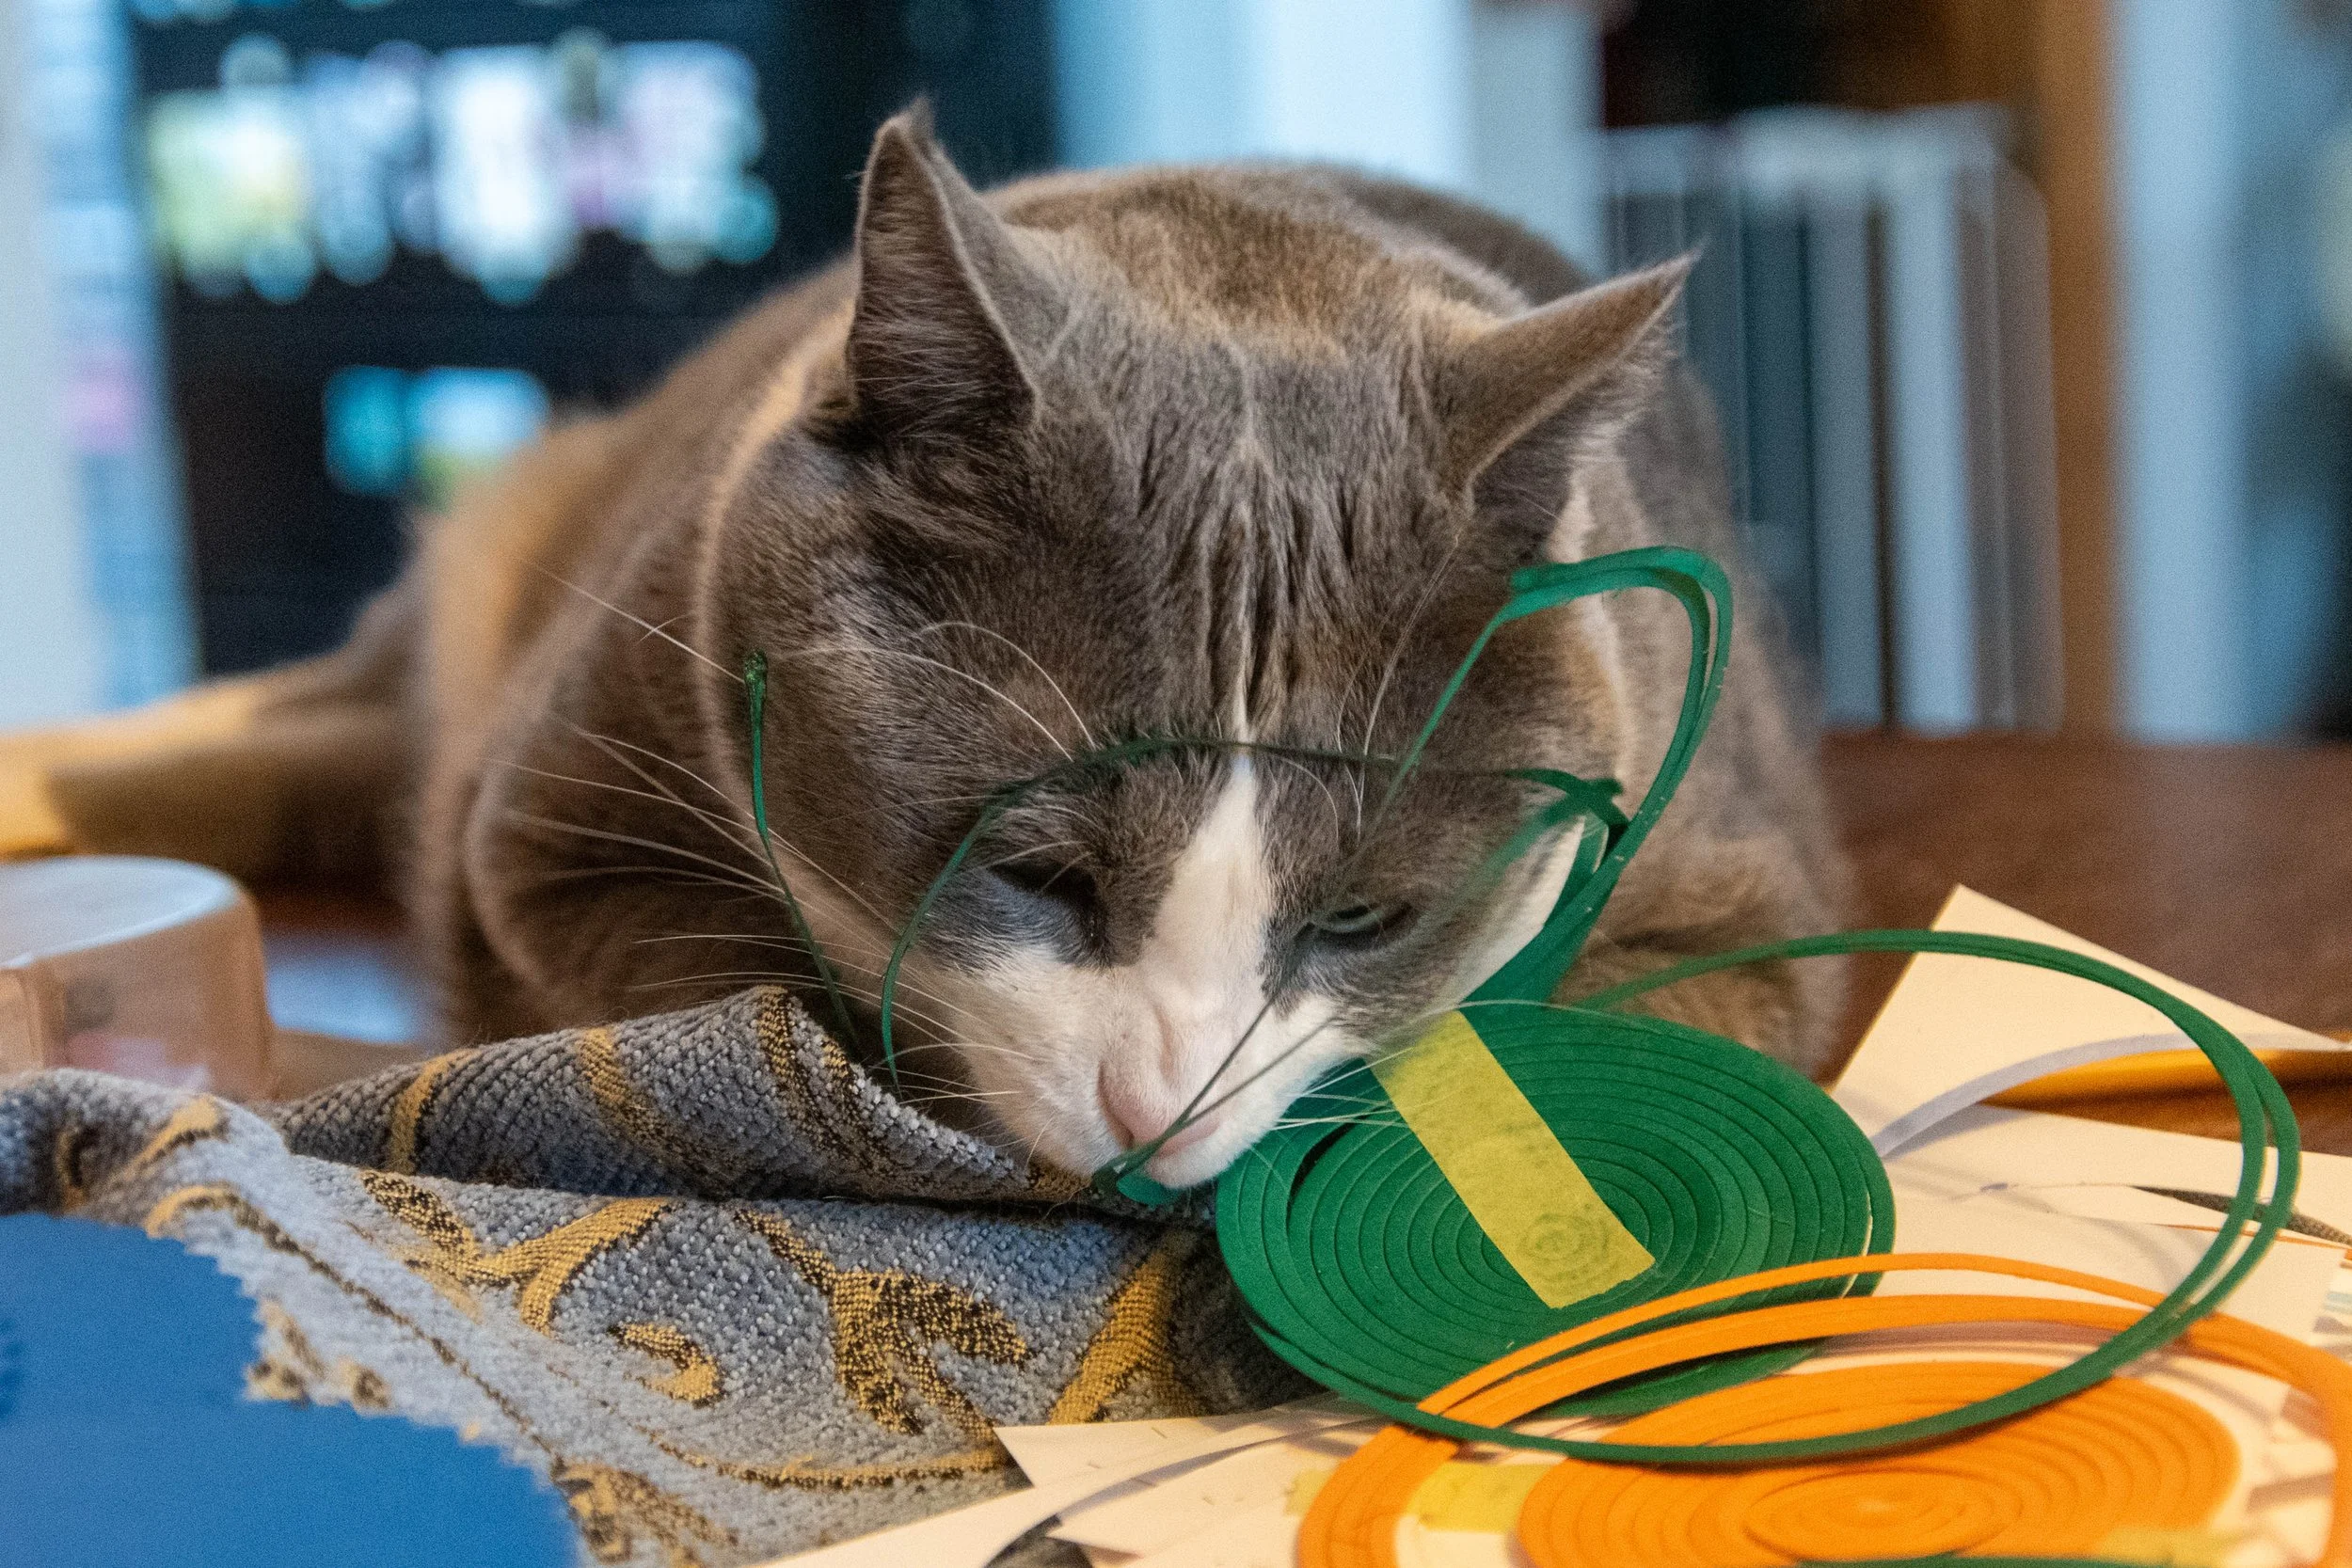
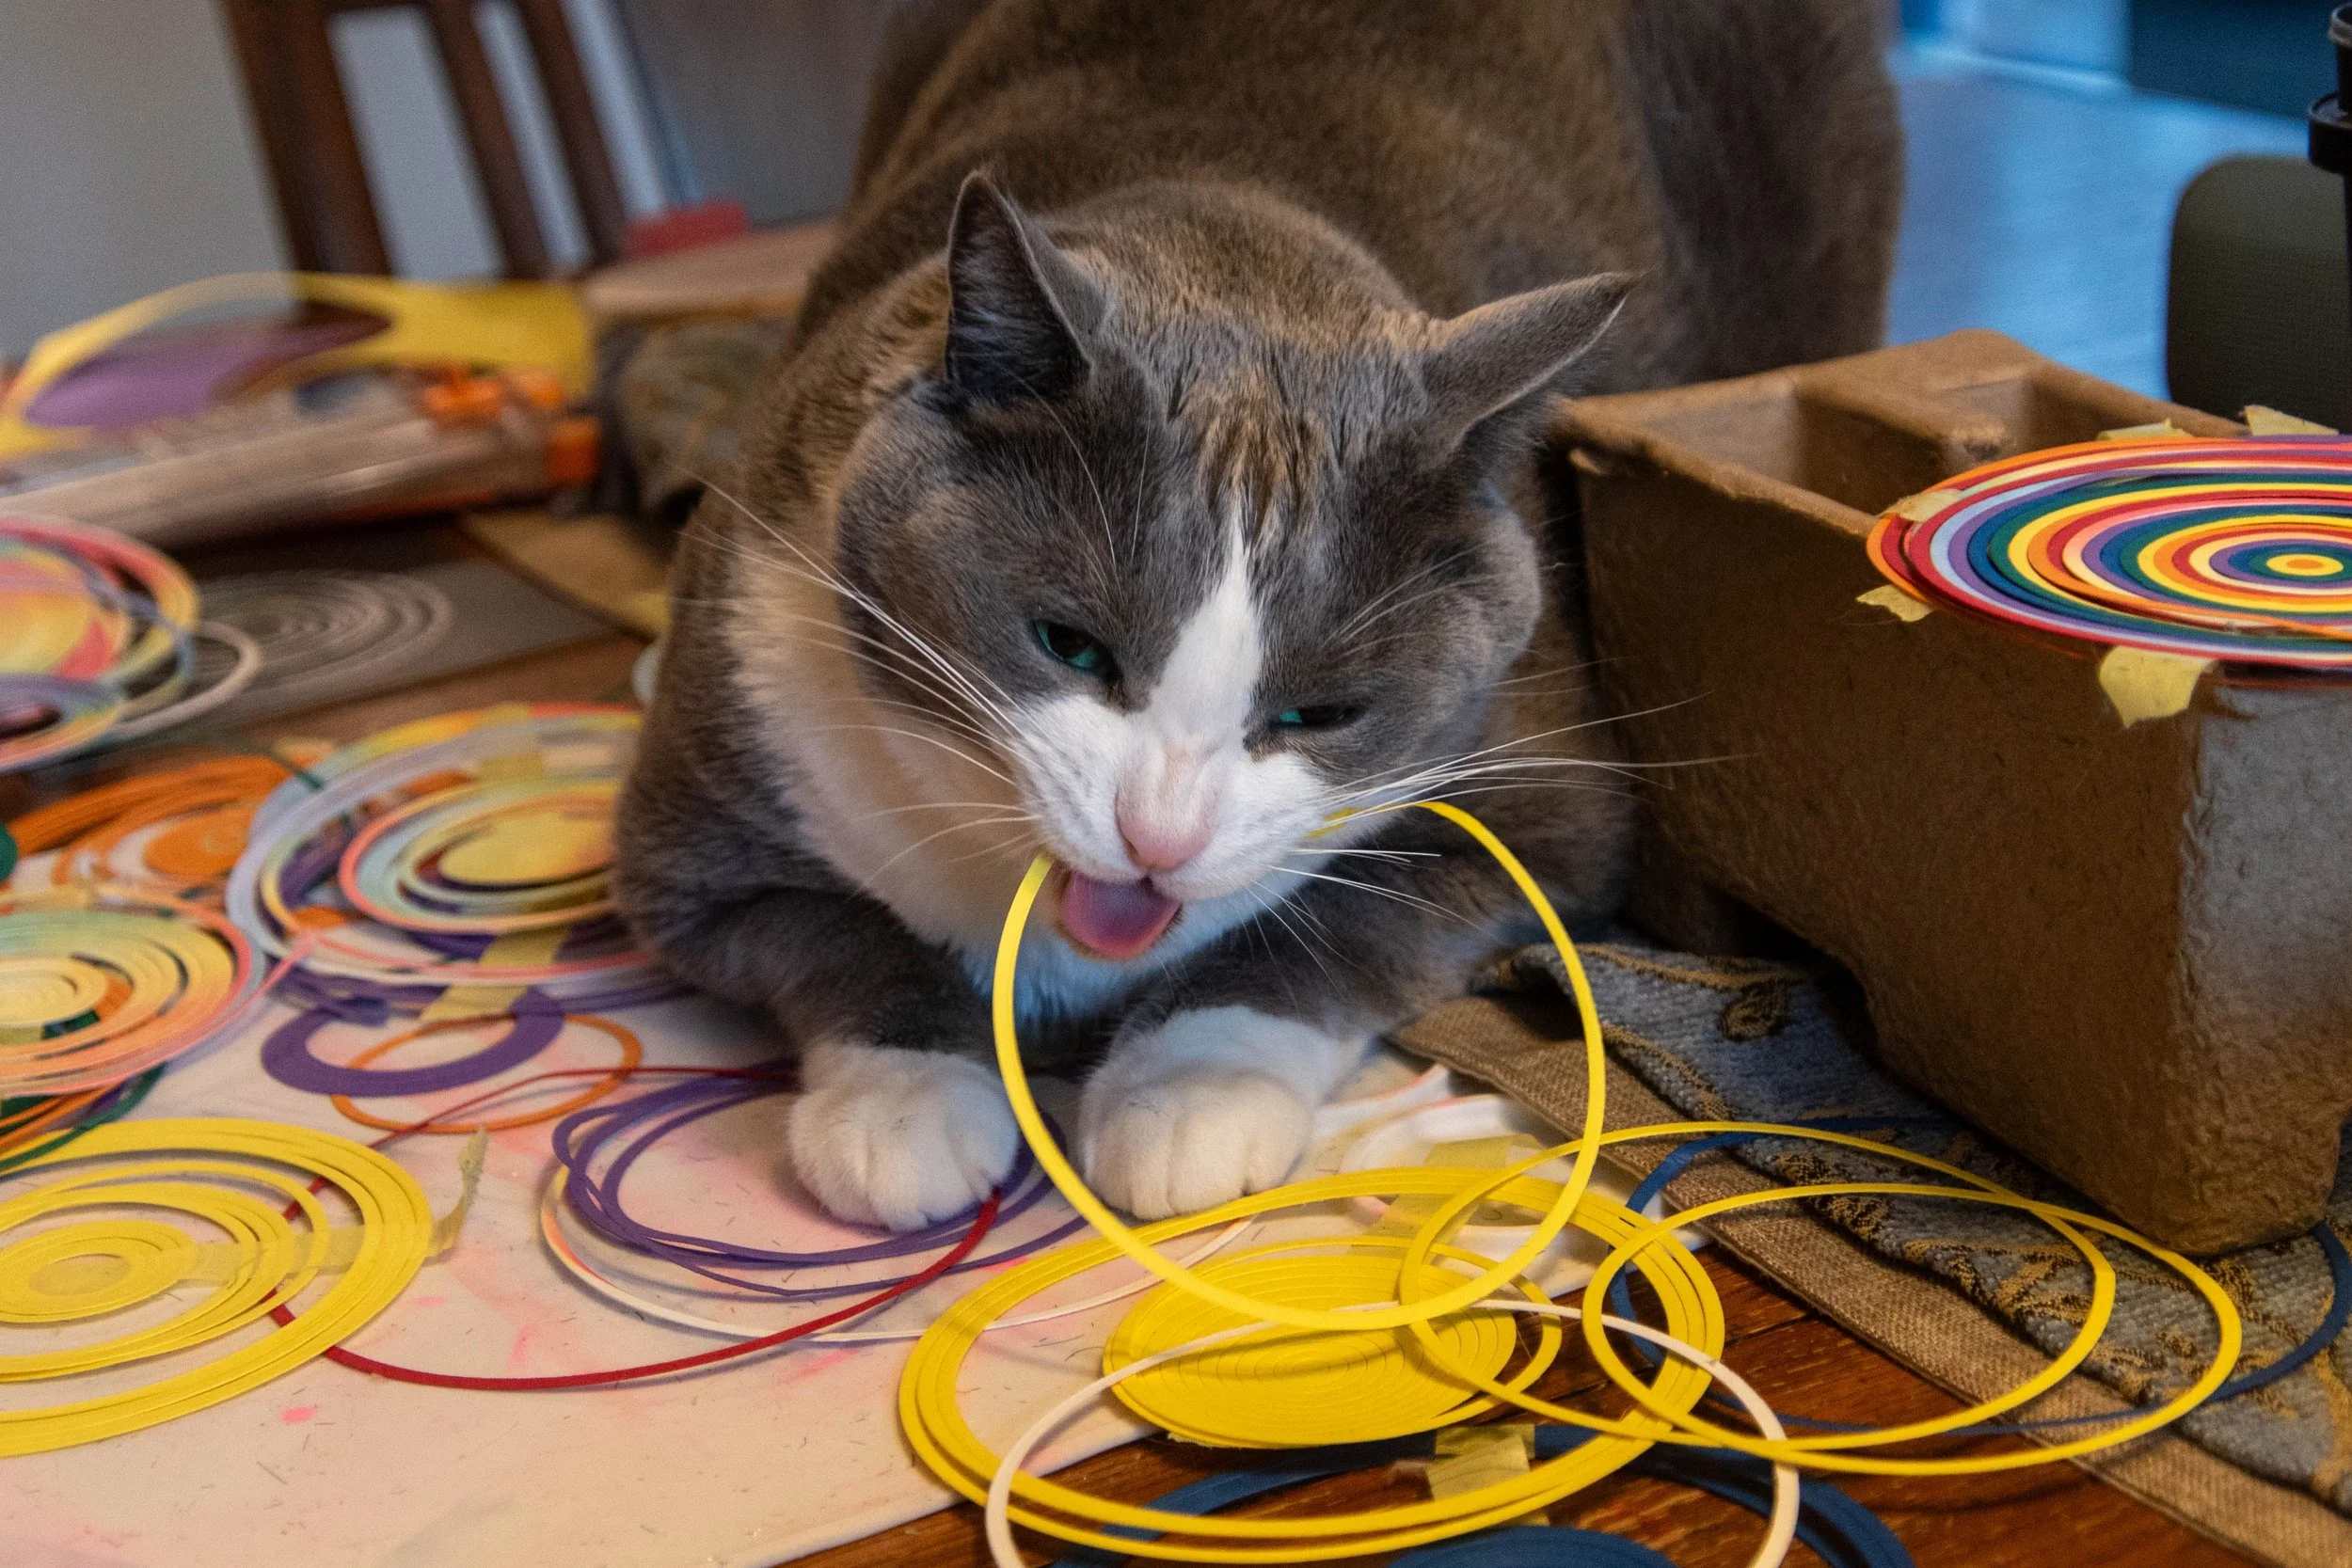
7. Place each sheet on the circle thin frame die and run through a die cutting machine. This will create 21 thin rings and a small circle. You will only use three rings between the two panels you cut. Put a piece of low-tac tape across the back side (cut side up) of the rings so you can keep them together until you use them.
8. Place the solid cardstock panel on the circle thin frame die and run through a die cutting machine. You will only need one ring. Put a piece of low-tac tape across the back side (cut side up) of the rings so you can keep them together until you use them.
Taste the Rainbow

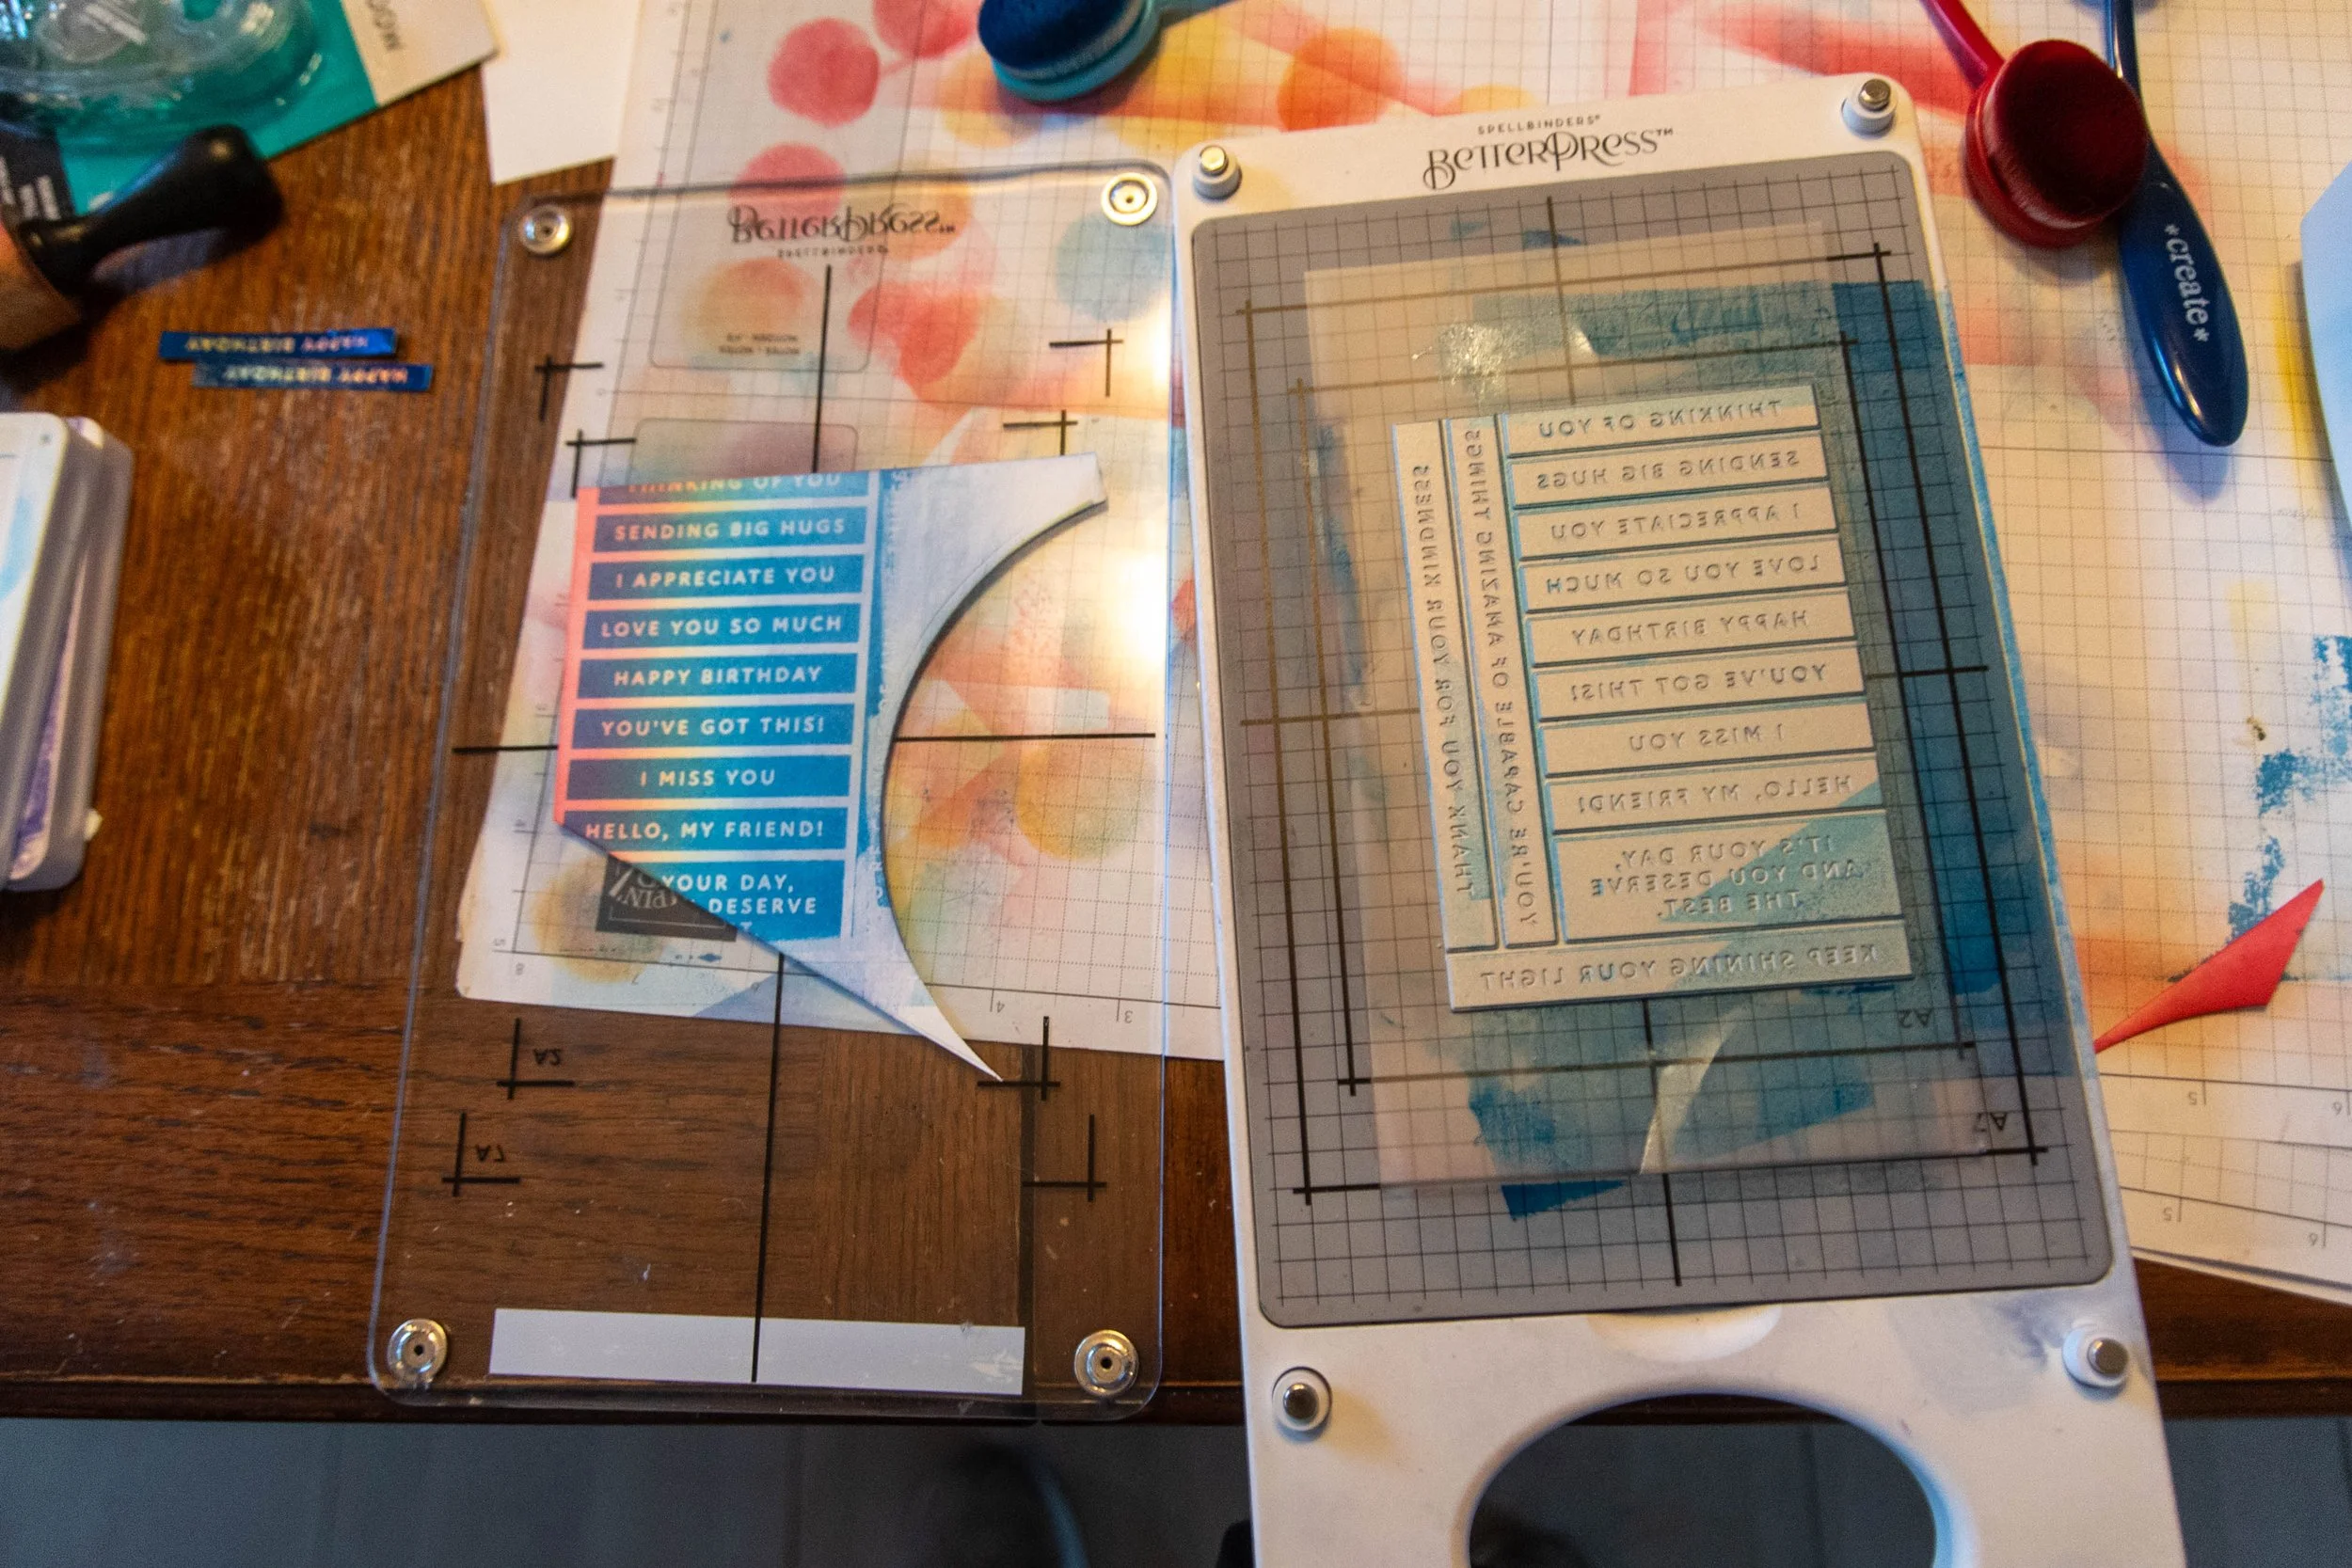
BetterPress the School of Fish for Front Panel
9. Put reusable adhesive on the back of the fish panel and place on the BetterPress system hover plate.
10. Put the school of fish plate onto the Better Press magnetic plate.
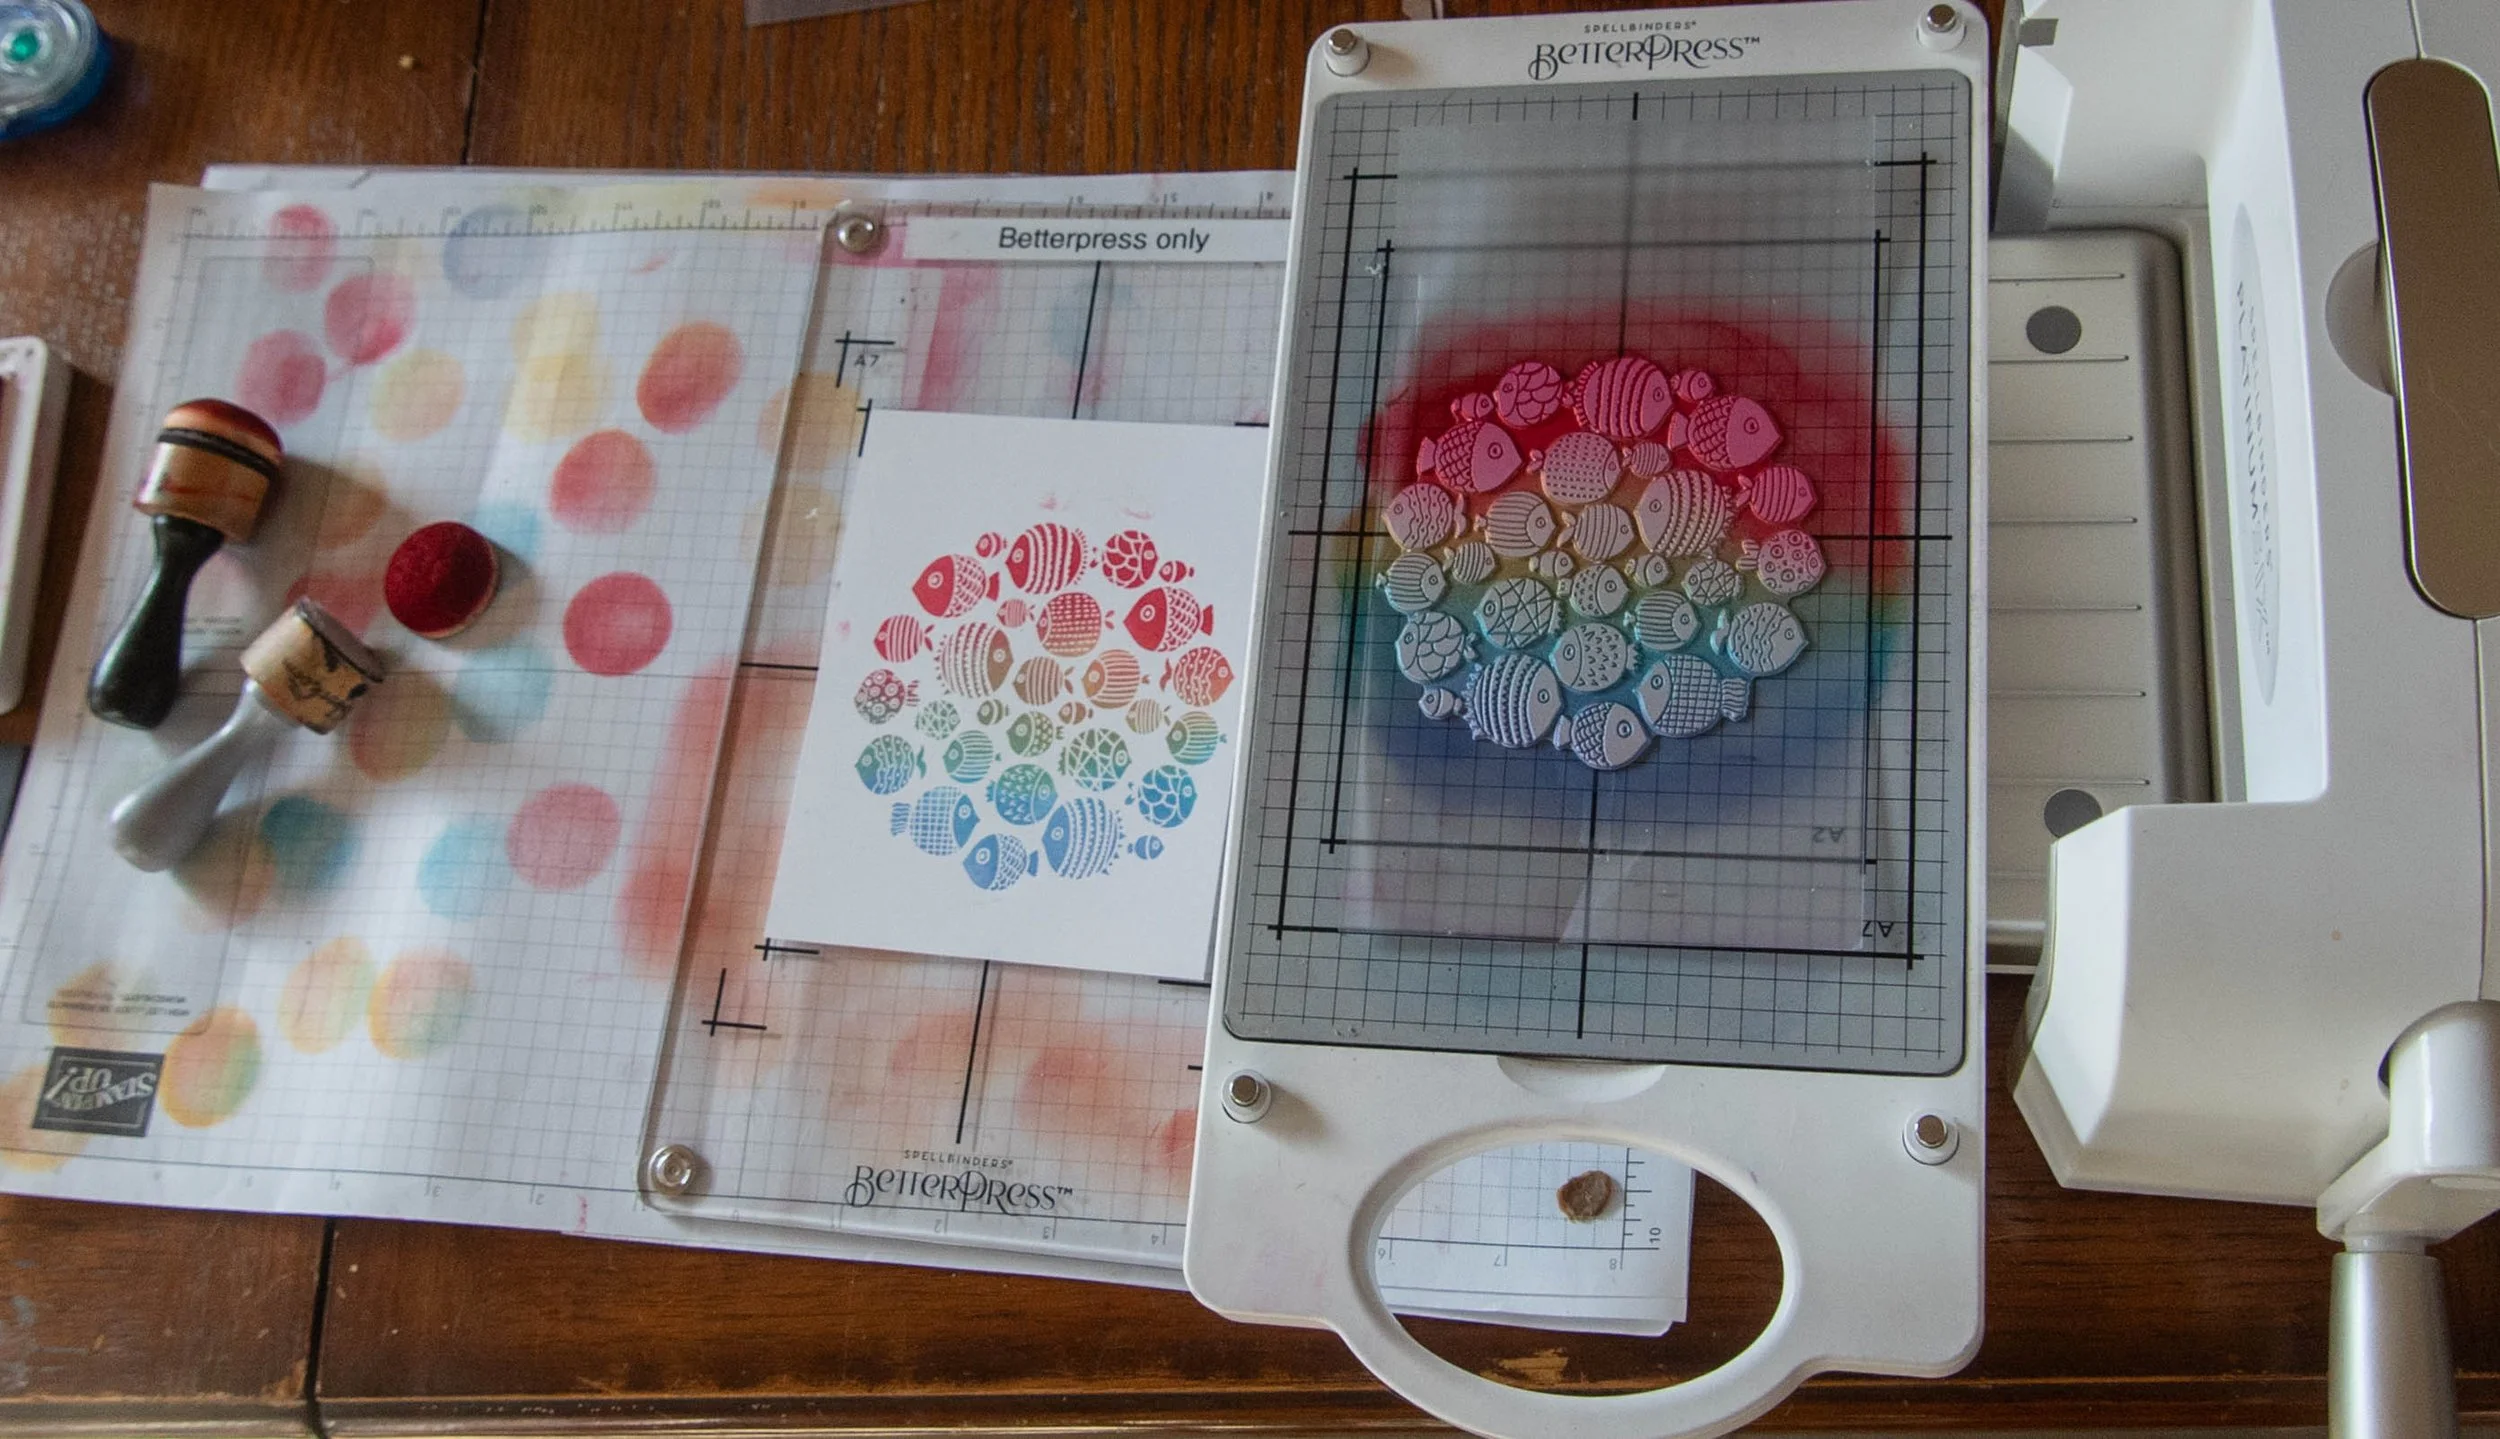
11. Using four daubers one for each color: Real Red, Daffodil Delight, Azure Afternoon, and Starry Sky. Apply color in the order of the rainbow from top of the plate to the bottom overlapping. The overlap will create the orange and the green colors.
12. Run the paper over the press plate using the BetterPress machine.
13. Position the 3 ½” circle die over the fish panel, so the panel is filled with the school of fish. Run through the die cut machine.
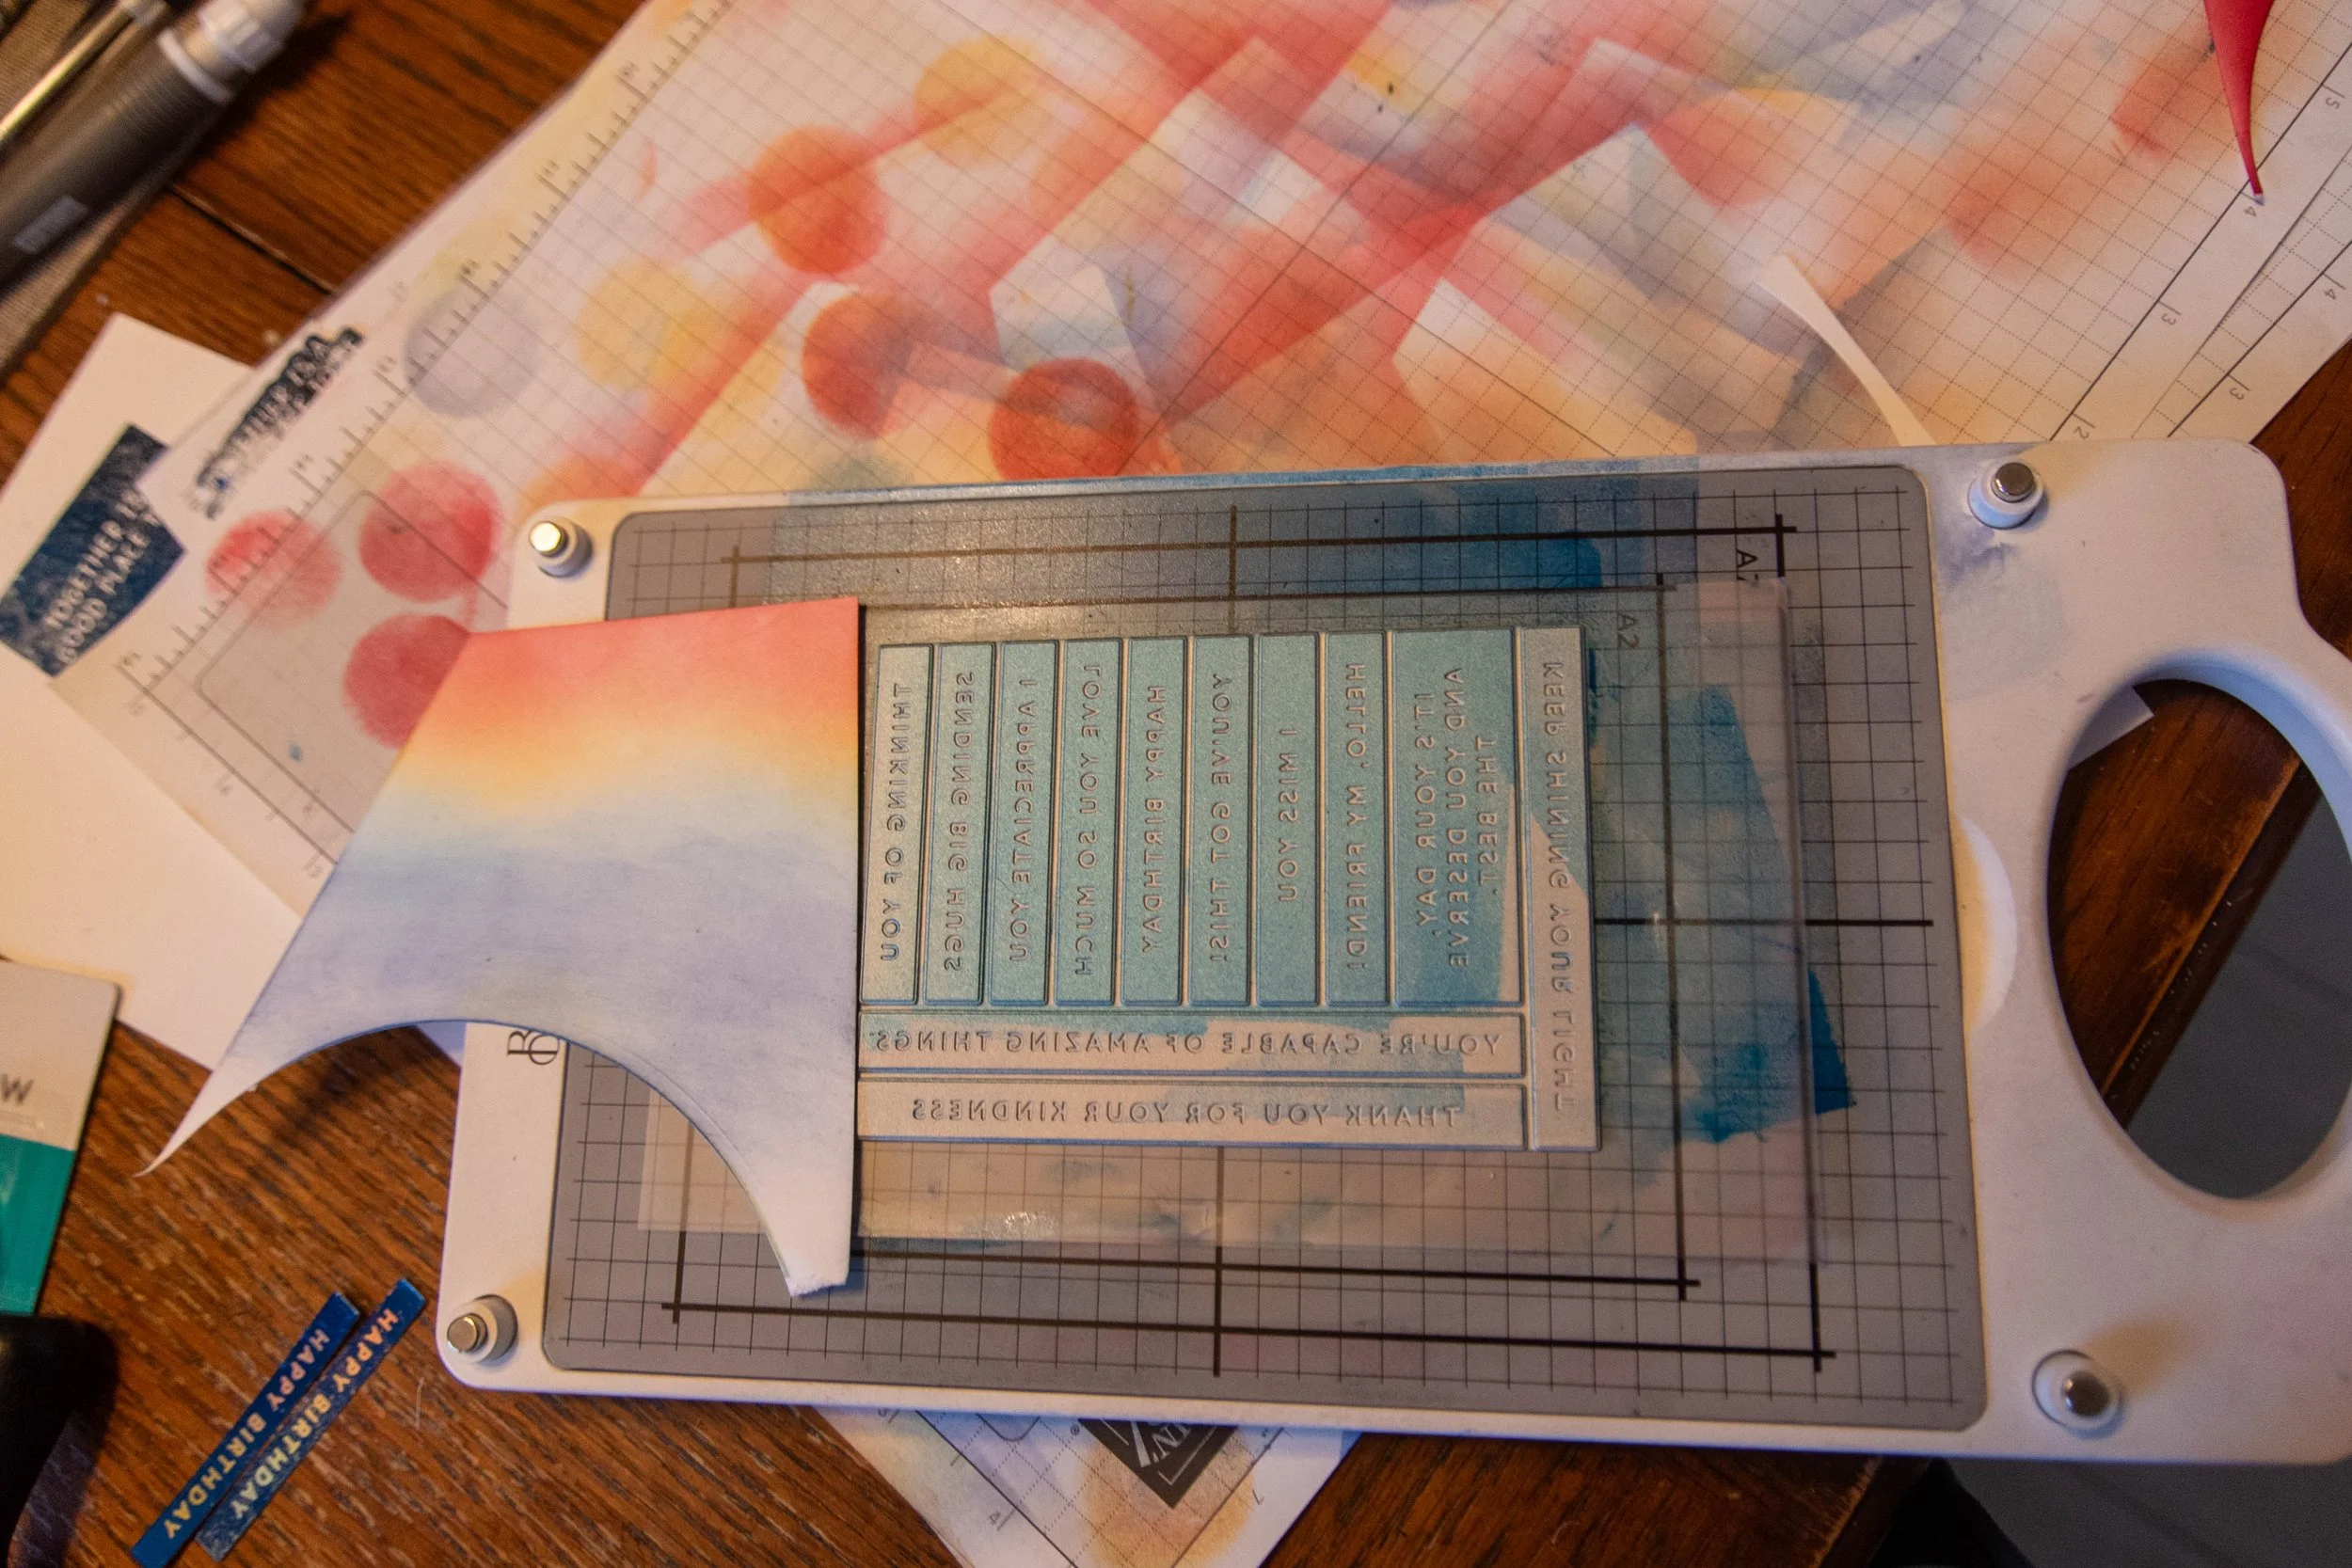
BetterPress Happy Birthday Sentiment
14. Using the left-over rainbow scraps, adhere to the hover plate using reusable adhesive. Make sure the paper will cover the happy birthday sentiment on the On-Go sentiment plate.
15. Put the one-Go sentiment plate on the magnetic plate. Ink plate with Azure Afternoon ink and run through the BetterPress system.
16. Cut out the Happy Birthday sentiment either by hand or using the One-Go Die. Glue another layer of paper under the Happy Birthday sentiment.
Make the Interior
17. Using the interior panel, cut out a 3 ¾” diameter circle using the circle die and die machine.
18. Place the circle onto the stamp positioner (I use a MISTI) and position the Whale Done Stamps onto the top of the circle. Using Blueberry Bushel ink stamp the images onto the circle panel.
Assemble card
19. Glue the School of Fish onto the center of card front.
20. Glue the Happy Birthday sentiment on the center of the card.
21. Select the Rainbow Ring that is just bigger than the school of fish circle. Glue around the fish.
22. Select the next larger size ring from the card stock rings and glue around the ring from step 16.
23. Select the next larger size ring from the rainbow rings and glue around the last ring from step 17.
24. Glue rainbow confetti on the front of the card.
25. Glue the interior circle with the sentiments in the center of the card’s interior
26. Select a rainbow ring bigger than the interior circle image and glue around the circle.
You will have many rings left over – save for a future card. Since I make 20 cards per design, I made rainbows with the excess rings.
List of products and tools
Non-Consumables
“Fish Parade”, BetterPress set by Spellbinders, School of Fish plate.
“One-Go Solid Sentiments Strips” BetterPress set by Alt-N-New; “Happy Birthday”
“Whale Done” Stamp set by Stampin Up; “Hoping All Your Birthday Fishes come true” sentiment and fish stamp.
Scalloped Circle die from the Circles Framelits Dies from Stampin’ Up.
3 ¾” Circle Die from the Circles Framelits Dies from Stampin’ Up.
3 1/2” Circle Die from the Circles Framelits Dies from Stampin’ Up.
Circle Thin Frame Dies from Honeybee
MISTI stamp positioner
Consumable
Real Red” Classic Ink by Stampin’ up
“Dandelion Delight” Classic Ink by Stampin’ Up
“Azure Afternoon” Classic Ink by Stampin’ Up
“Starry Sky” Classic Ink by Stampin’ Up
“Blueberry Bushel” Classic Ink by Stampin’ Up
“Blueberry Bushel” Cardstock by Stampin’ Up
“Real Red” Cardstock by Stampin’ Up
“Pineapple Punch” Cardstock by Stampin’ Up
“Shaded Spruce” Cardstock by Stampin’ Up
“Gorgeous Grape” Cardstock by Stampin’ Up
“Pumpkin Pie” Cardstock by Stampin’ Up
“White” Premium Color Copy Cover Paper by Hammermill
Crystal Rainbow Confetti by Studio Katia
Tombow reusable adhesive
Special Tools
BetterPress System by Spellbinders
Platinum Machine by Spellbinders