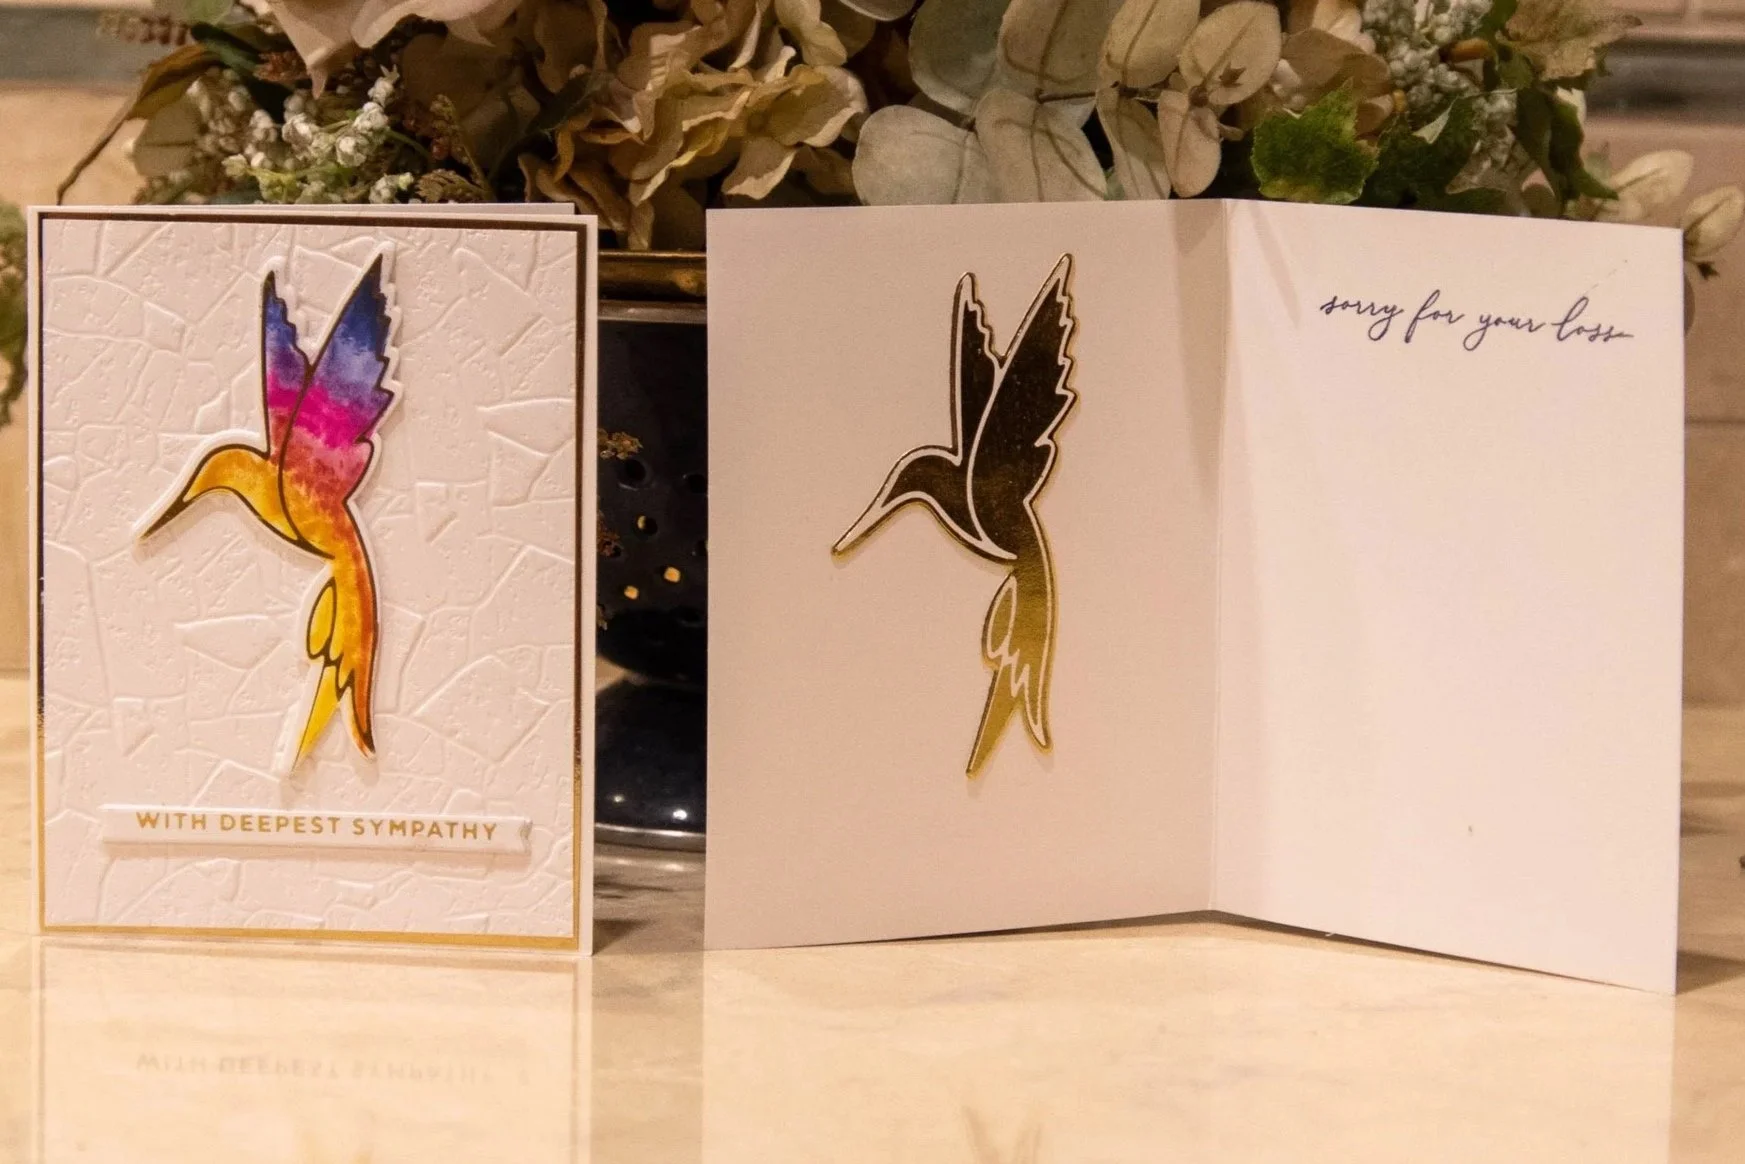
Hummingbird Condolence
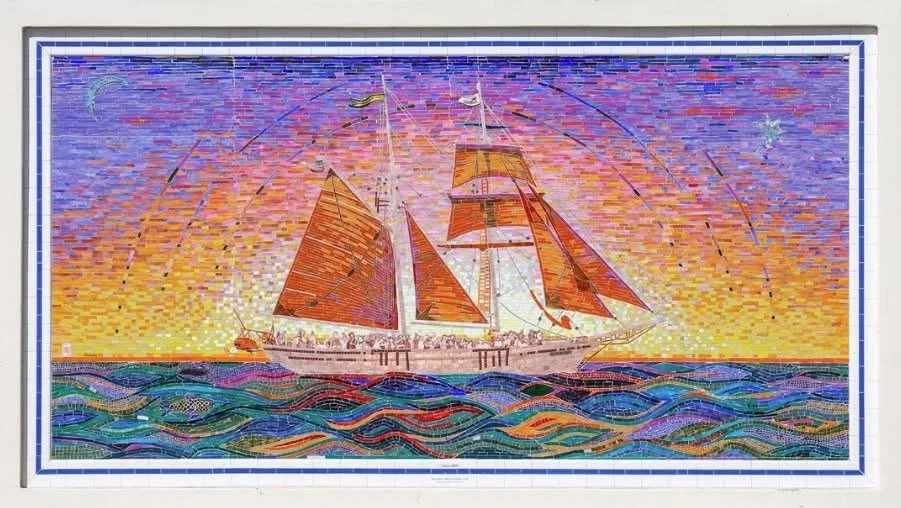
When I drive to Dana Point, CA, I always stop and look at the Tall Ship mosaic on the Pedestrian Bridge. I love this piece of art – especially the color. I wanted to recreate these colors in a card. I tried many combinations, but it wasn’t until I added the magenta that I really felt I captured the same feel as the original art in the mosaic. My intent was to emulate the small tiles by applying color via a bouncing inked Q-tip onto the paper. Instead, I got a muddled blend. Hmm… I LIKE IT!! I am often surprised by the results of what I make. It is these surprises that keeps me crafting
This card is a 5.5” by 4.25” card (A2). The products used on this card are listed at the end of the page.
Step by Step Instructions for making this Card.
Make the Card Base
1. Make the card base with the Heavy White Card Stock for an A2 card. (See Card Basics). Using the heavy gives strength to the card without adding and interior panel.
There are 4 panels that need to be cut for this card – a gold matting panel, a background panel, and the 2 focal panel (used to create the hummingbird and the banner sentiment). There are 2 focal panel because one is used for the front of the card, and the other panel is used to create the negative image of the hummingbird that will be put in the interior of the card.
Cut the Card Panels
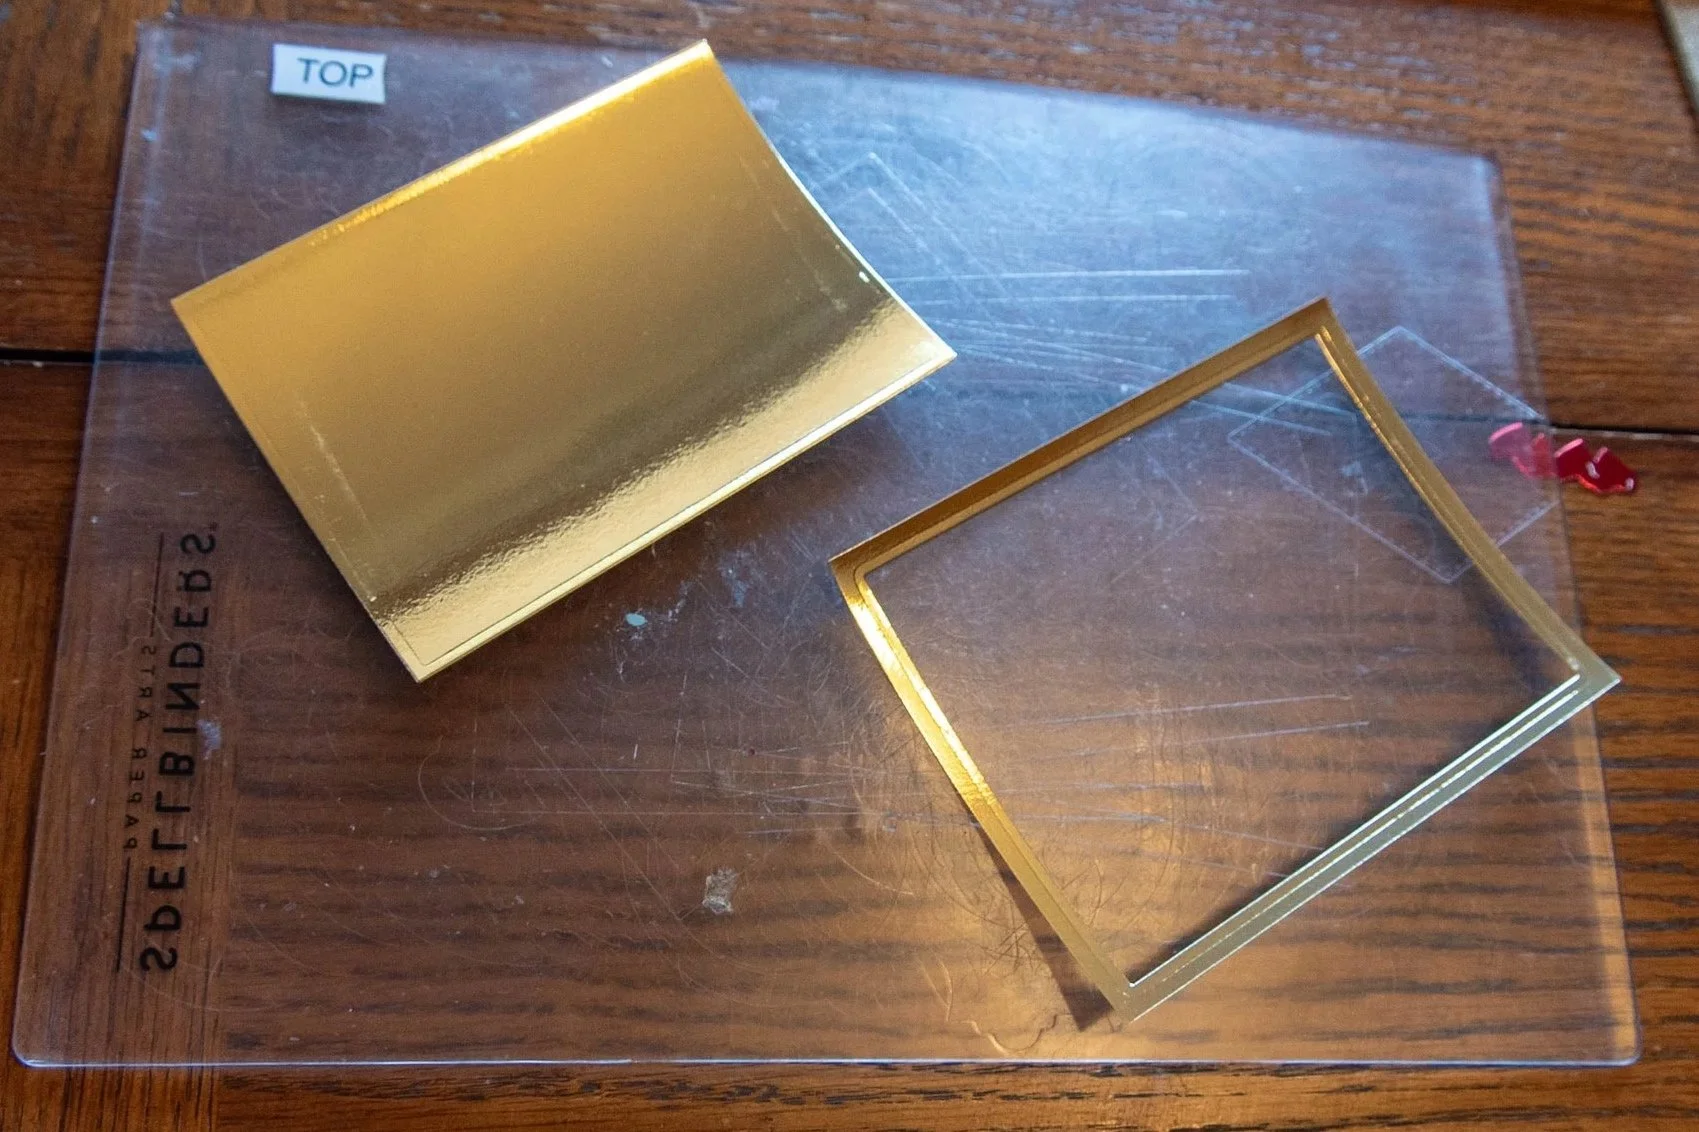
2. Using the Gold Foil cardstock, cut out a 4-1/8” x 5-3/8” for the matting panel. Foil cardstock is expensive; I only need the edges of the foil for this design. Use a rectangle die to cut out the center of the cardstock. I save the center piece for future use and retain the frame for this card. The center of the frame will be covered by the background panel when the card is in finally assembly.
3. Using the heavy white cardstock paper cut out the background panel to 4” x 5 ¼”.
4. To make the focal panels use the White Hammermill paper and cut out a large enough paper to foil the hummingbird and the sentiment. I cut a panel the size of 3” x 5”.
Note: Although you can use any white cardstock you like, I get my best results when I foil with the White Premium Color Copy Cover paper. AND it is really reasonably priced.
Foil the Front Hummingbird
5. Align the Hummingbird foil plate and the “With Deepest Sympathy” plate onto the glimmer machine so the focal panel can fit over both plates.
6. Place the gold foil 3” x 5” over the hot foil plates on the glimmer matching. Gold foil side down.
7. Complete foil sandwich with the interior panel. Place the panel directly on the foil. The foil and the panel are the same size.
8. Heat and Foil per the Glimmer Machine instructions.
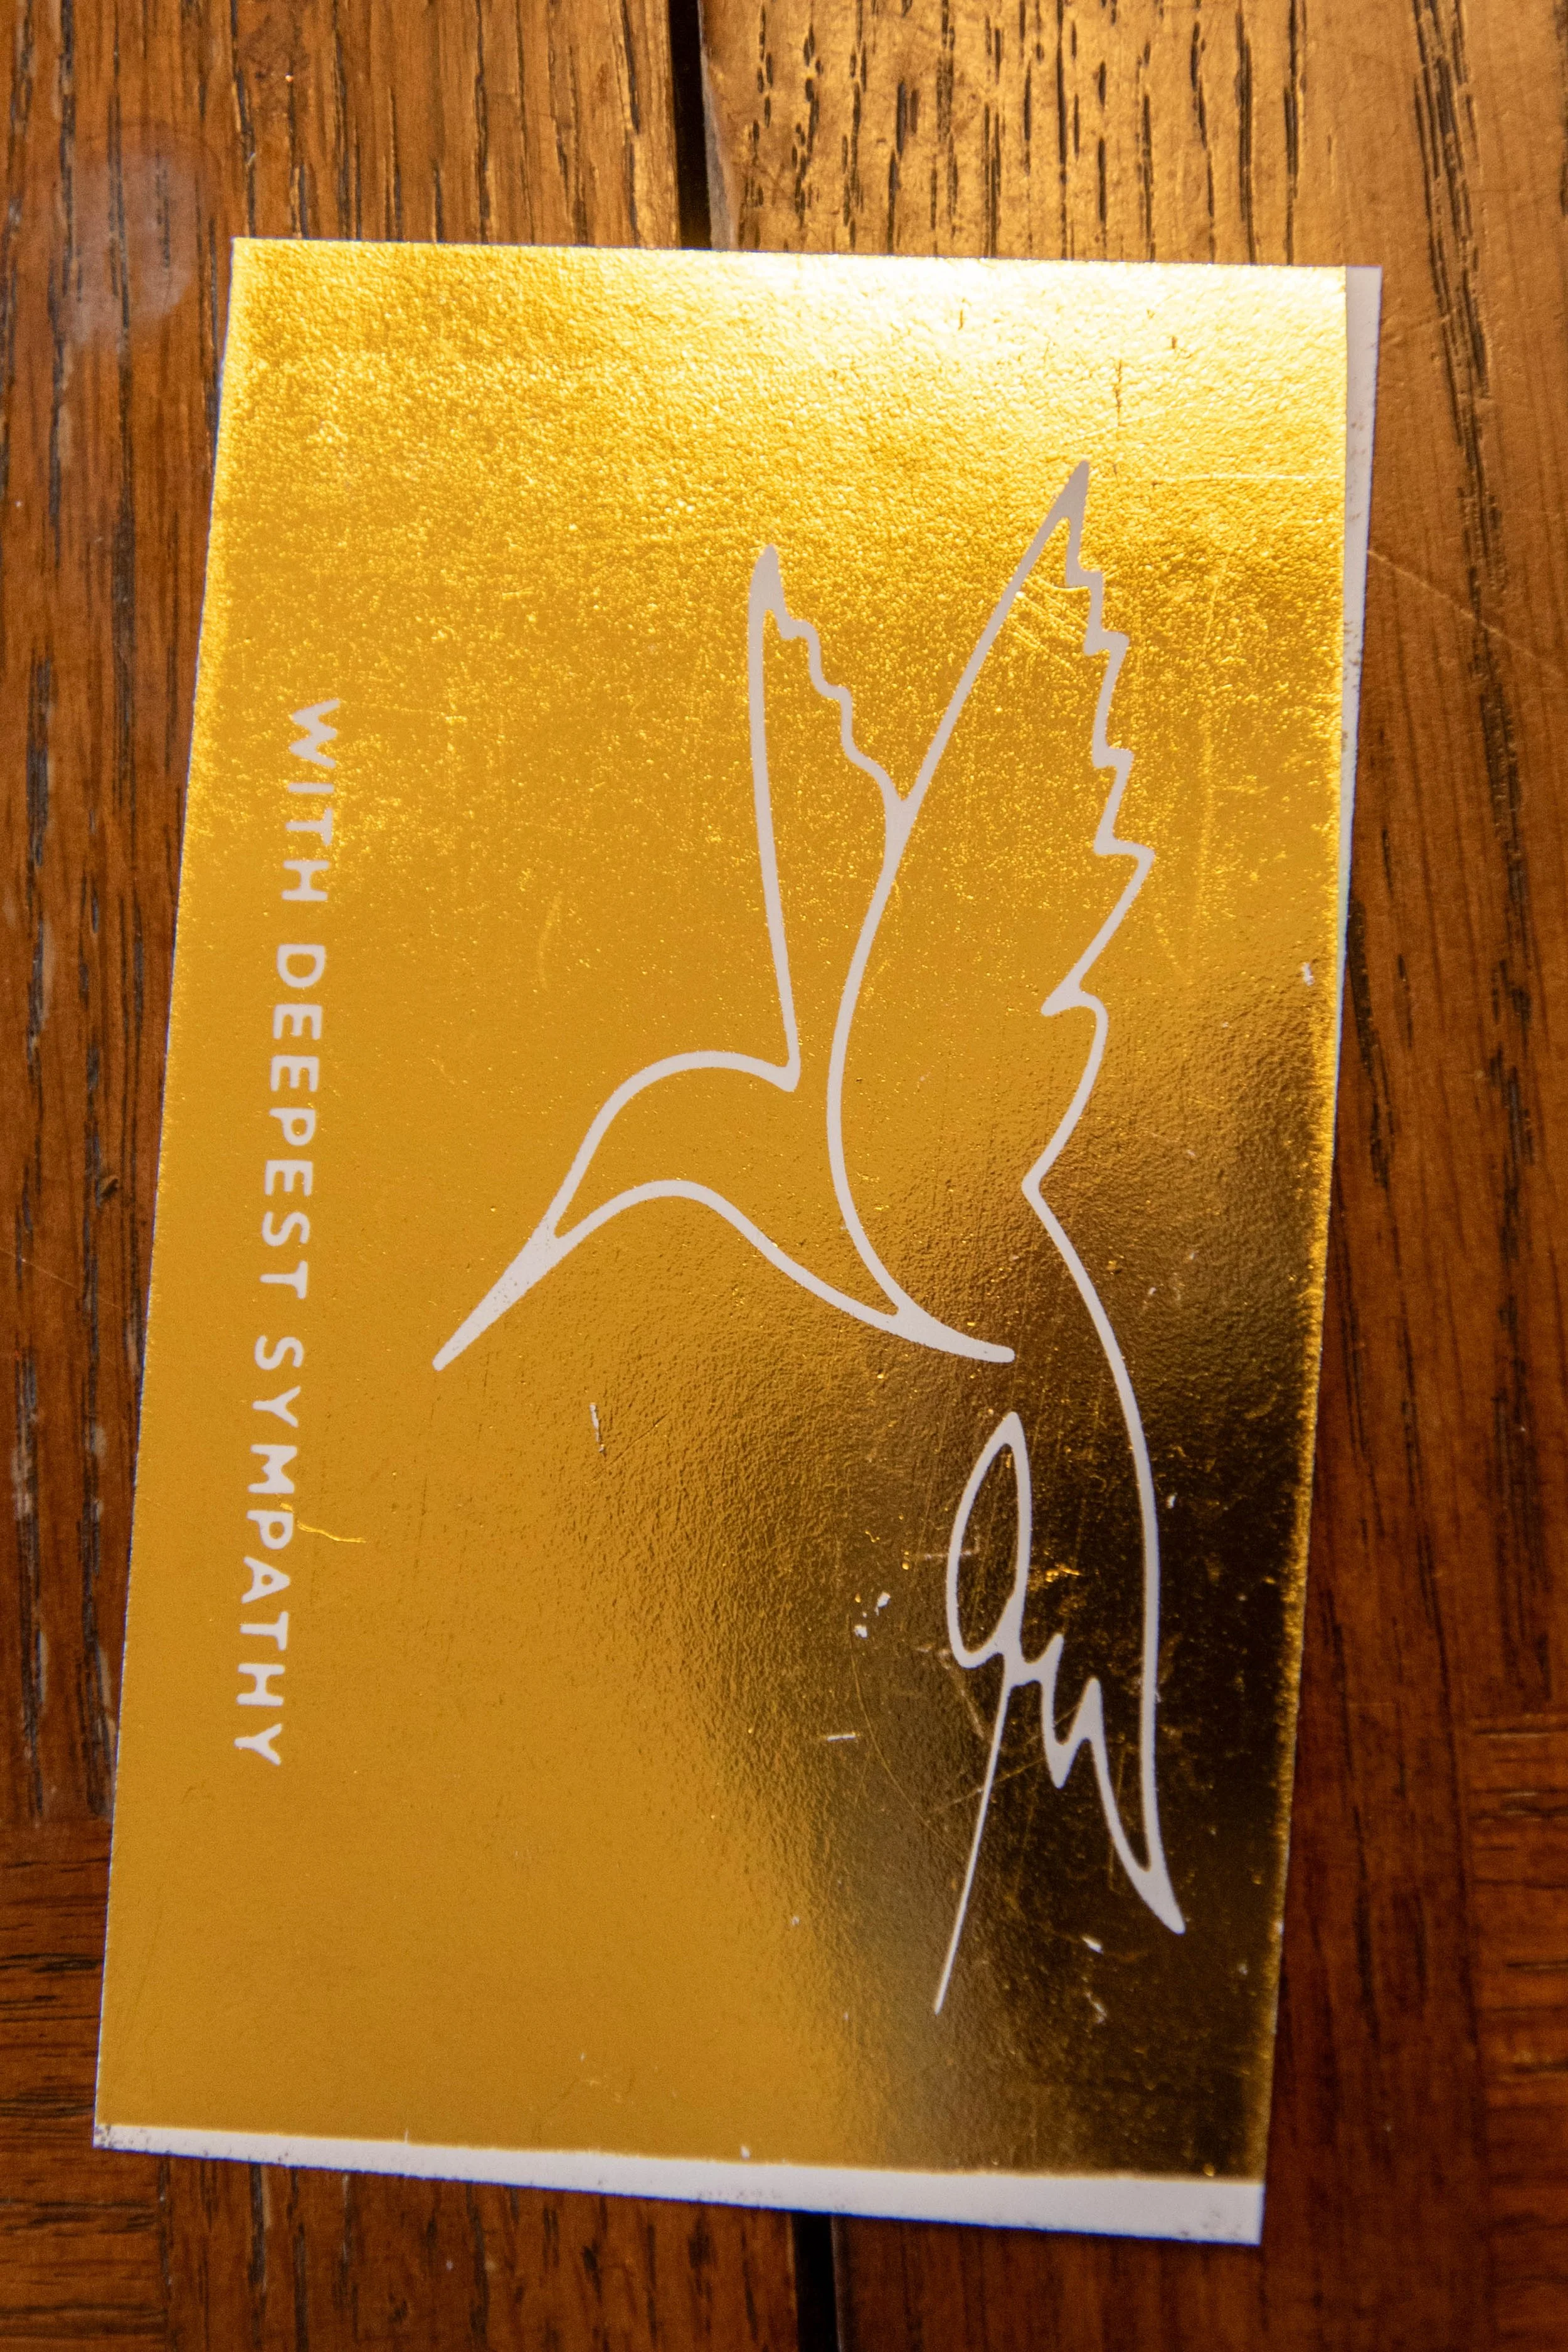
Note: I use the negative foil from this step to create the gold hummingbird on the interior of the card.
Foil the Interior Hummingbird
9. Place the Solid Hot foil plate on the glimmer machine.
10. Place the negative foil used to create the front hummingbird and place on the foil plate gold side down.
11. Complete sandwich with the second focal panel covering the entire foil on the glimmer machine.
12. Heat and foil per the Glimmer Machine instructions.
Emboss the Background Panel
13. Using the stone embossing folder, emboss the background panel. Make sure you use the right sandwich based on our machine.
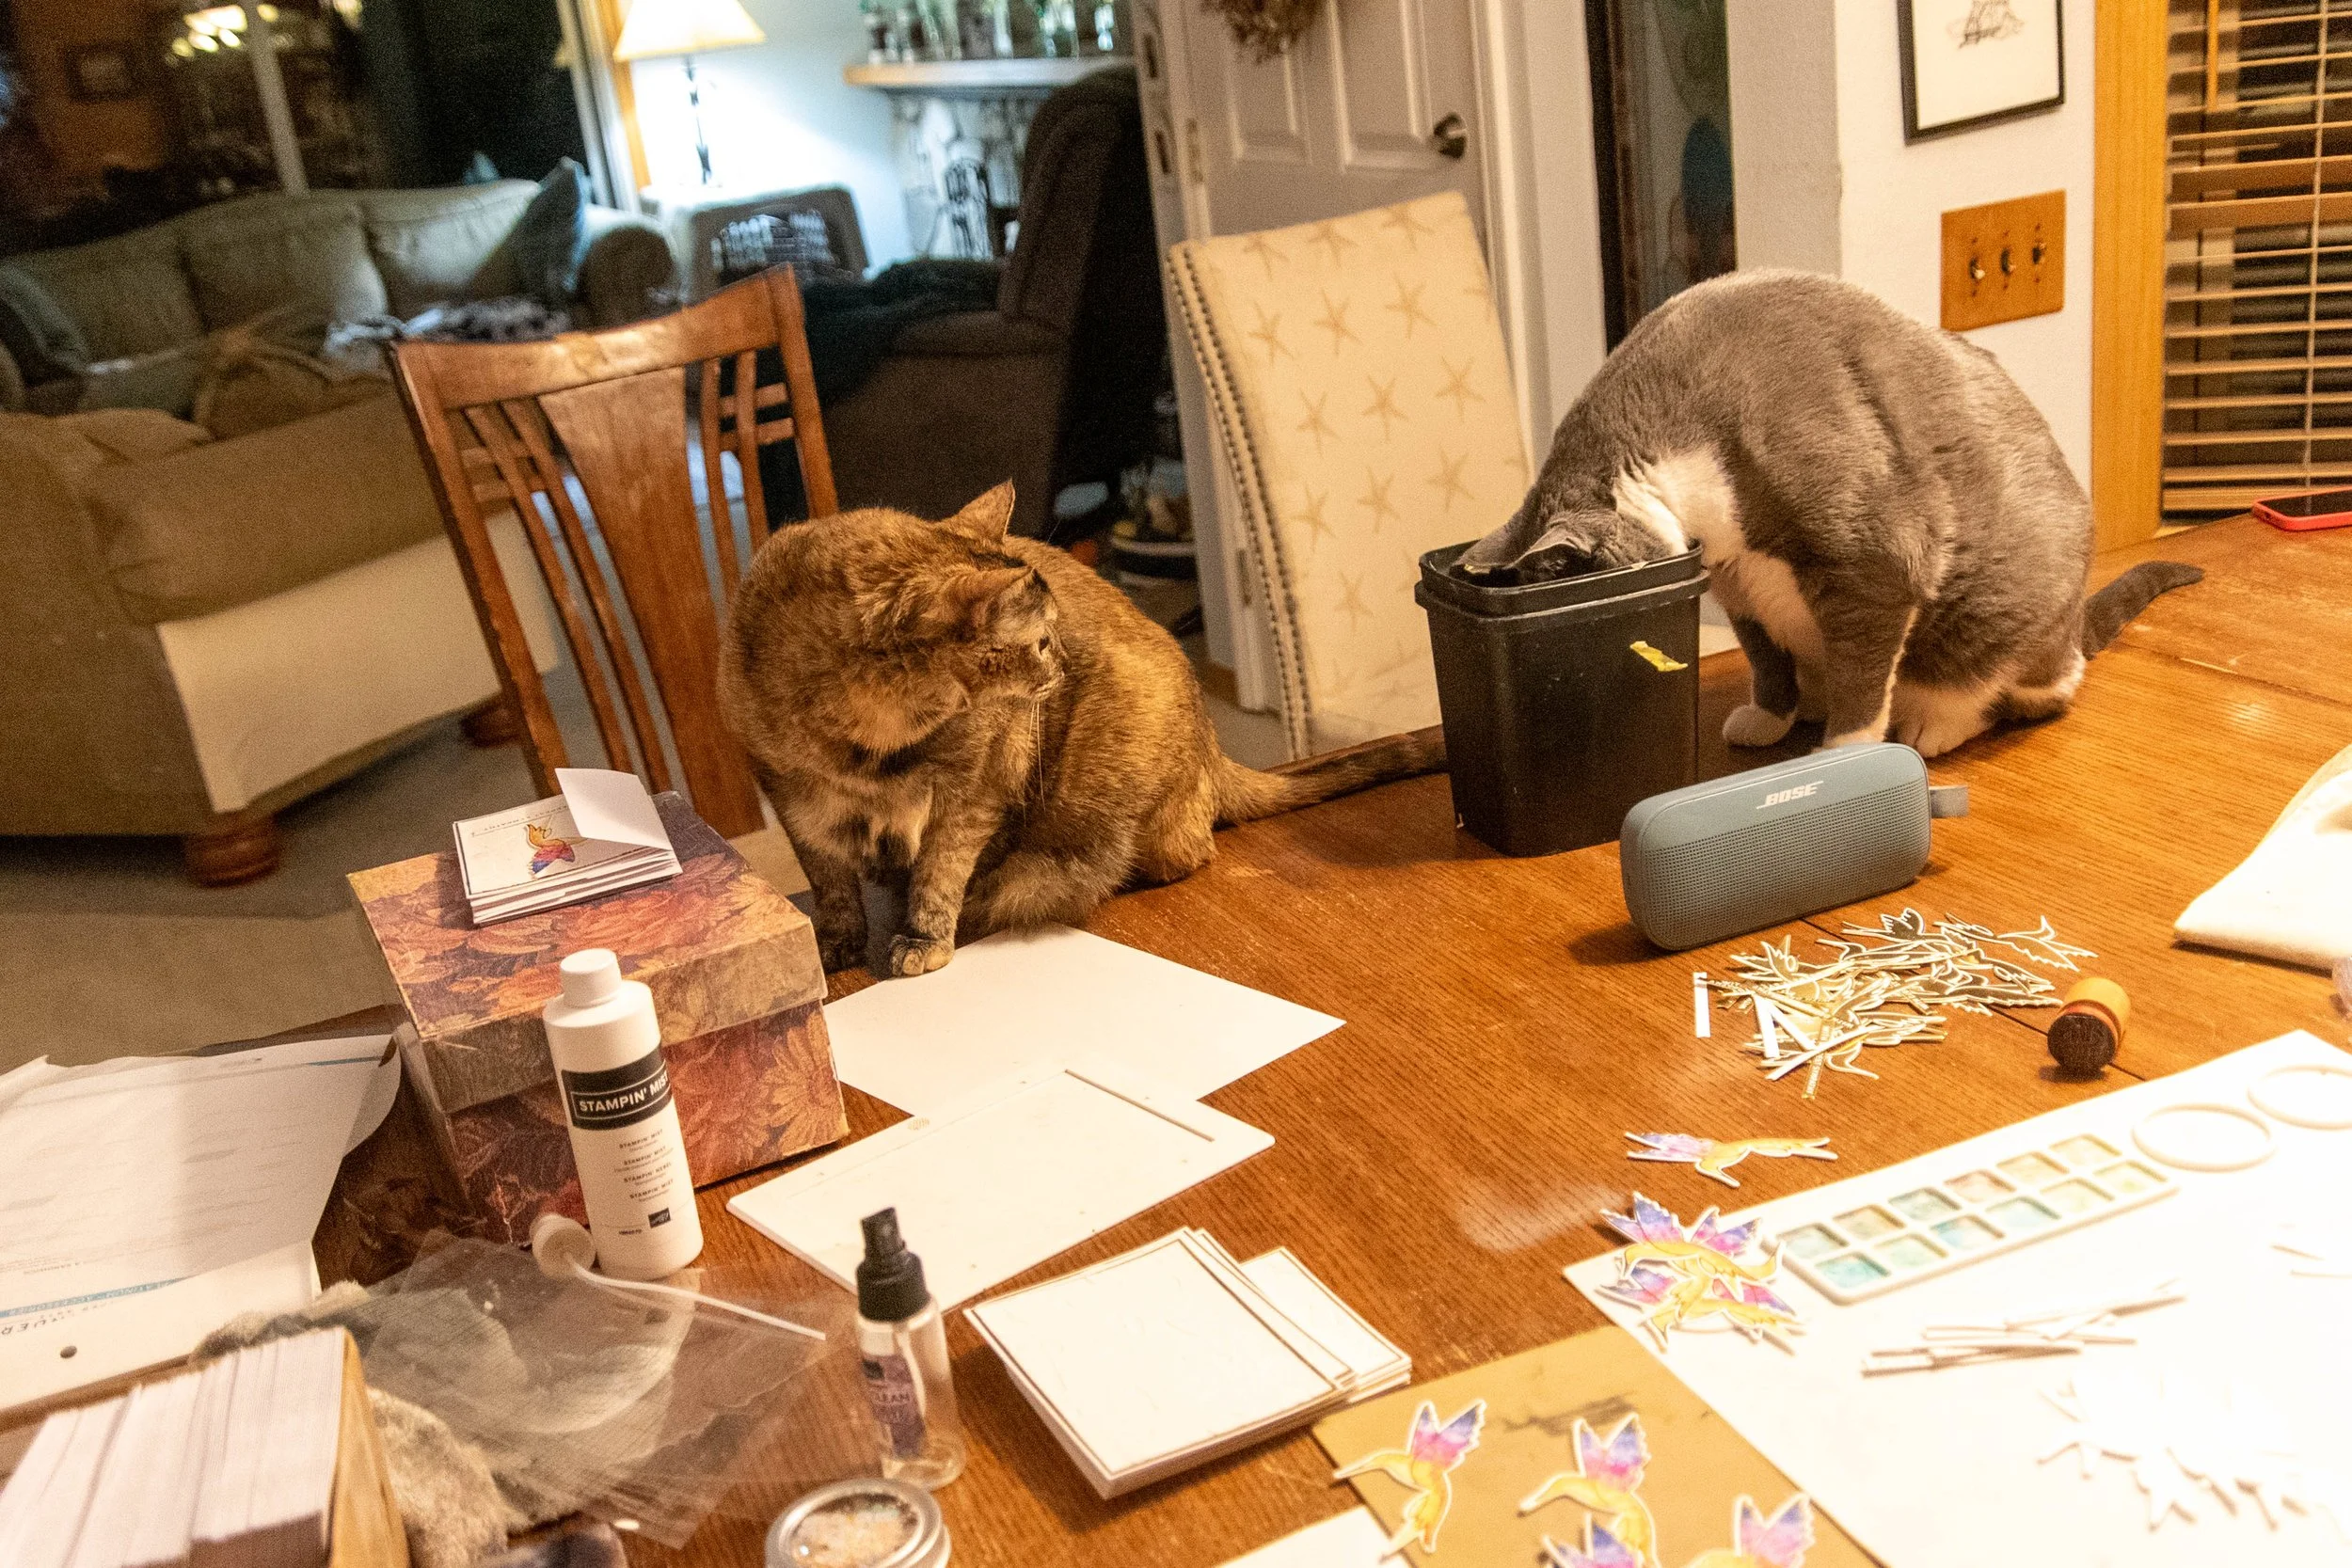
Blaze is doing her quality control job. No embossing here but a picture too cute not to include.
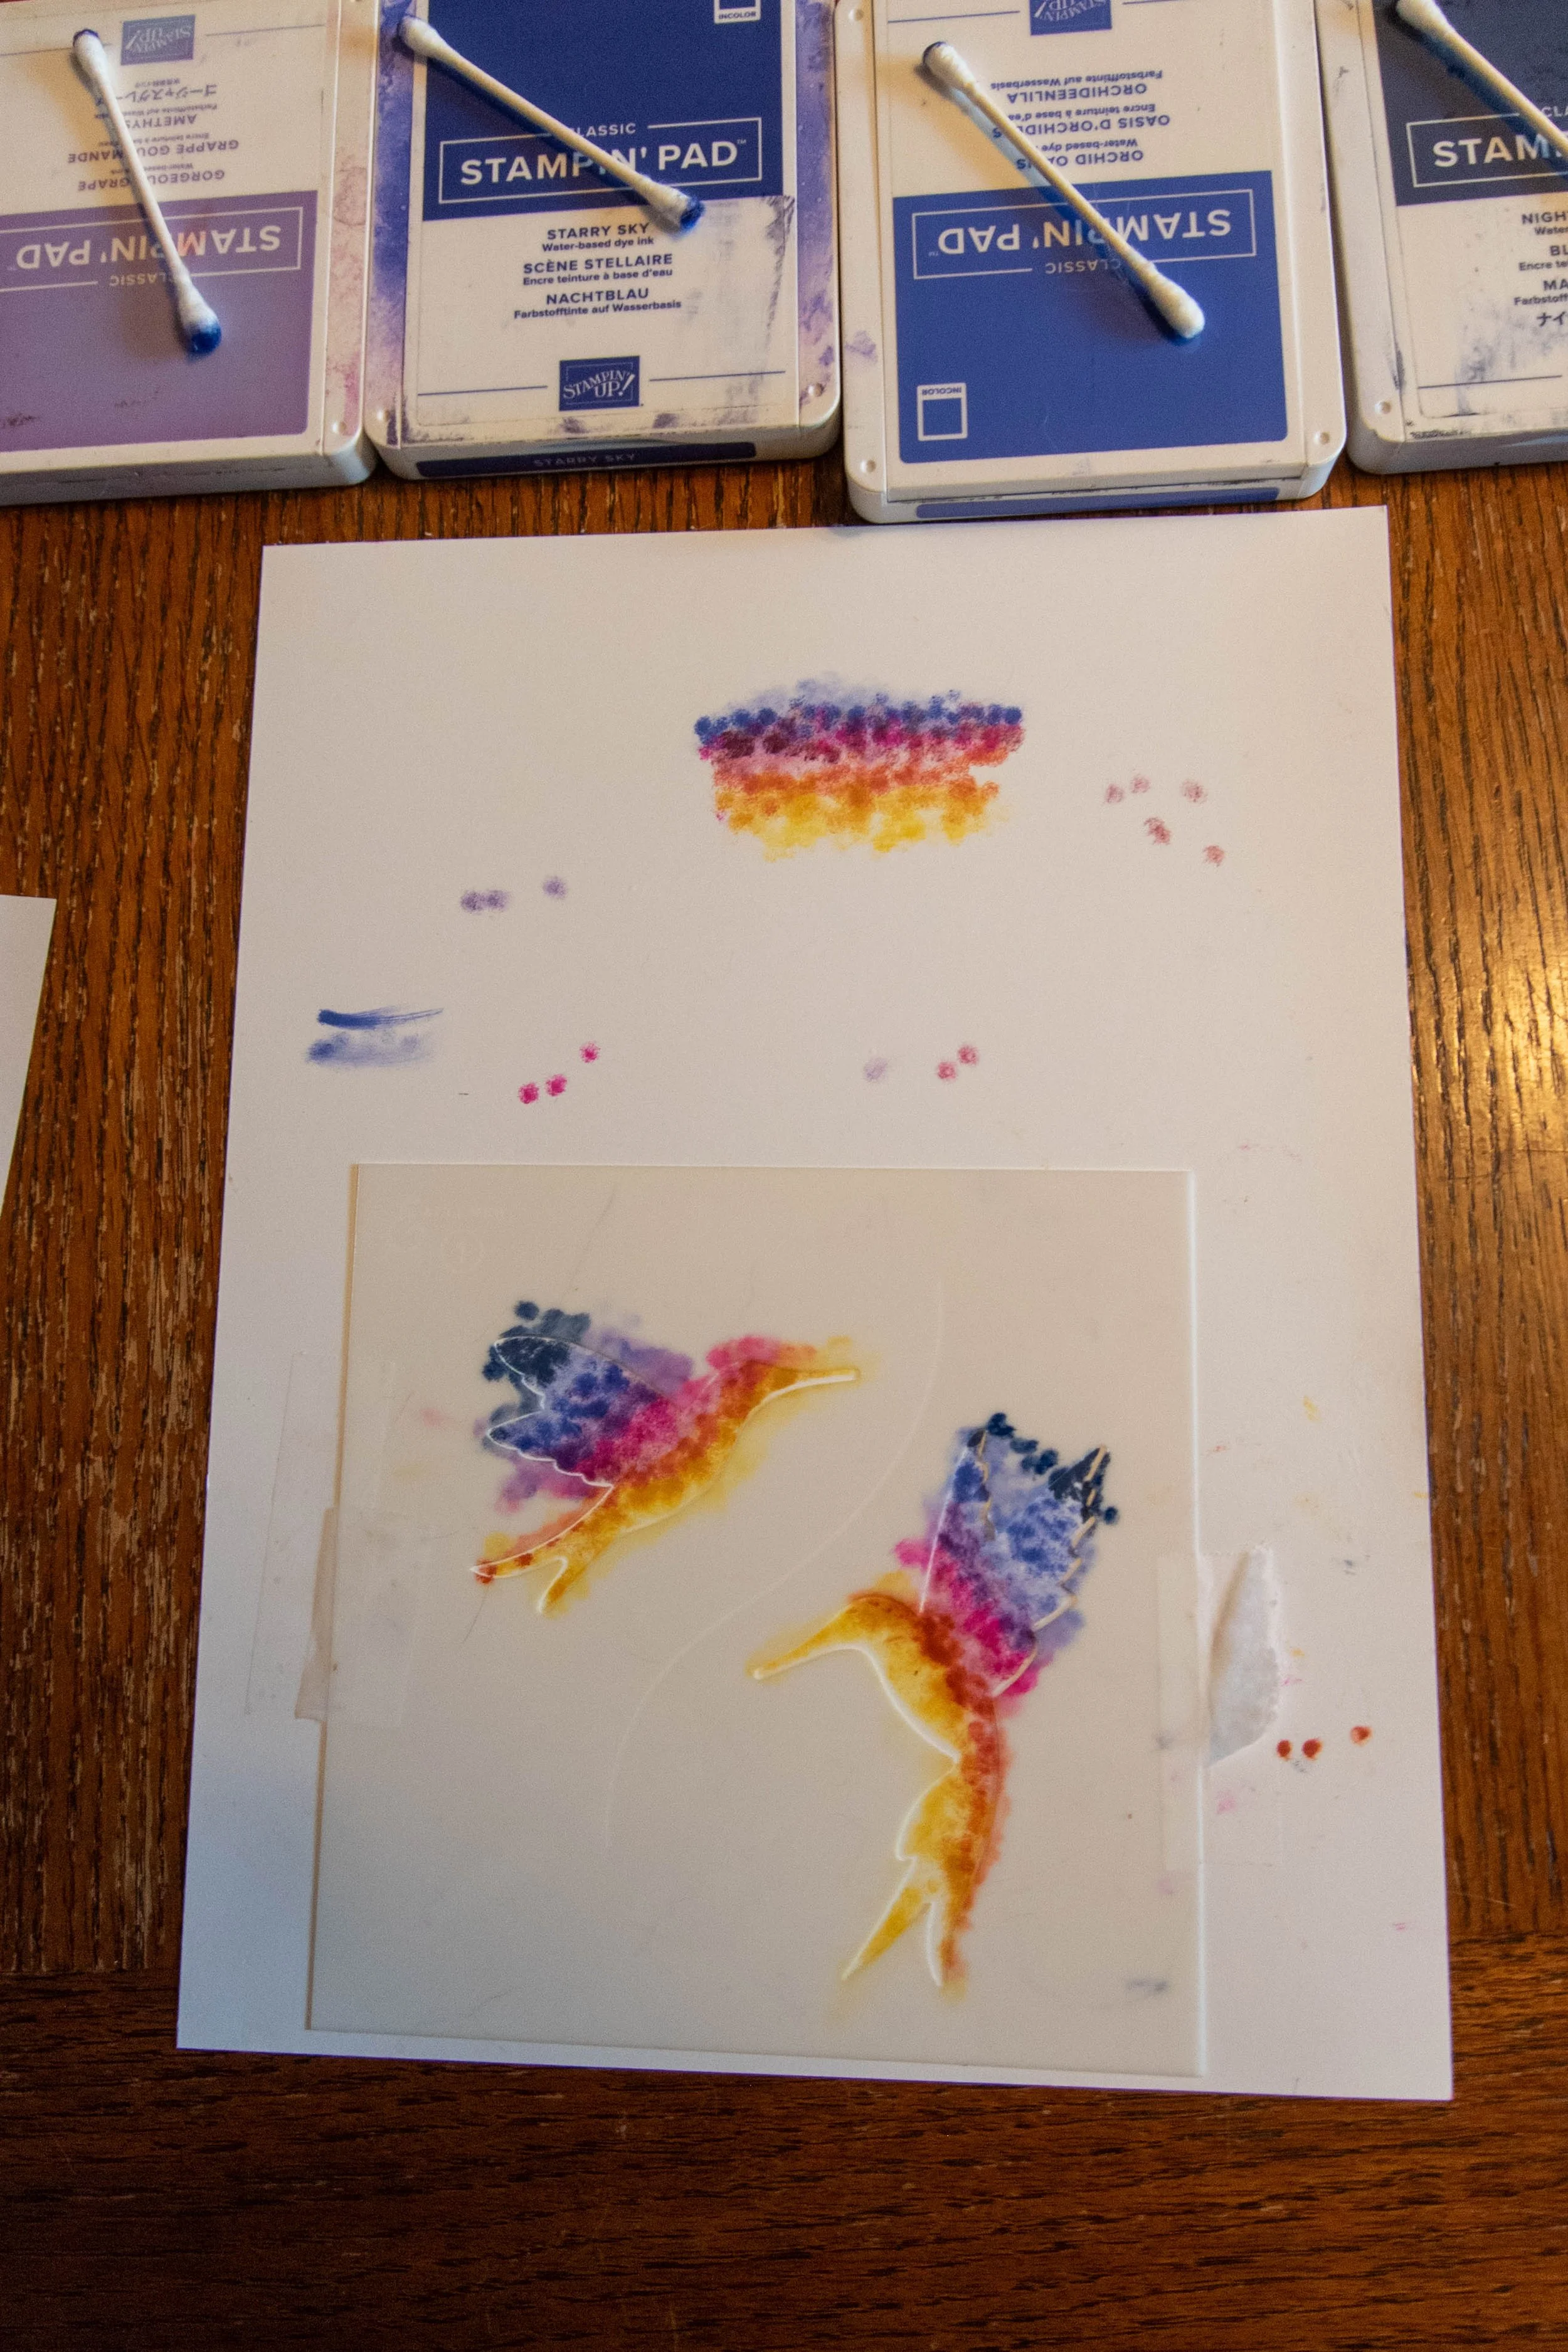
Color Hummingbird
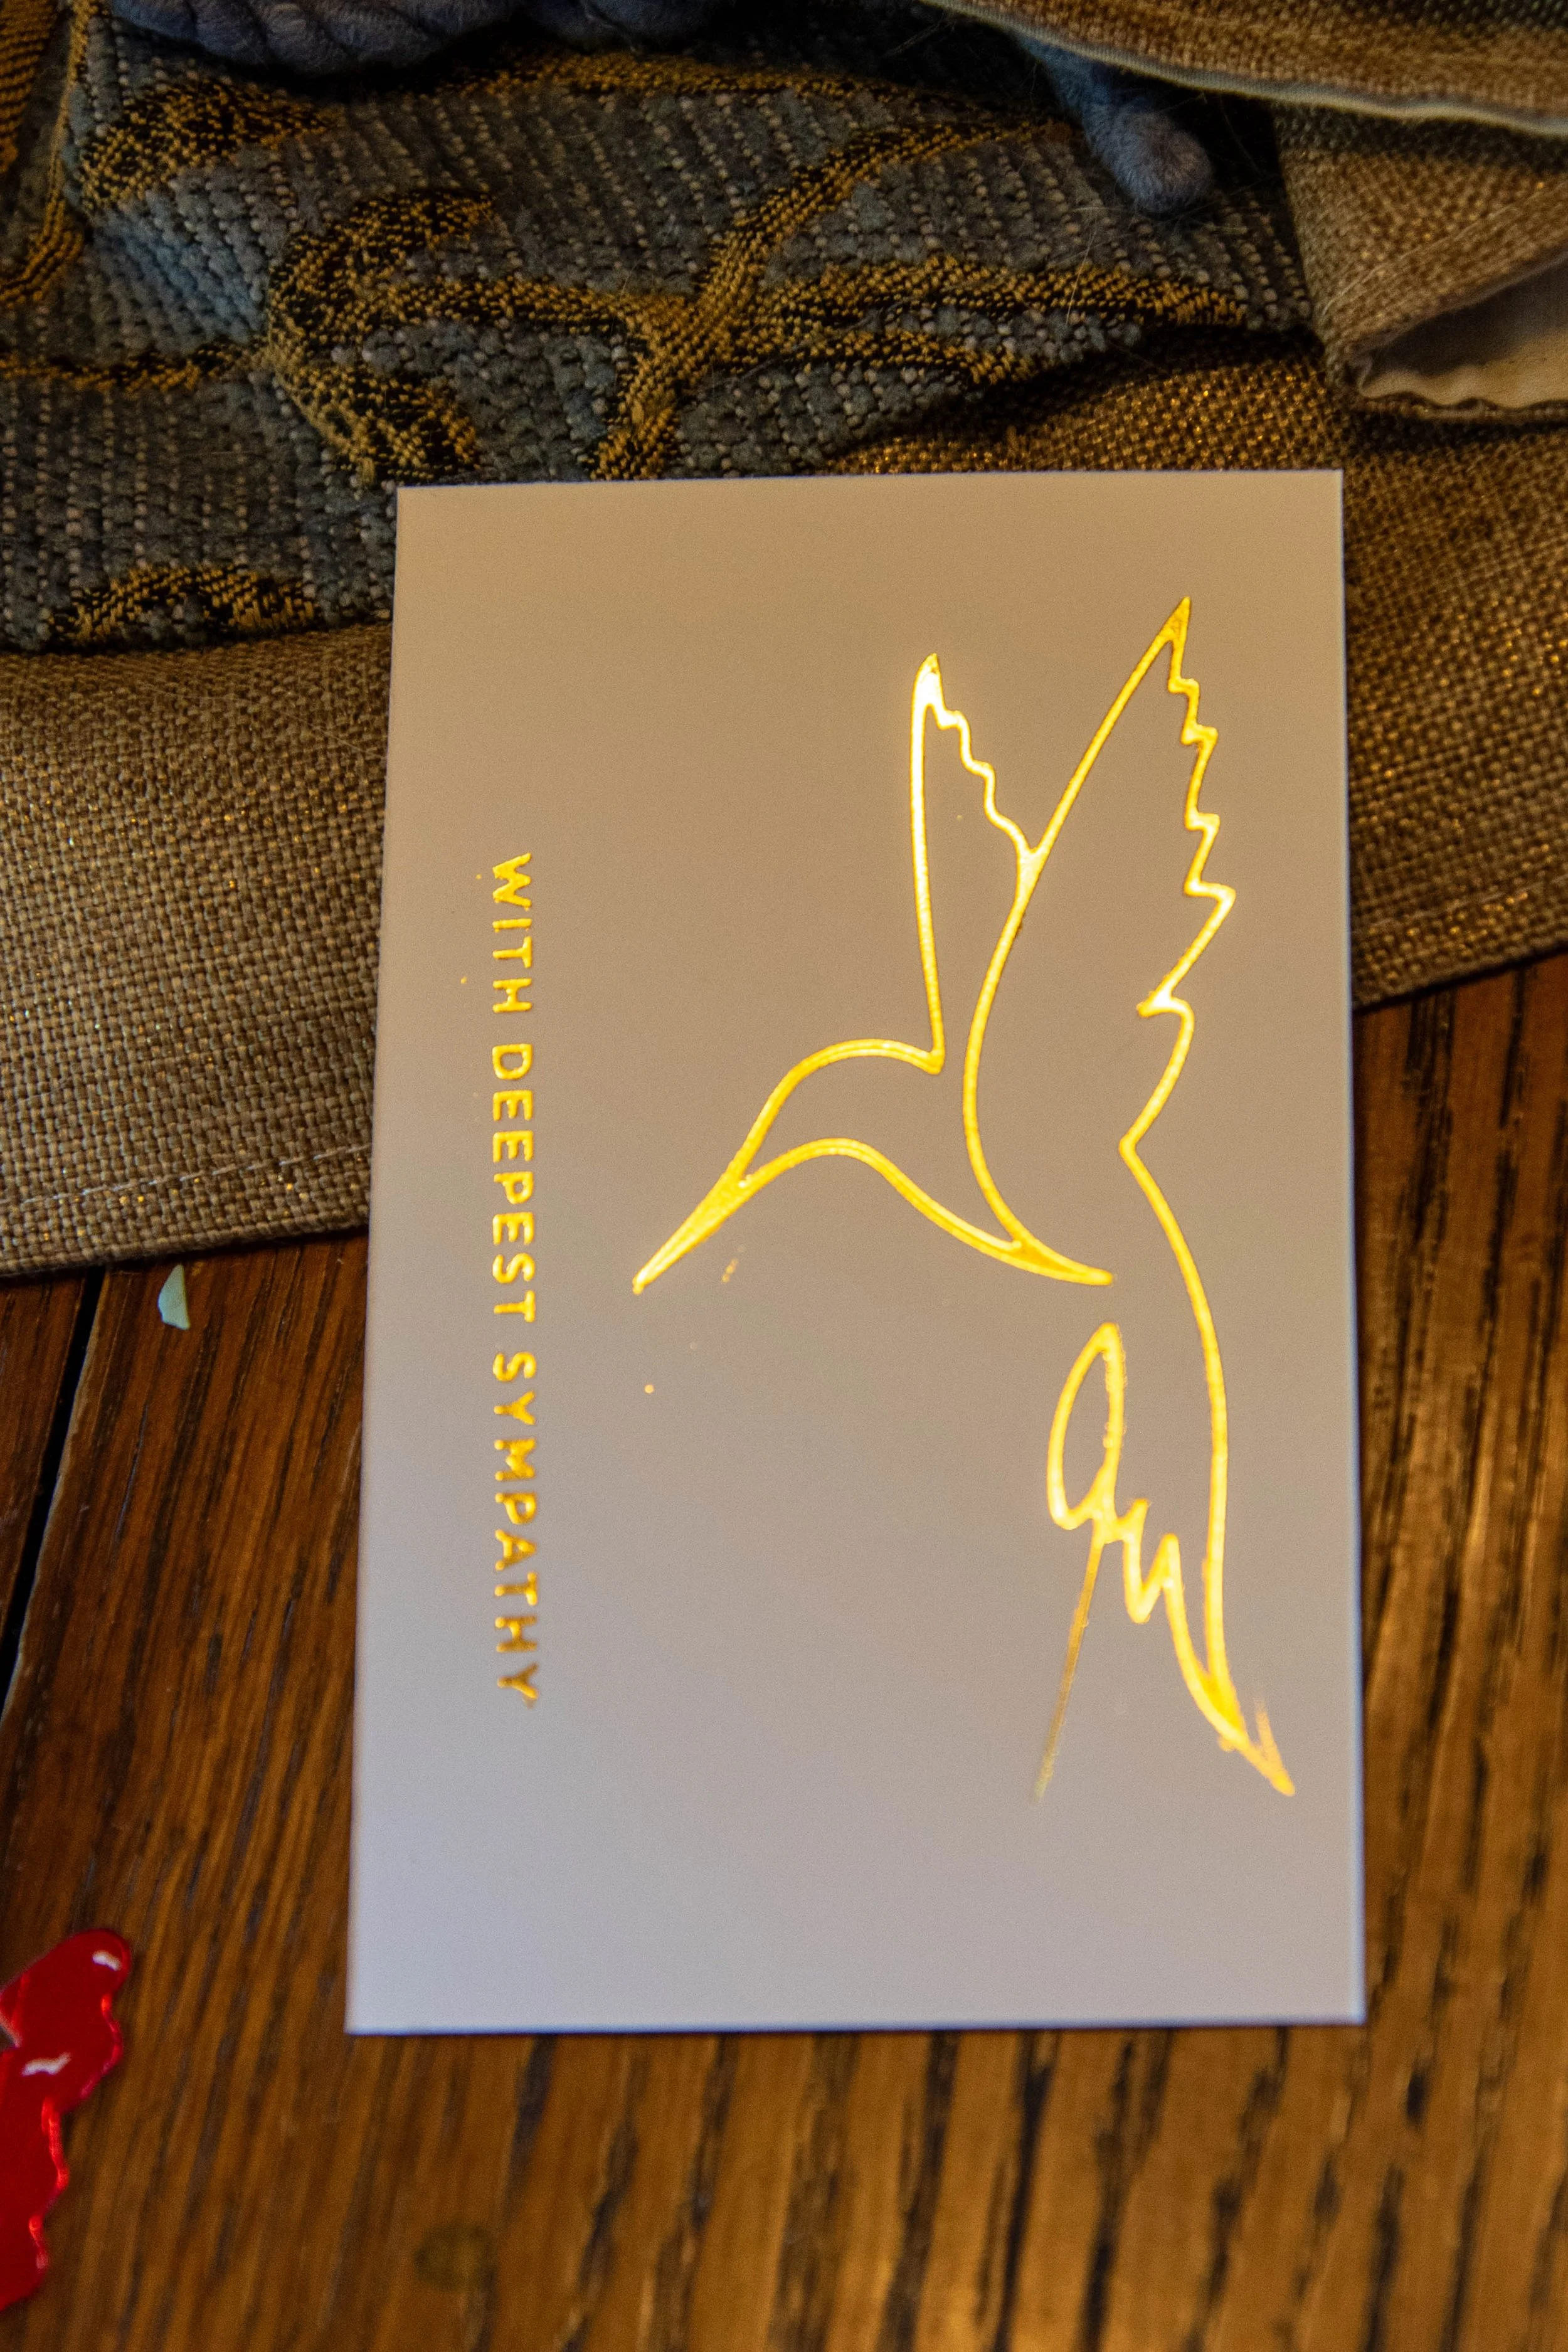
14. Place the focal panel hummingbird panel on a non-slip mat.
15. Align the Shimmering Hummingbird stencil over the hummingbird on the focal panel.
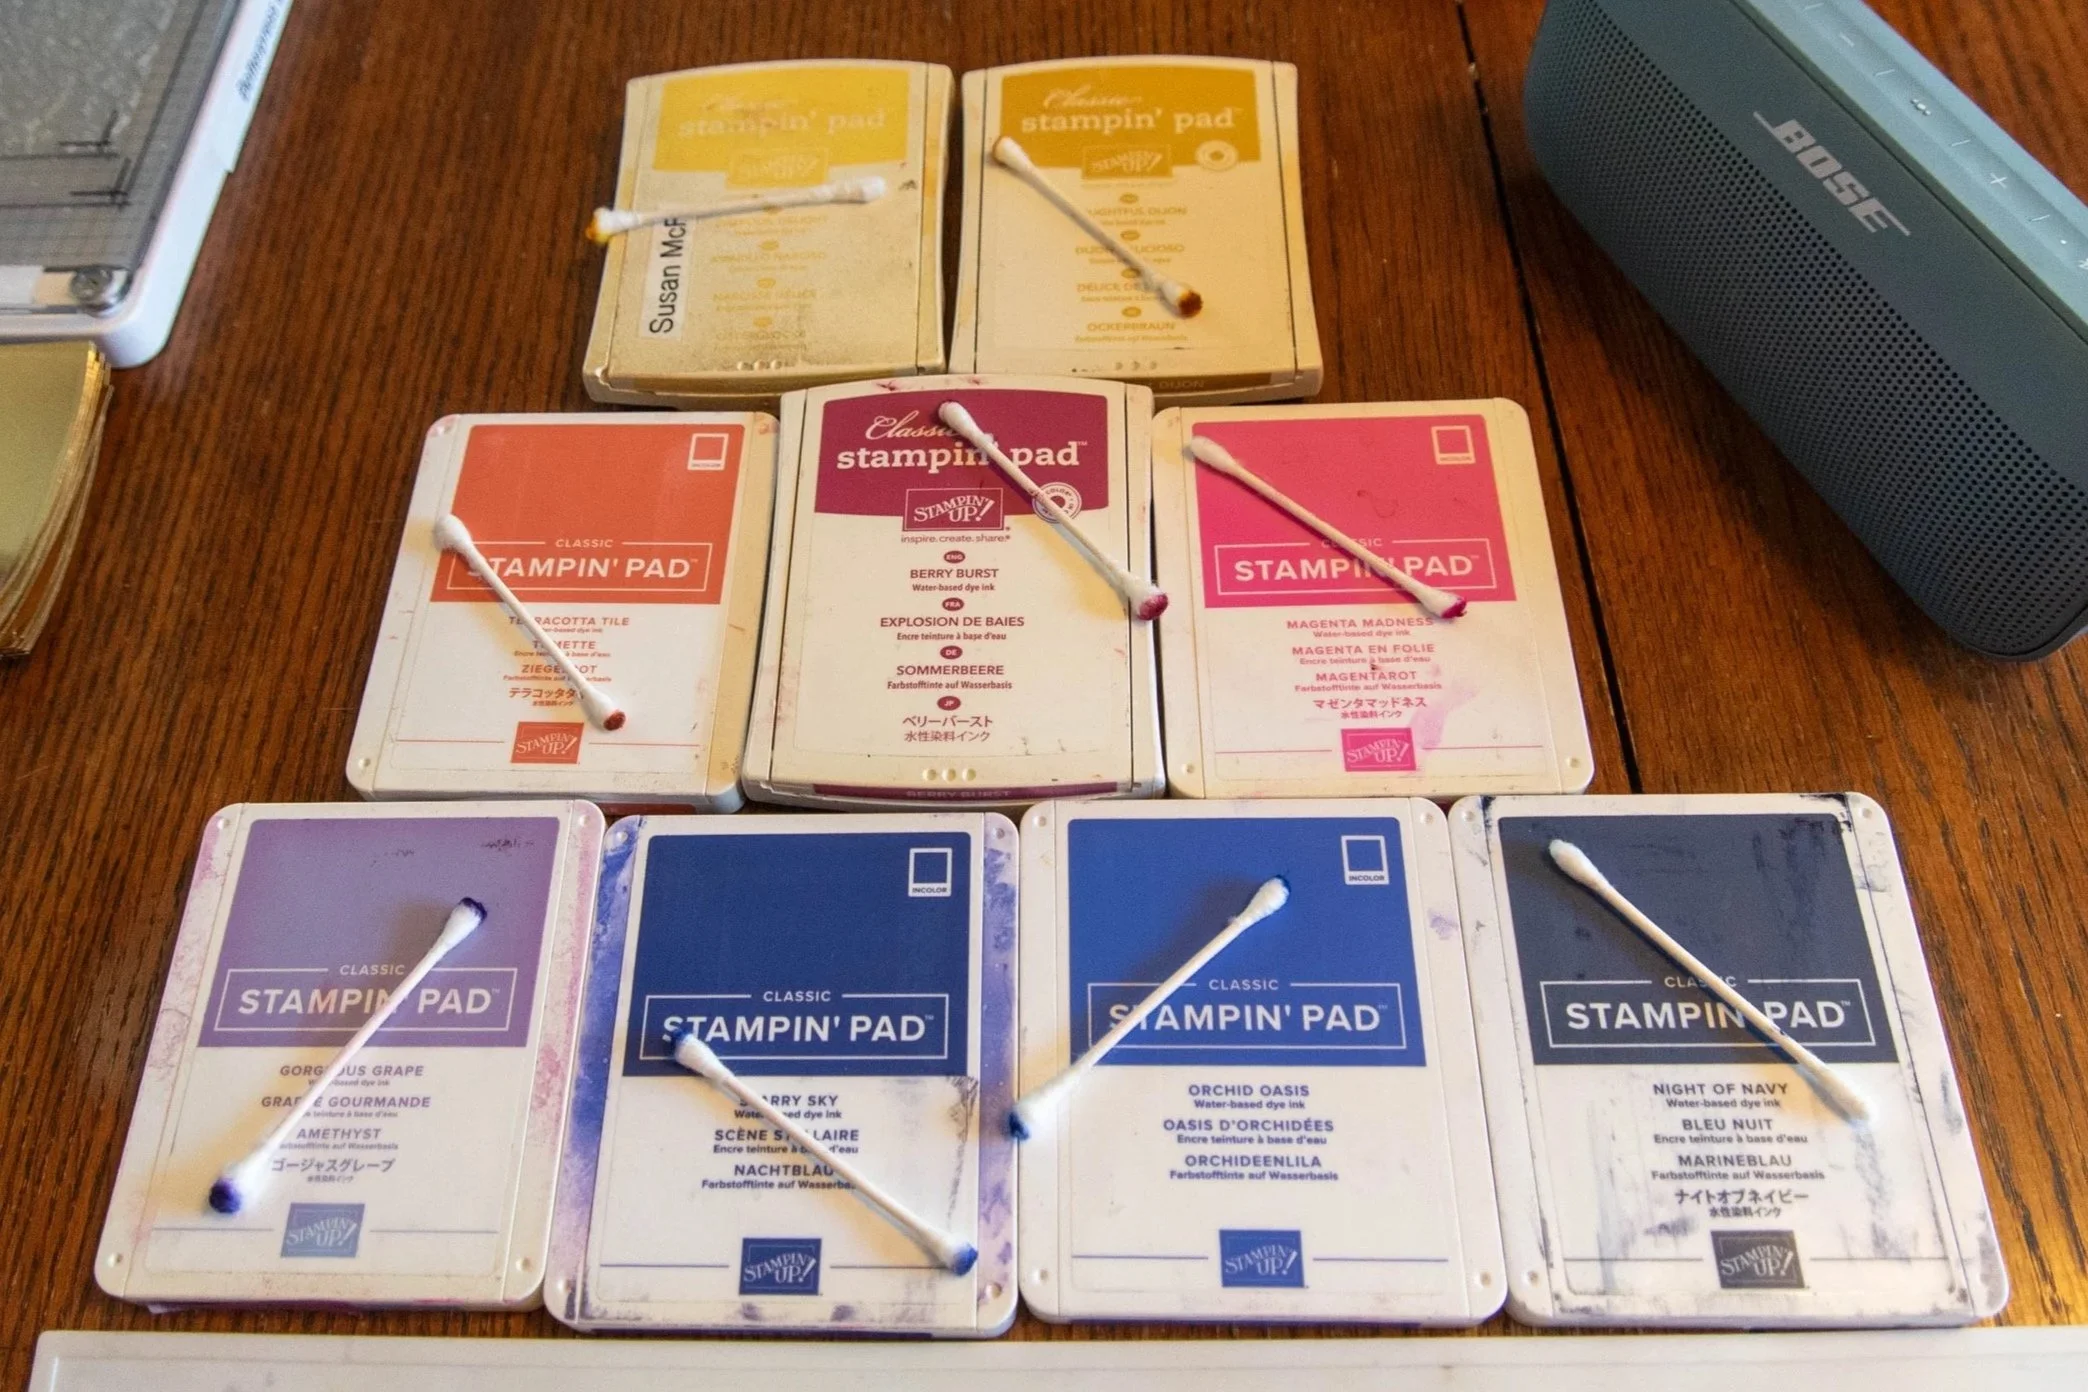
16. Using a Q-Tip (one for each color) ink the Q-Tip and bounce the tip onto the image. Continue bouncing until you have colored in the area you are focusing on.
a. For this design the colors were applied in a slight arch with the lightest yellow (daffodil delight) starting below the beak down through the left sight of the tail.
b. The darker yellow ink (delightful Dijon) overlaps the light yellow and color through the top of the head and back of the bird
c. Continue to overlap the color with the previous color and follow the arch up through the wings.
d. The following is the order of the coloring: Daffodil Delight, Delightful Dijon, Terracotta Tile, Berry Burst, Magenta Madness, Gorgeous Grape, Starry Sky, Orchid Oasis, and Night of Navy.
17. Remove the stencil.
Note: The image shown is taken from when I was experimenting with this process. The actual coloring for this card will be done on the foiled focal panel.
Cut out the Focal pieces
18. Use the matching hummingbird die to cut out the front version and interior version of the hummingbird.
19. Cut out 2 more versions of the hummingbird from scrap cardstock and glue together. Glue the colored version of the hummingbird onto the top.
20. Use the banner die to cut out the sympathy sentiment from both the front version and interior version.
21. Cut out 2 more banners using scrap cardstock and glue both banners to the back of the sentiment banner.
Note: I did not use the reverse image of the sentiment. I saved it for future use.
Assemble card
22. Glue the gold frame onto the front of the base card.
23. Glue the stone embossed background panel onto the card over the foil. Position so the foil frames the background panel.
24. Glue colored hummingbird on the card (top center).
25. Glue sympathy sentiment on the card.
26. Glue the gold hummingbird on the left panel interior.
27. Stamp the “sorry for your loss” sentiment with navy color on the card’s interior.
List of products and tools
Non-Consumables
“Heal Your Heart”, stamp set by Stampin’ Up; “sorry for your loss”
“Mini Everyday Sentiments” Hot Foil set by Spellbinders; “WITH DEEPEST SYMPATHY”
“Shimmery Hummingbirds” Bundle (Hot Foil, Die, and Stencil) set by Alt&New
Solid Hot Foil Plate from Pink Fresh
Stone embossing folder by Stampin’ Up
Rectangle Nested Dies by Spellbinder
Consumable
Daffodil Delight Classic Ink from Stampin’ Up
Delightful Dijon Classic Ink from Stampin’ Up
Terracotta Tile Classic Ink from Stampin’ Up
Berry Burst Classic Ink from Stampin’ Up
Magenta Madness Classic Ink from Stampin’ Up
Gorgeous Grape Classic Ink from Stampin’ Up
Starry Sky Classic Ink from Stampin’ Up
Orchid Oasis Classic Ink from Stampin’ Up
Night of Navy Classic Ink from Stampin’ Up
Gold Foil
Gold Foiled Cardstock
White Heavy Cardstock
White Hammermill Premium Cover Copy Paper
Special Tools
Glimmer Hot Foil System by Spellbinders
Platinum Machine by Spellbinders