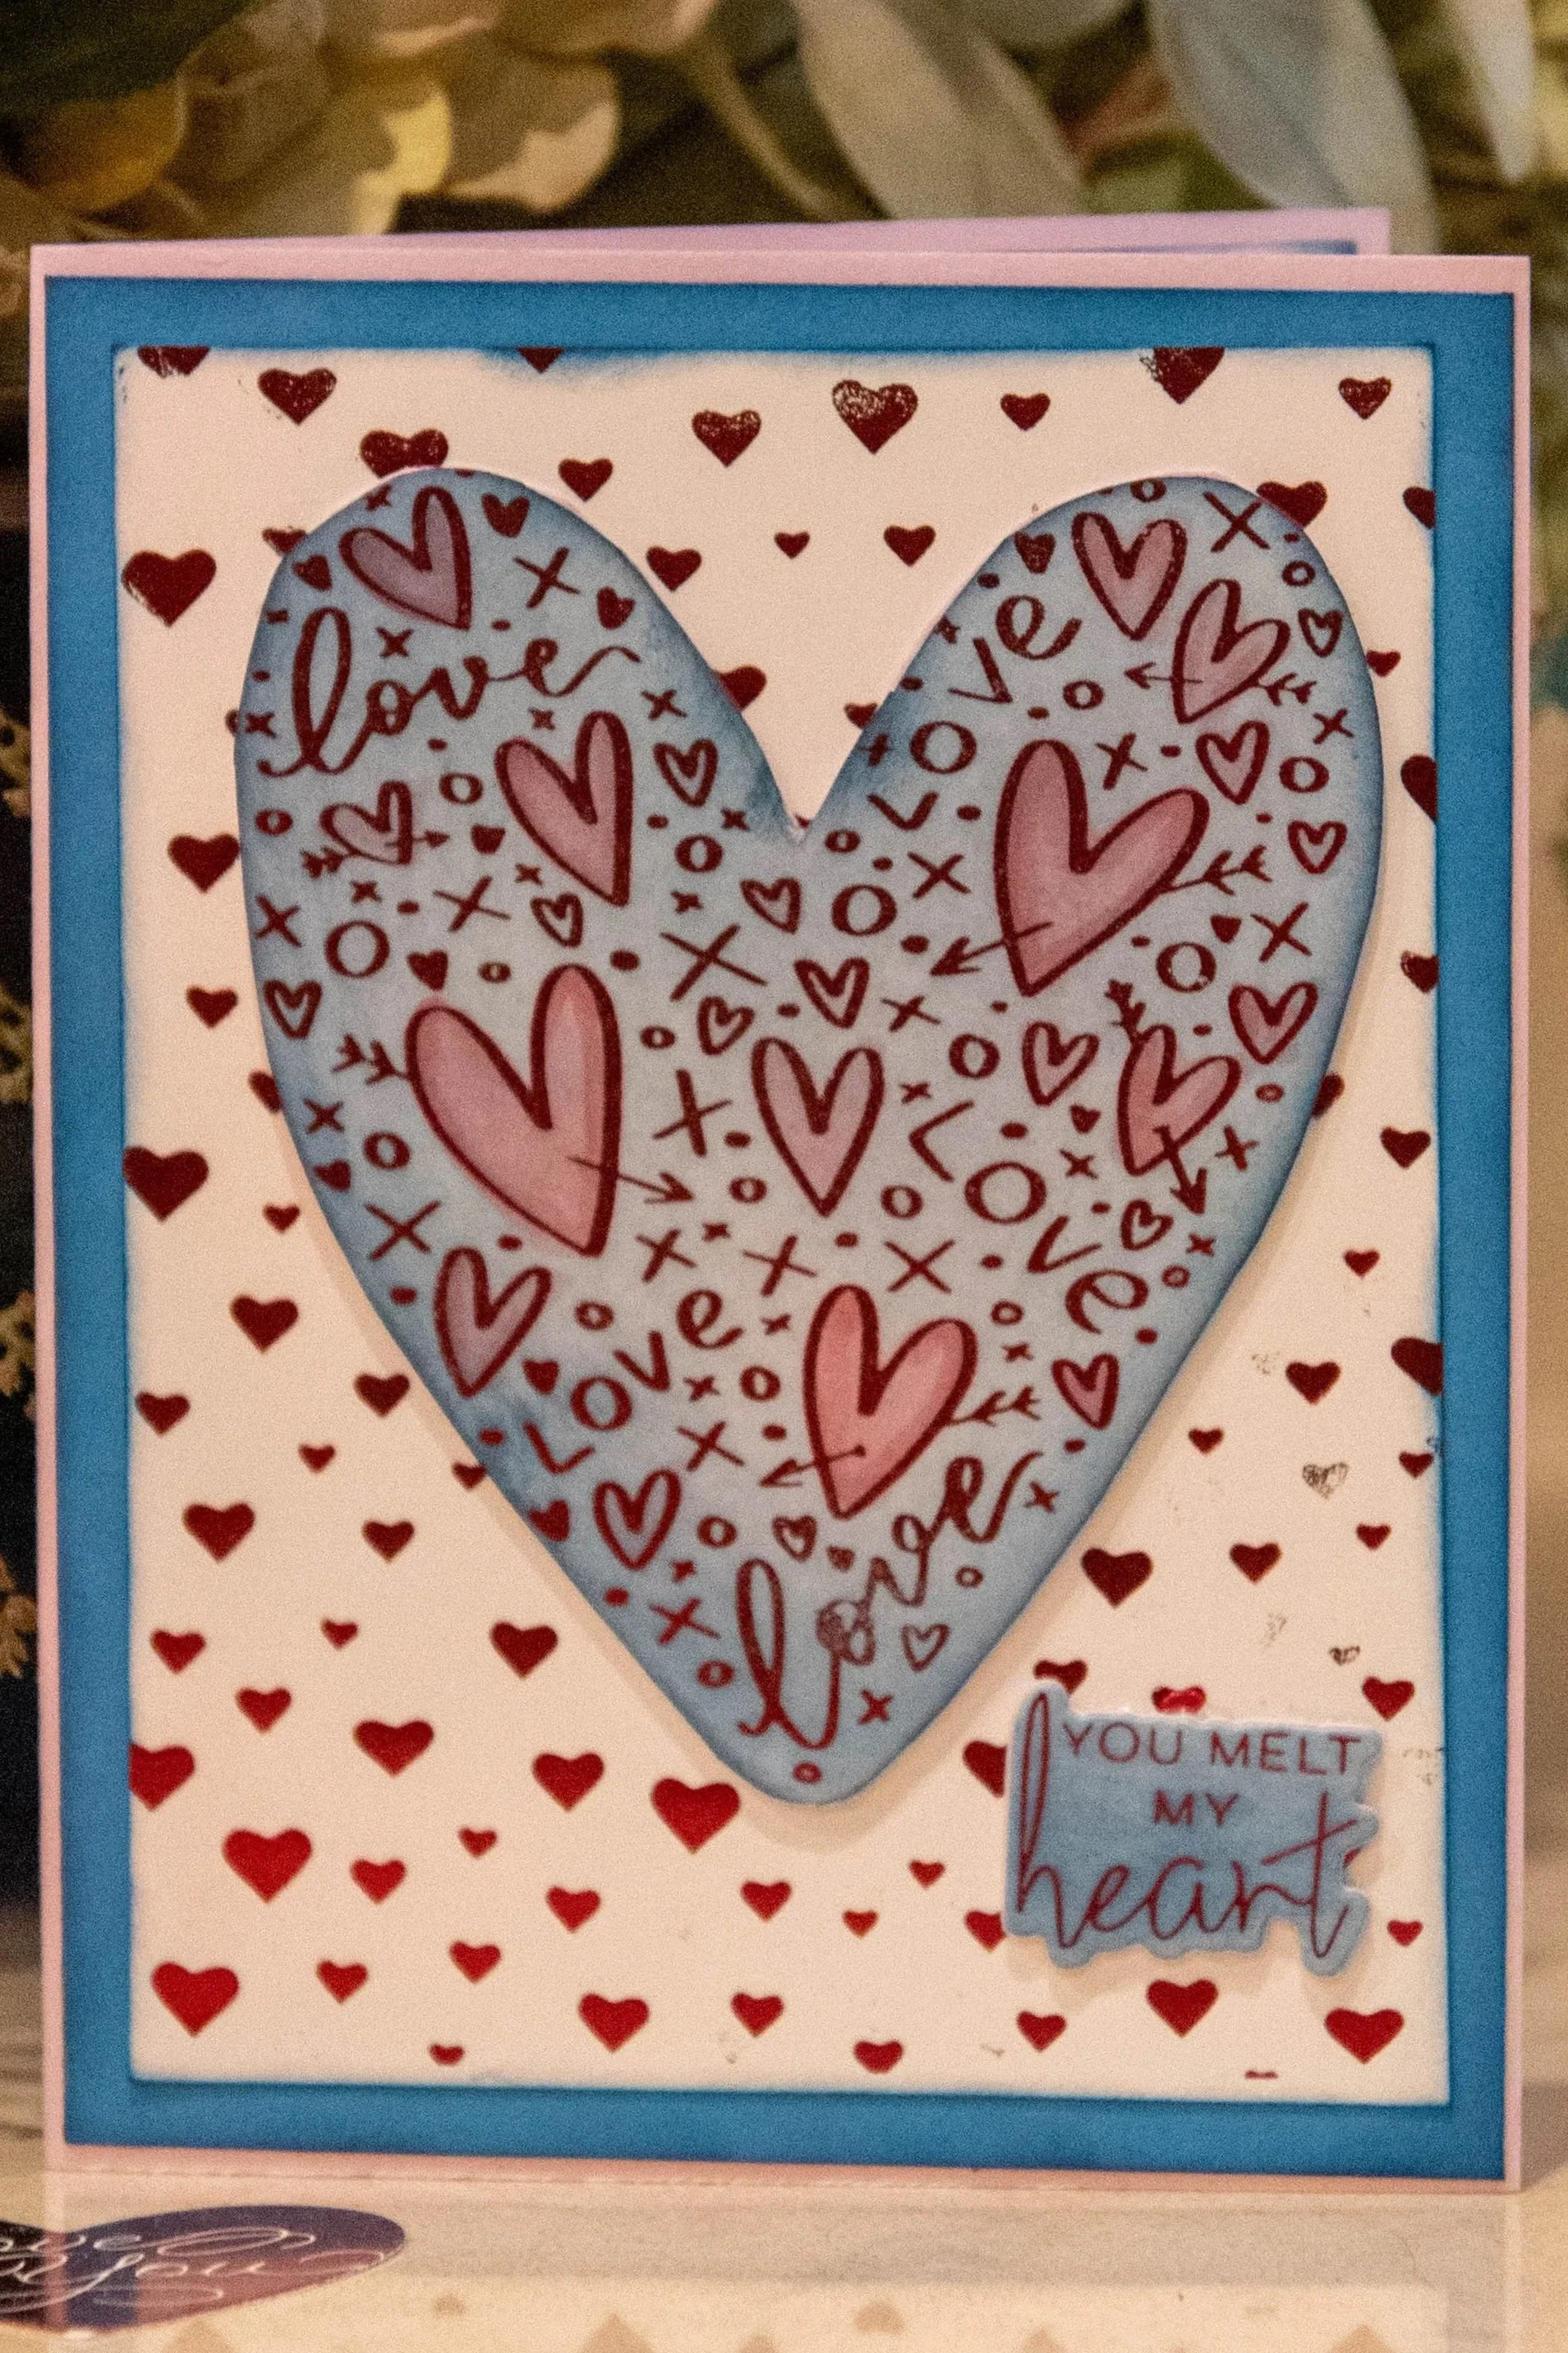
You Melt My Heart
I am always looking for inspiration for the designs. I tend to look at nature or other designers for inspiration but for this card it came from a completely different source. This card’s color theme was inspired by a clothing catalog. I loved the blue being a featured color mixed with the hearts and love theme. I really think it works, and it makes the card more versatile. You never know where inspiration will come from!
This card is a 5.5” by 4.25” card (A2). The products used on this card are listed at the end of the page.
Step by Step Instructions for making this Card.
Make the Card Base
1. Make the card base with Pool Party Card Stock for an A2 card. (See Card Basics).
There are 4 panels that need to be cut for this card – a matting panel, a background panel, focal panel (used to create the focal heart and sentiment), and the internal panel.
Cut the Card Panels
2. Using the Azure Afternoon cardstock, cut out a 4-1/8” x 5-3/8” for the matting panel. Burnish with Dapper Denim ink on the edges.
3. Using the White Hammermill copy paper cut out the background panel 5” x 3-3/4”.
4. To make the focal panel use the White Hammermill copy paper and cut out a large enough paper to foil the heart and the sentiment. I cut a panel the size of 4-1/2” x 5”.
5. Using the White Hammermill copy paper cut out the internal panel to 4” x 5 -1/4”. Burnish edges with Dapper Denim ink.
Note: Although you can use any white cardstock you like, I get my best results when I foil with the White Premium Color Copy Cover paper. AND it is really reasonably priced.
Foil the Interior
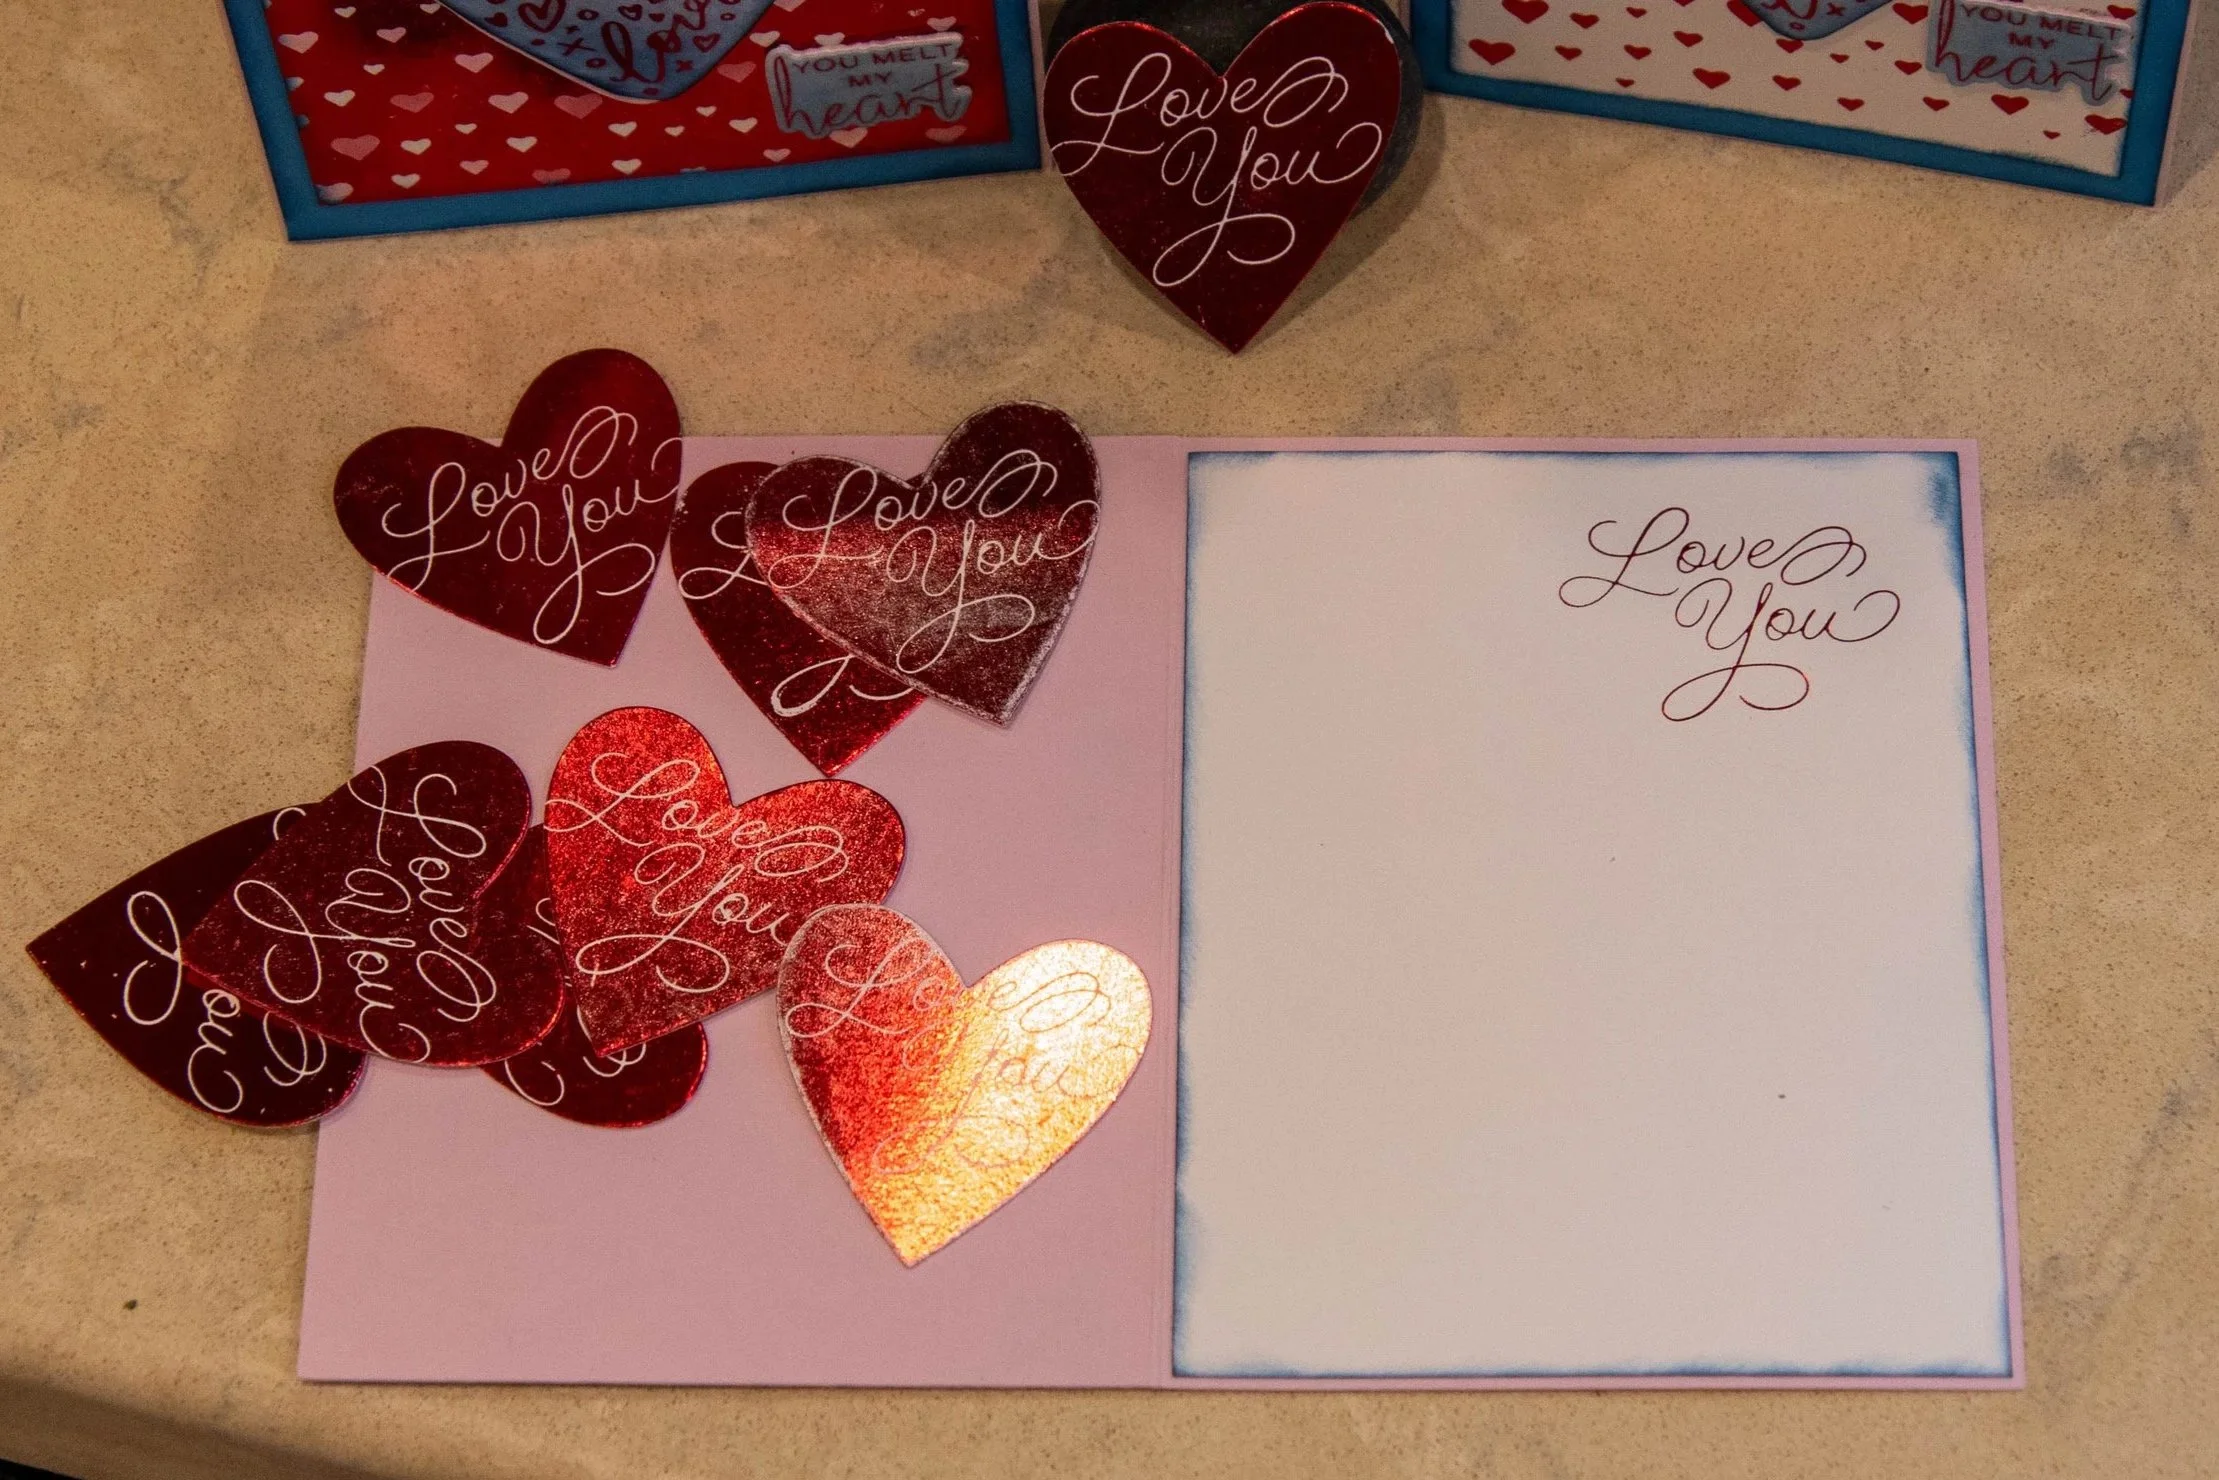
For this card I foiled a simple “I love you” on the interior of the card.
6. Align the “I Love You” press plate onto the glimmer machine so it would impress into the left corner of the interior panel.
7. Place red foil 2-1/2” by 2” over press plate. Red foil side down.
8. Complete foil sandwich with the interior panel. Place the panel so the left corner lies over the press plate. Keep the burnished side down.
9. Heat and Foil per the Glimmer Machine instructions.
Note: I use the negative foil from this step to create the hearts in the photo. This heart can be included in the card or glued to the envelope. It’s just a little extra item that will make the recipient feel special.
Foil the Background
10. Place the Hearts Hot foil plate on the glimmer machine.
11. Cut the red foil 5” x 5-1/2” and place over the foil plate.
12. Complete the foil sandwich with the background panel, burnished side down, and covering the entire foil plate.
13. Heat and foil per the Glimmer Machine instructions.
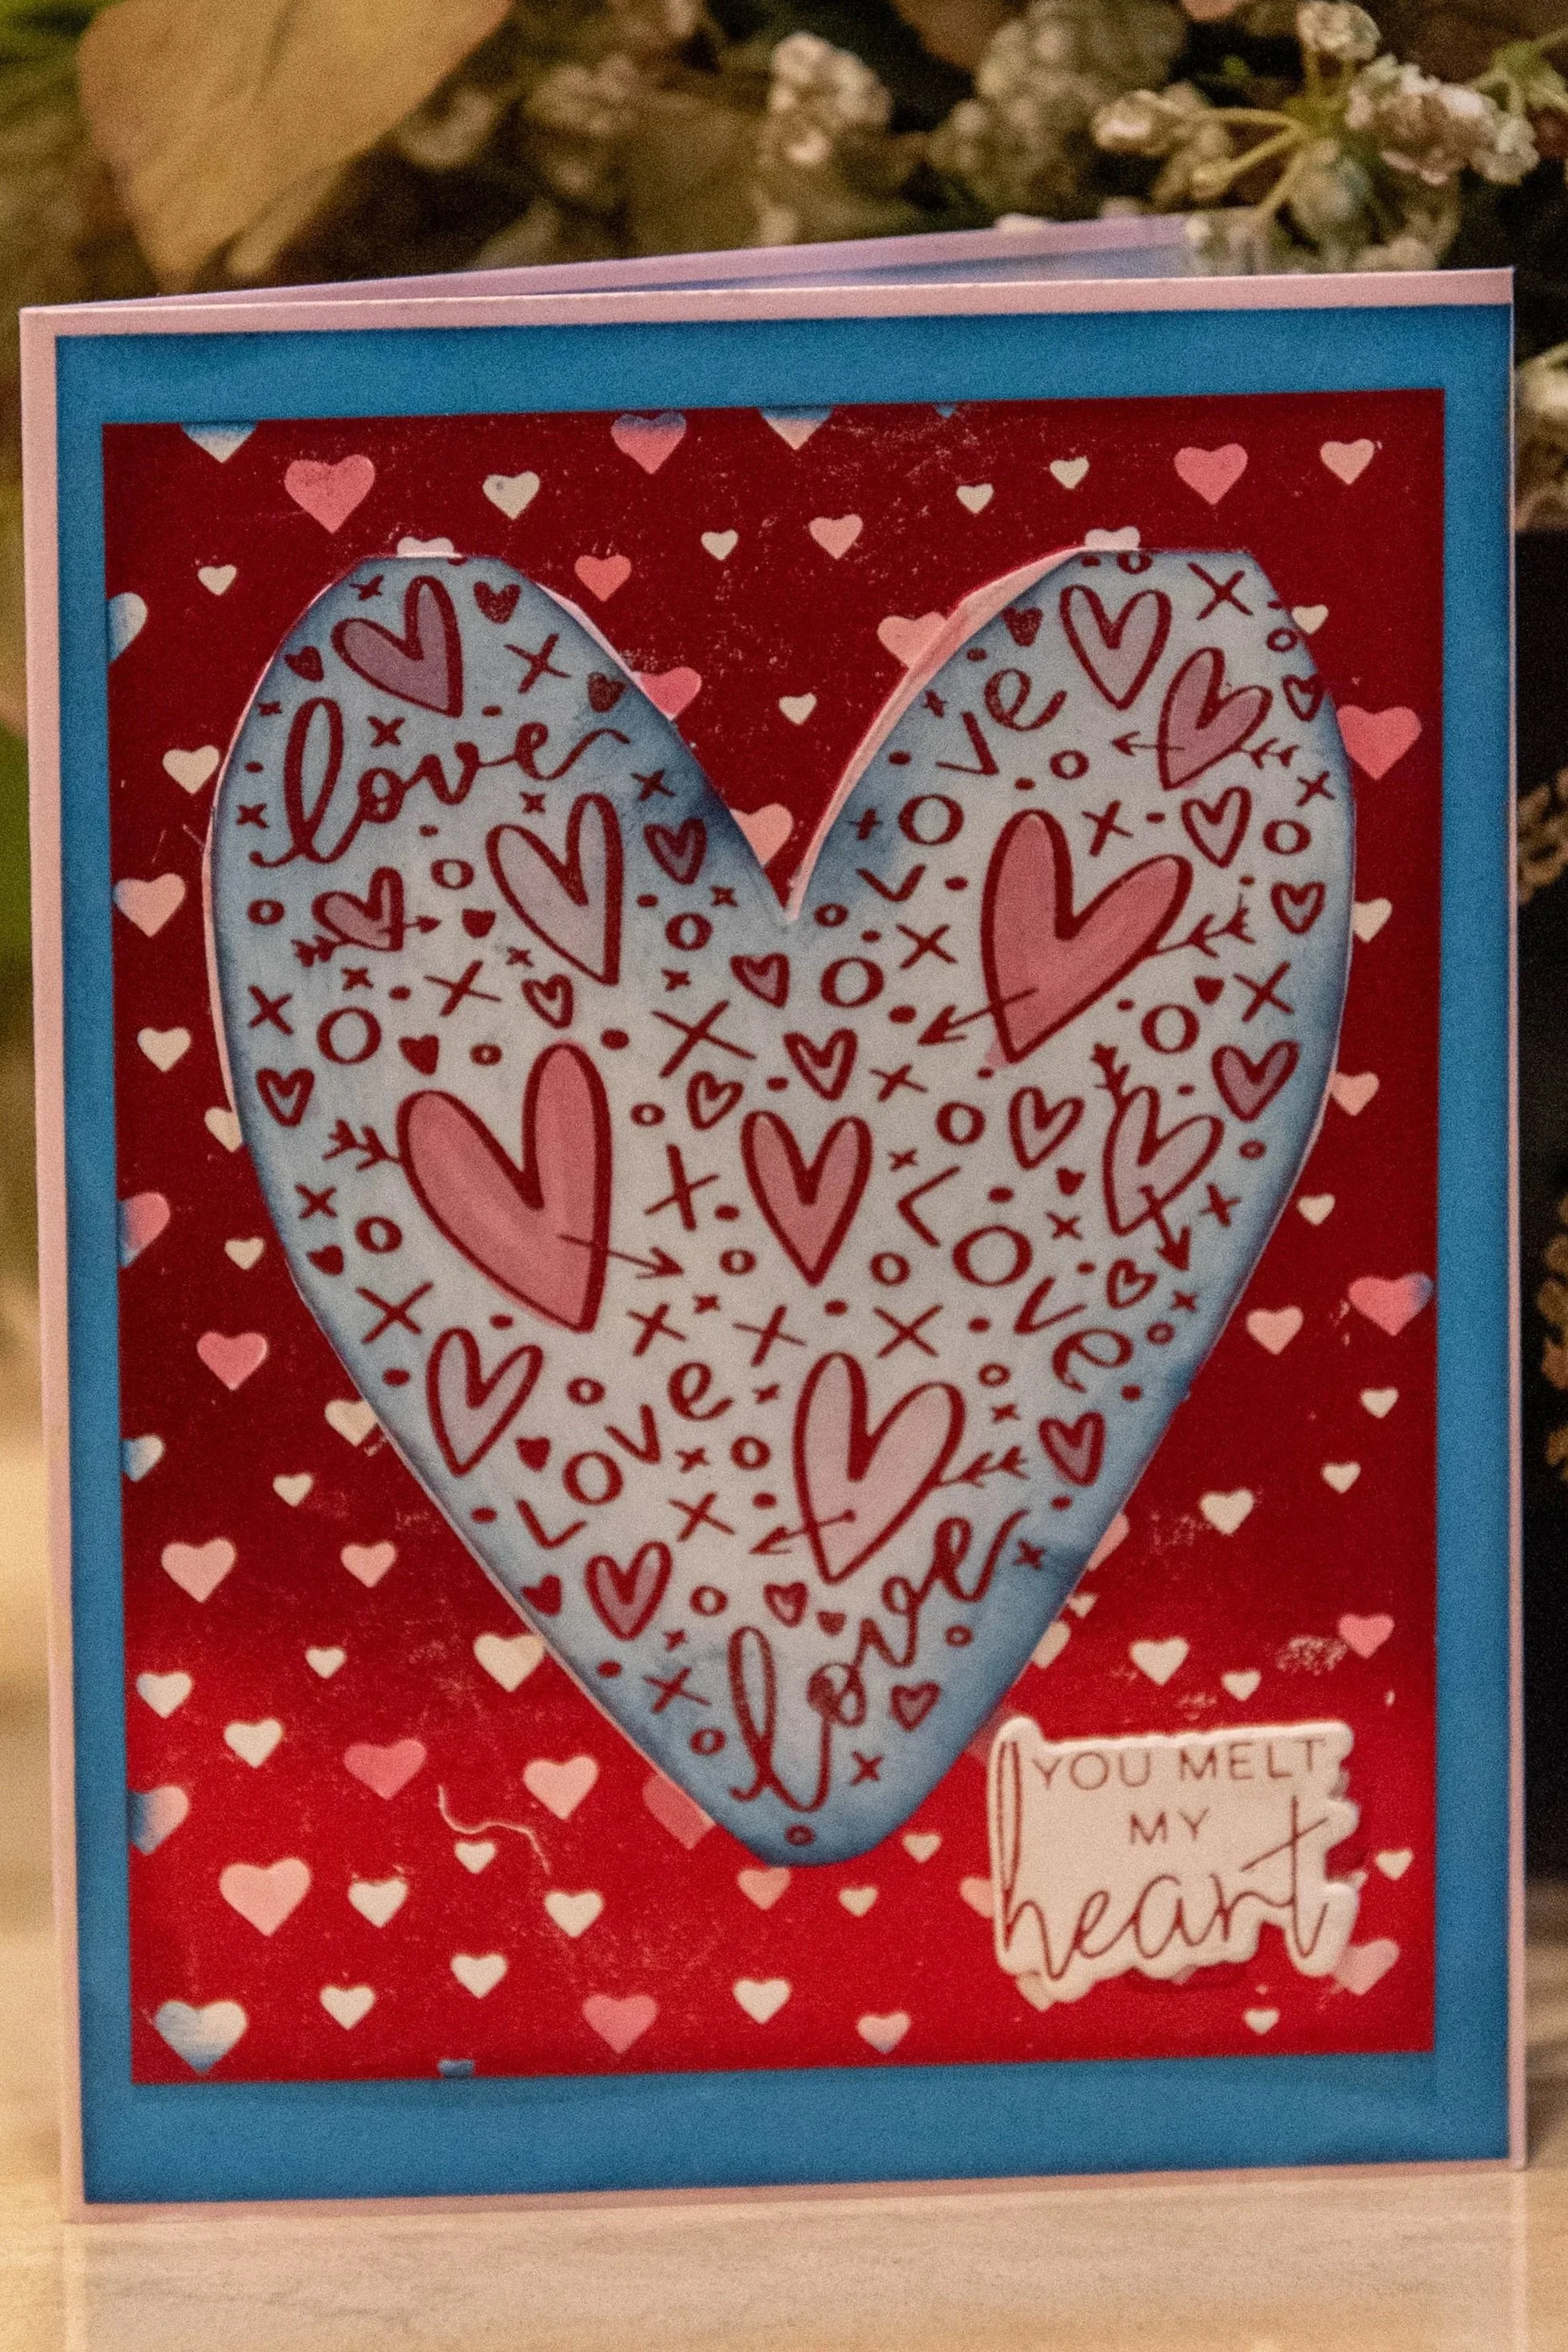
Note: With the negative foil, I created the red shiny version of the card seen in the photo at the top of this page. I used the Copic pens to color in light pink and dark pink hearts on to the negative white hearts created with the leftover foil.
Foil the Card Focal
The images on this panel will be cut so I am taking advantage of the paper real estate to foil the heart and card-front sentiment. There are two plate that will be used: The heart from the “I’d pick you” press plate set, and “you melt my heart” sentiment from the “A little Message Sentiment” hot foil set.
14. Place both plates onto the glimmer machine. Place these pieces so that the focal panel will cover both plates.
15. Cut out the red foil so it is big enough to cover both plates and lay on top of the plates, red foil side down.
16. Complete the foil sandwich with the focal panel placed on the foil covering the plates.
17. Heat and foil per the Glimmer Machine instructions.

Note: The picture show both the original and negative foiled image. The negative image was not used in this card. Anytime I foil, I foil the negative onto white card stock for future use. Foil on its own is fragile and will scratch so by foiling on card stock you can save for future use.
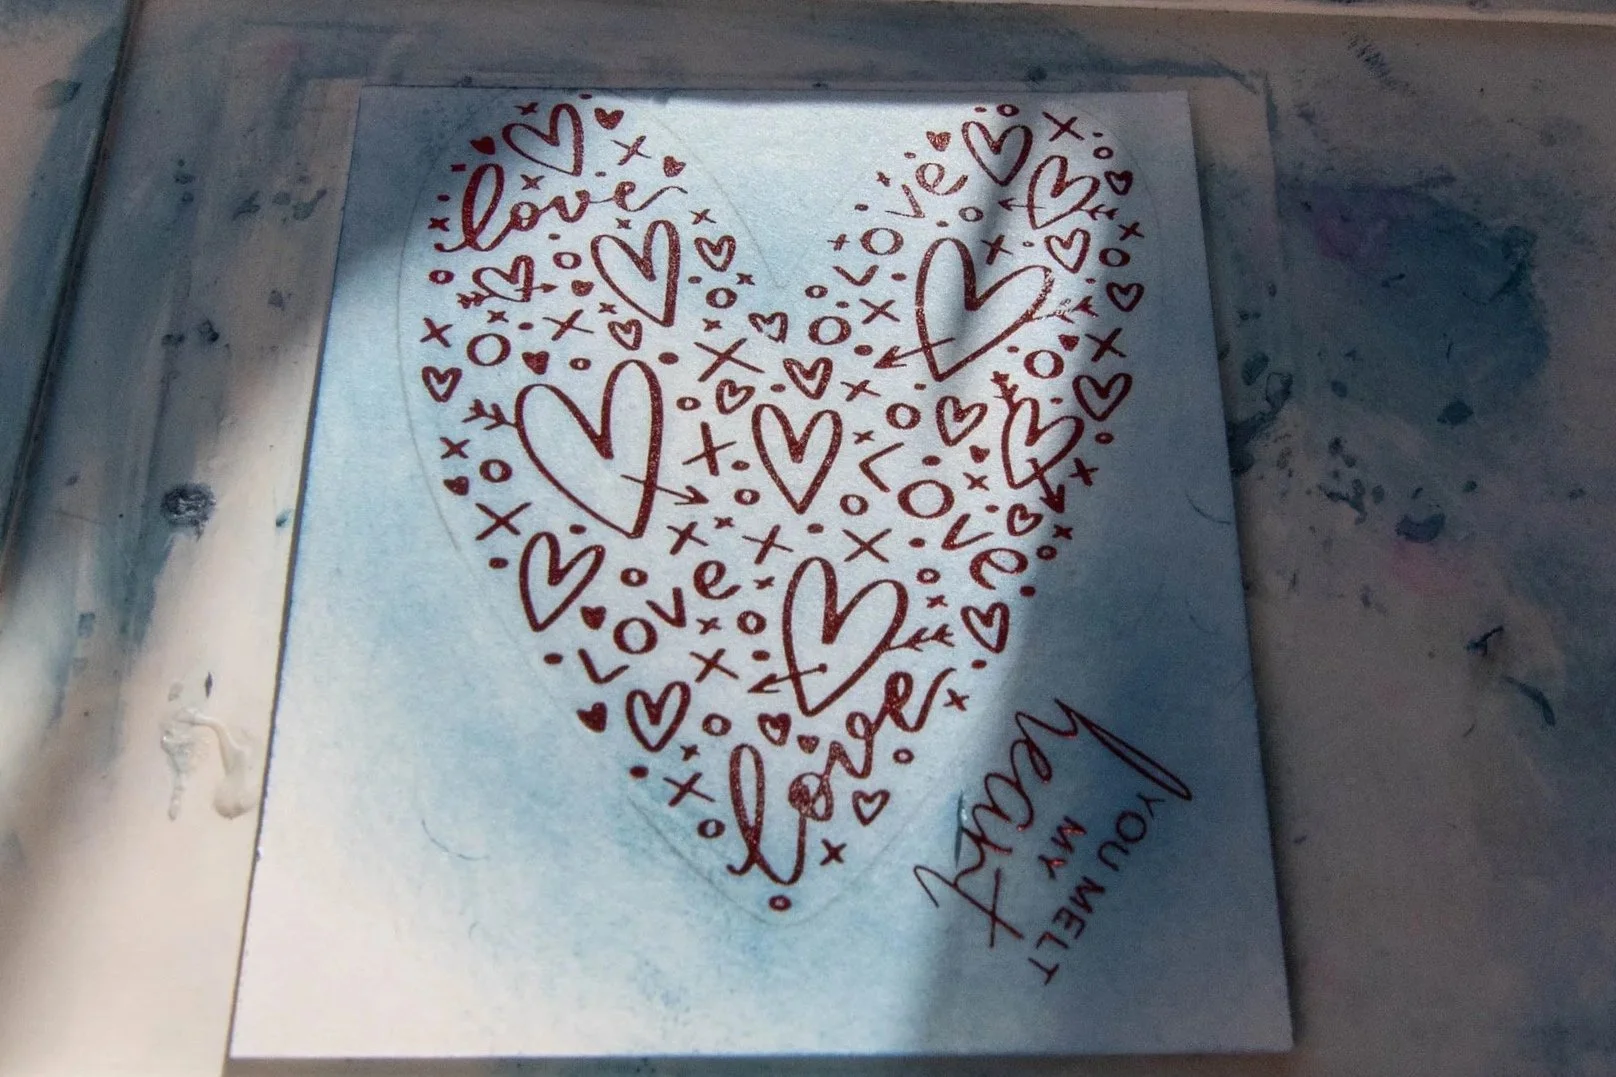
Color Heart
Since the heart and sentiment is going to be cut out of the panel, you can get messy in regard to coloring the heart. If you want to keep the sentiment background white, then you can use the die to cut it out before you color the heart. I preferred the blue background on the sentiment, so I colored both heart and sentiment at the same time.
15. Starting with the lightest color blue use the brush to color the middle of the heart.
16. Proceed with the medium color blue, starting at the edge of the light color, and brush to the edge of the heart.
17. Finally using the darkest blue ink to slightly overlap with the medium blue and color the edge of the heart. Don’t worry about going out of the lines – this is expected and encouraged. (Because it is also really fun to color outside the lines!!)
18. Now that the main heart is colored use the Copic pens to color the smaller hearts in the main heart.
19. Use a die to cut out the sentiment.
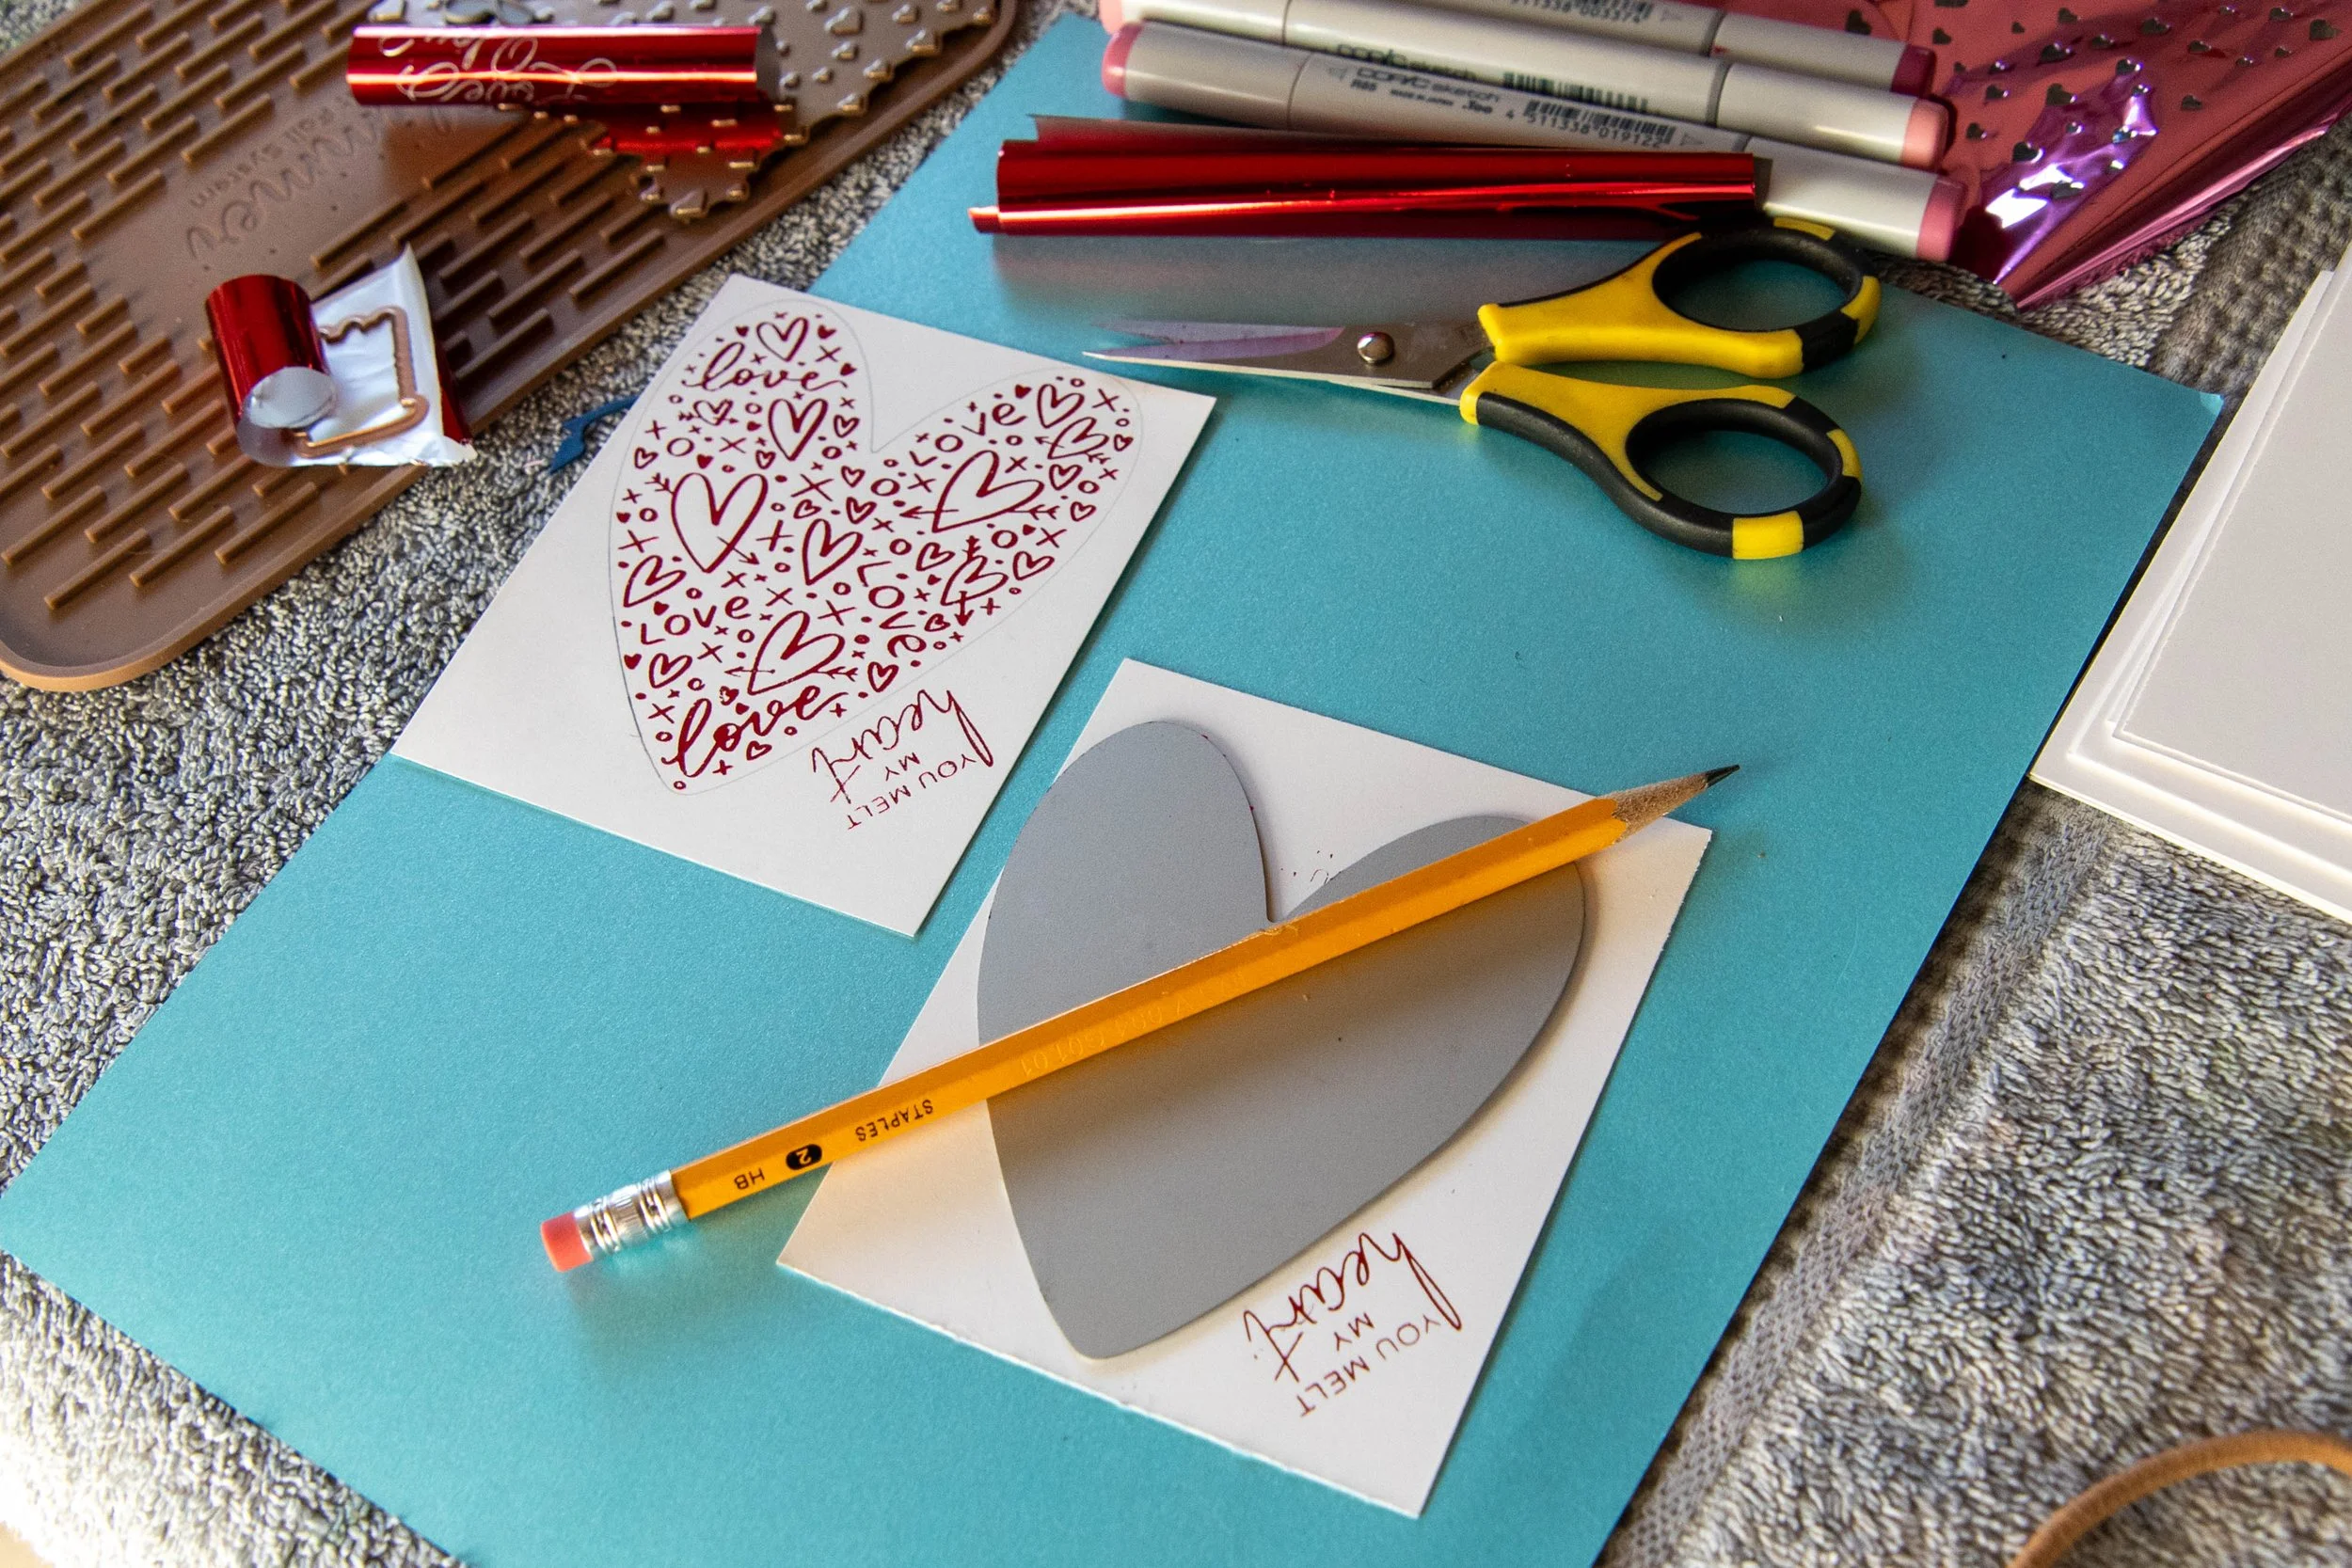
Cut Heart
I don’t have a die cut for this heart. I looked through my die stash, and nothing fit the heart image, so I had to go back to the old school method and cut it by hand.
20. Place the Heart Place plate onto the heart image. Use a pencil to trace the heart around the foiled image.
21. Use the pencil mark to guide you as your cut out the heart.
Assemble card
22. For the focal images on the front of the card, I cut out two more hearts from the Bubble Bath (Pink) card stock using the same technique as cutting out the focal heart. I also die cut two more of the sentiment shadows out of the pink card stock.
23. Glue the pink hearts together, then glue the blue foiled heart on the pink hearts. This gives a solid heart piece.
24. Glue the pink shadow pieces together. Glue the foiled image onto the pink shadow pieces.
25. Glue the interior panel into the inside of the card.
26. Glue the matting panel onto the base card.
27. Glue the background panel onto the matting panel.
28. Glue the heart onto the front of the card.
29. Glue the sentiment on the front of the card.

List of products and tools
Non-Consumables
“I’d Pick You” BetterPress set by Spellbinders; the heart.
“A Little Message Sentiments” BetterPress set by Spellbinders; “you melt my heart”
“Cascading Vines” BetterPress set by Alt & New; “I Love You”
HF111 “Hearts” Hot foil Plate by Hero Arts
Consumable
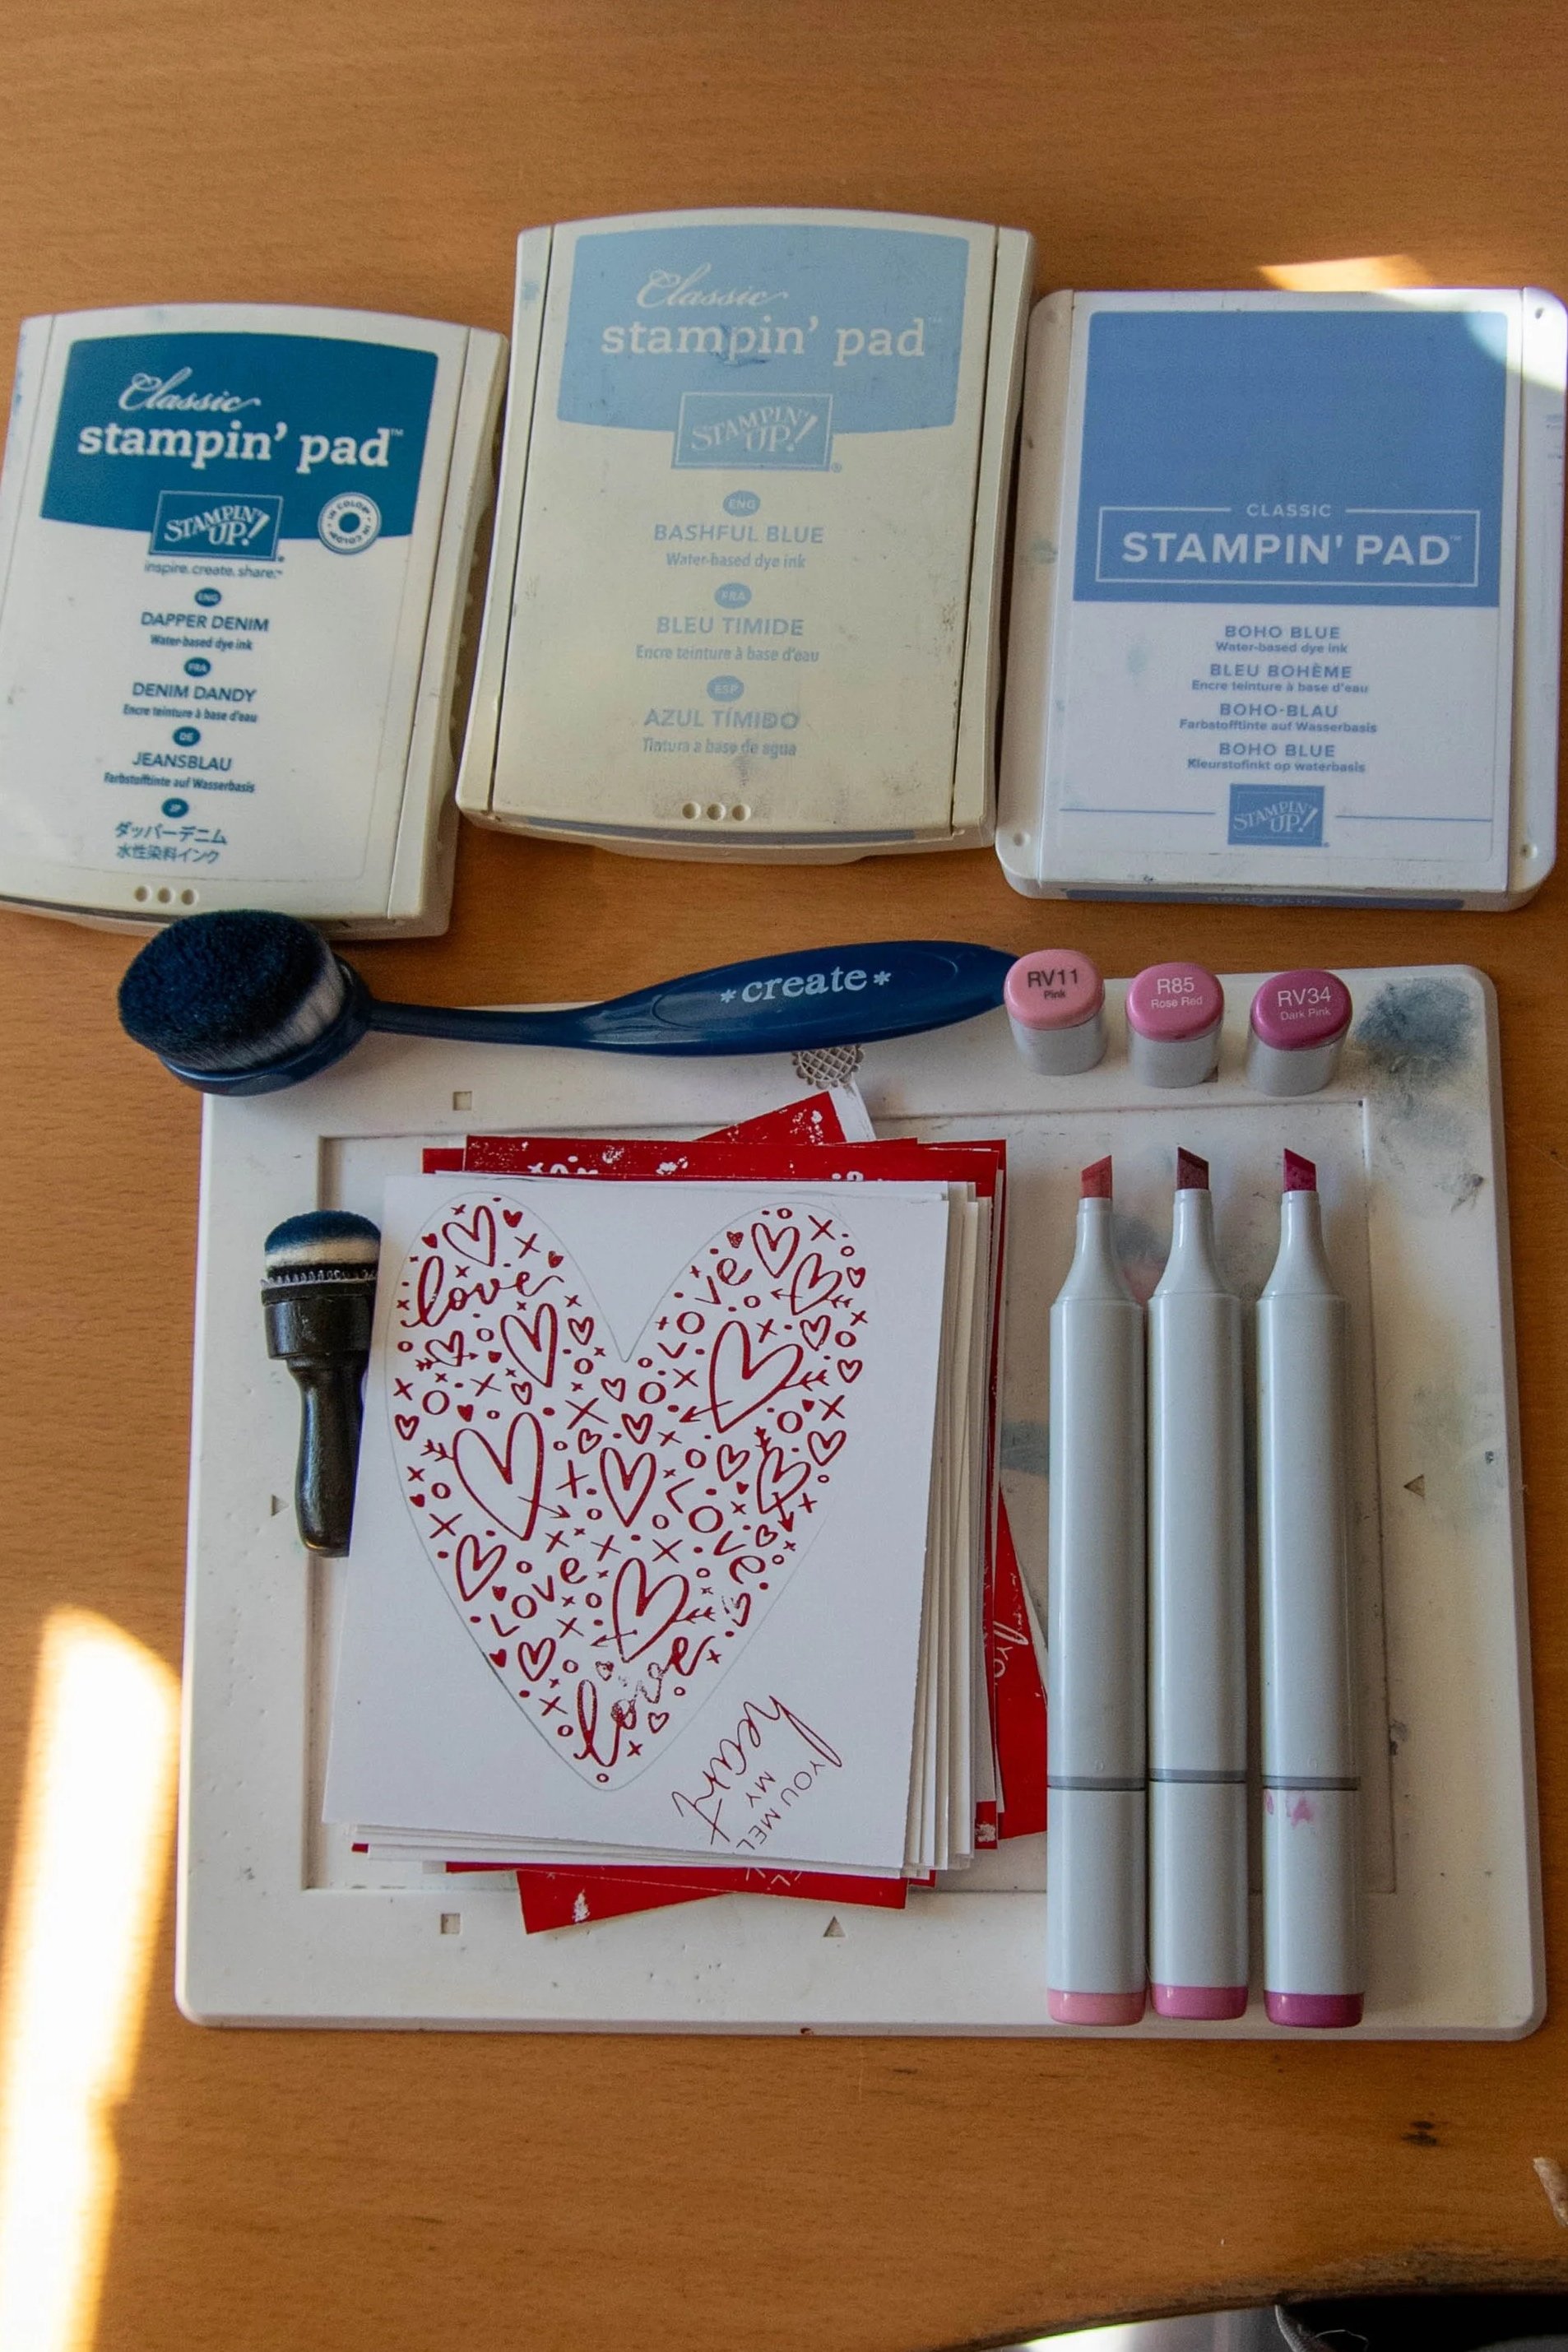
Copic Pen RV11 Pink
Copic Pen R85 Rose Red
Copic Pen RV34 Dark Pink
Paper Denim Classic Ink by Stampin’ Up
Bashful Blue Classic Ink by Stampin’ Up
Boho Blue Classic Ink by Stampin’ Up
Red Glimmer foil by Spellbinders
Bubble Bath Card Stock by Stampin’ Up
Azure Afternoon Card Stock by Stampin’ Up
White Premium Color Copy Cover by Hammermill
Special Tools
Glimmer Hot Foil System by Spellbinders
Platinum Machine by Spellbinders