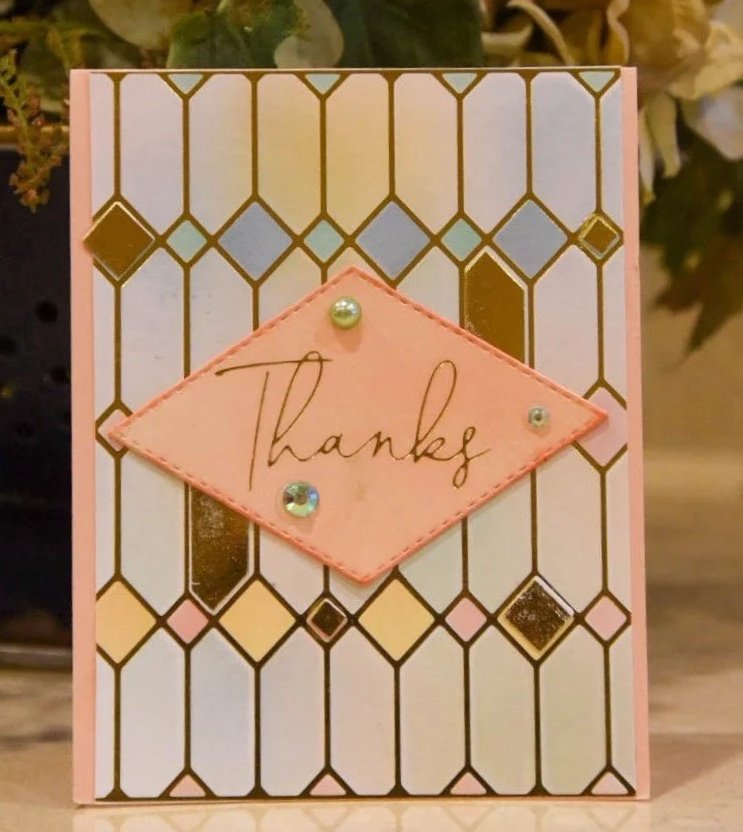
Stained Glass Thanks
Every January I start my designing of cards with a Thank You card. It is my way of starting the year in a spirit of gratitude. I had discovered the Stained-Glass Foil plate late in 2024 and ordered it. I then found out there was a coordinating stencil and die set and picked them up as well. My original thought was to make the stained glass feel like you are looking at a prism. I wanted soft rainbow colors through-out the image. I think this is the first card where my original vision made it through the design process. I think it is very pretty.
This card is a 5.5” by 4.25” card (A2). The products used on this card are listed at the end of the page.
Step by Step Instructions for making this Card.
Make the card Base
1. Make the card base with Crisp Cantaloupe Card Stock for an A2 card. (See Card Basics).
Foil two panels
2. Cut out two panels from the Hammermill paper that measures 4.25” by 5.5”. (Each panel is a quarter of the Hammermill sheet).
a. You will need two of these panels for this card.
b. This panel will be a bit larger than you need but you will trim it down later.
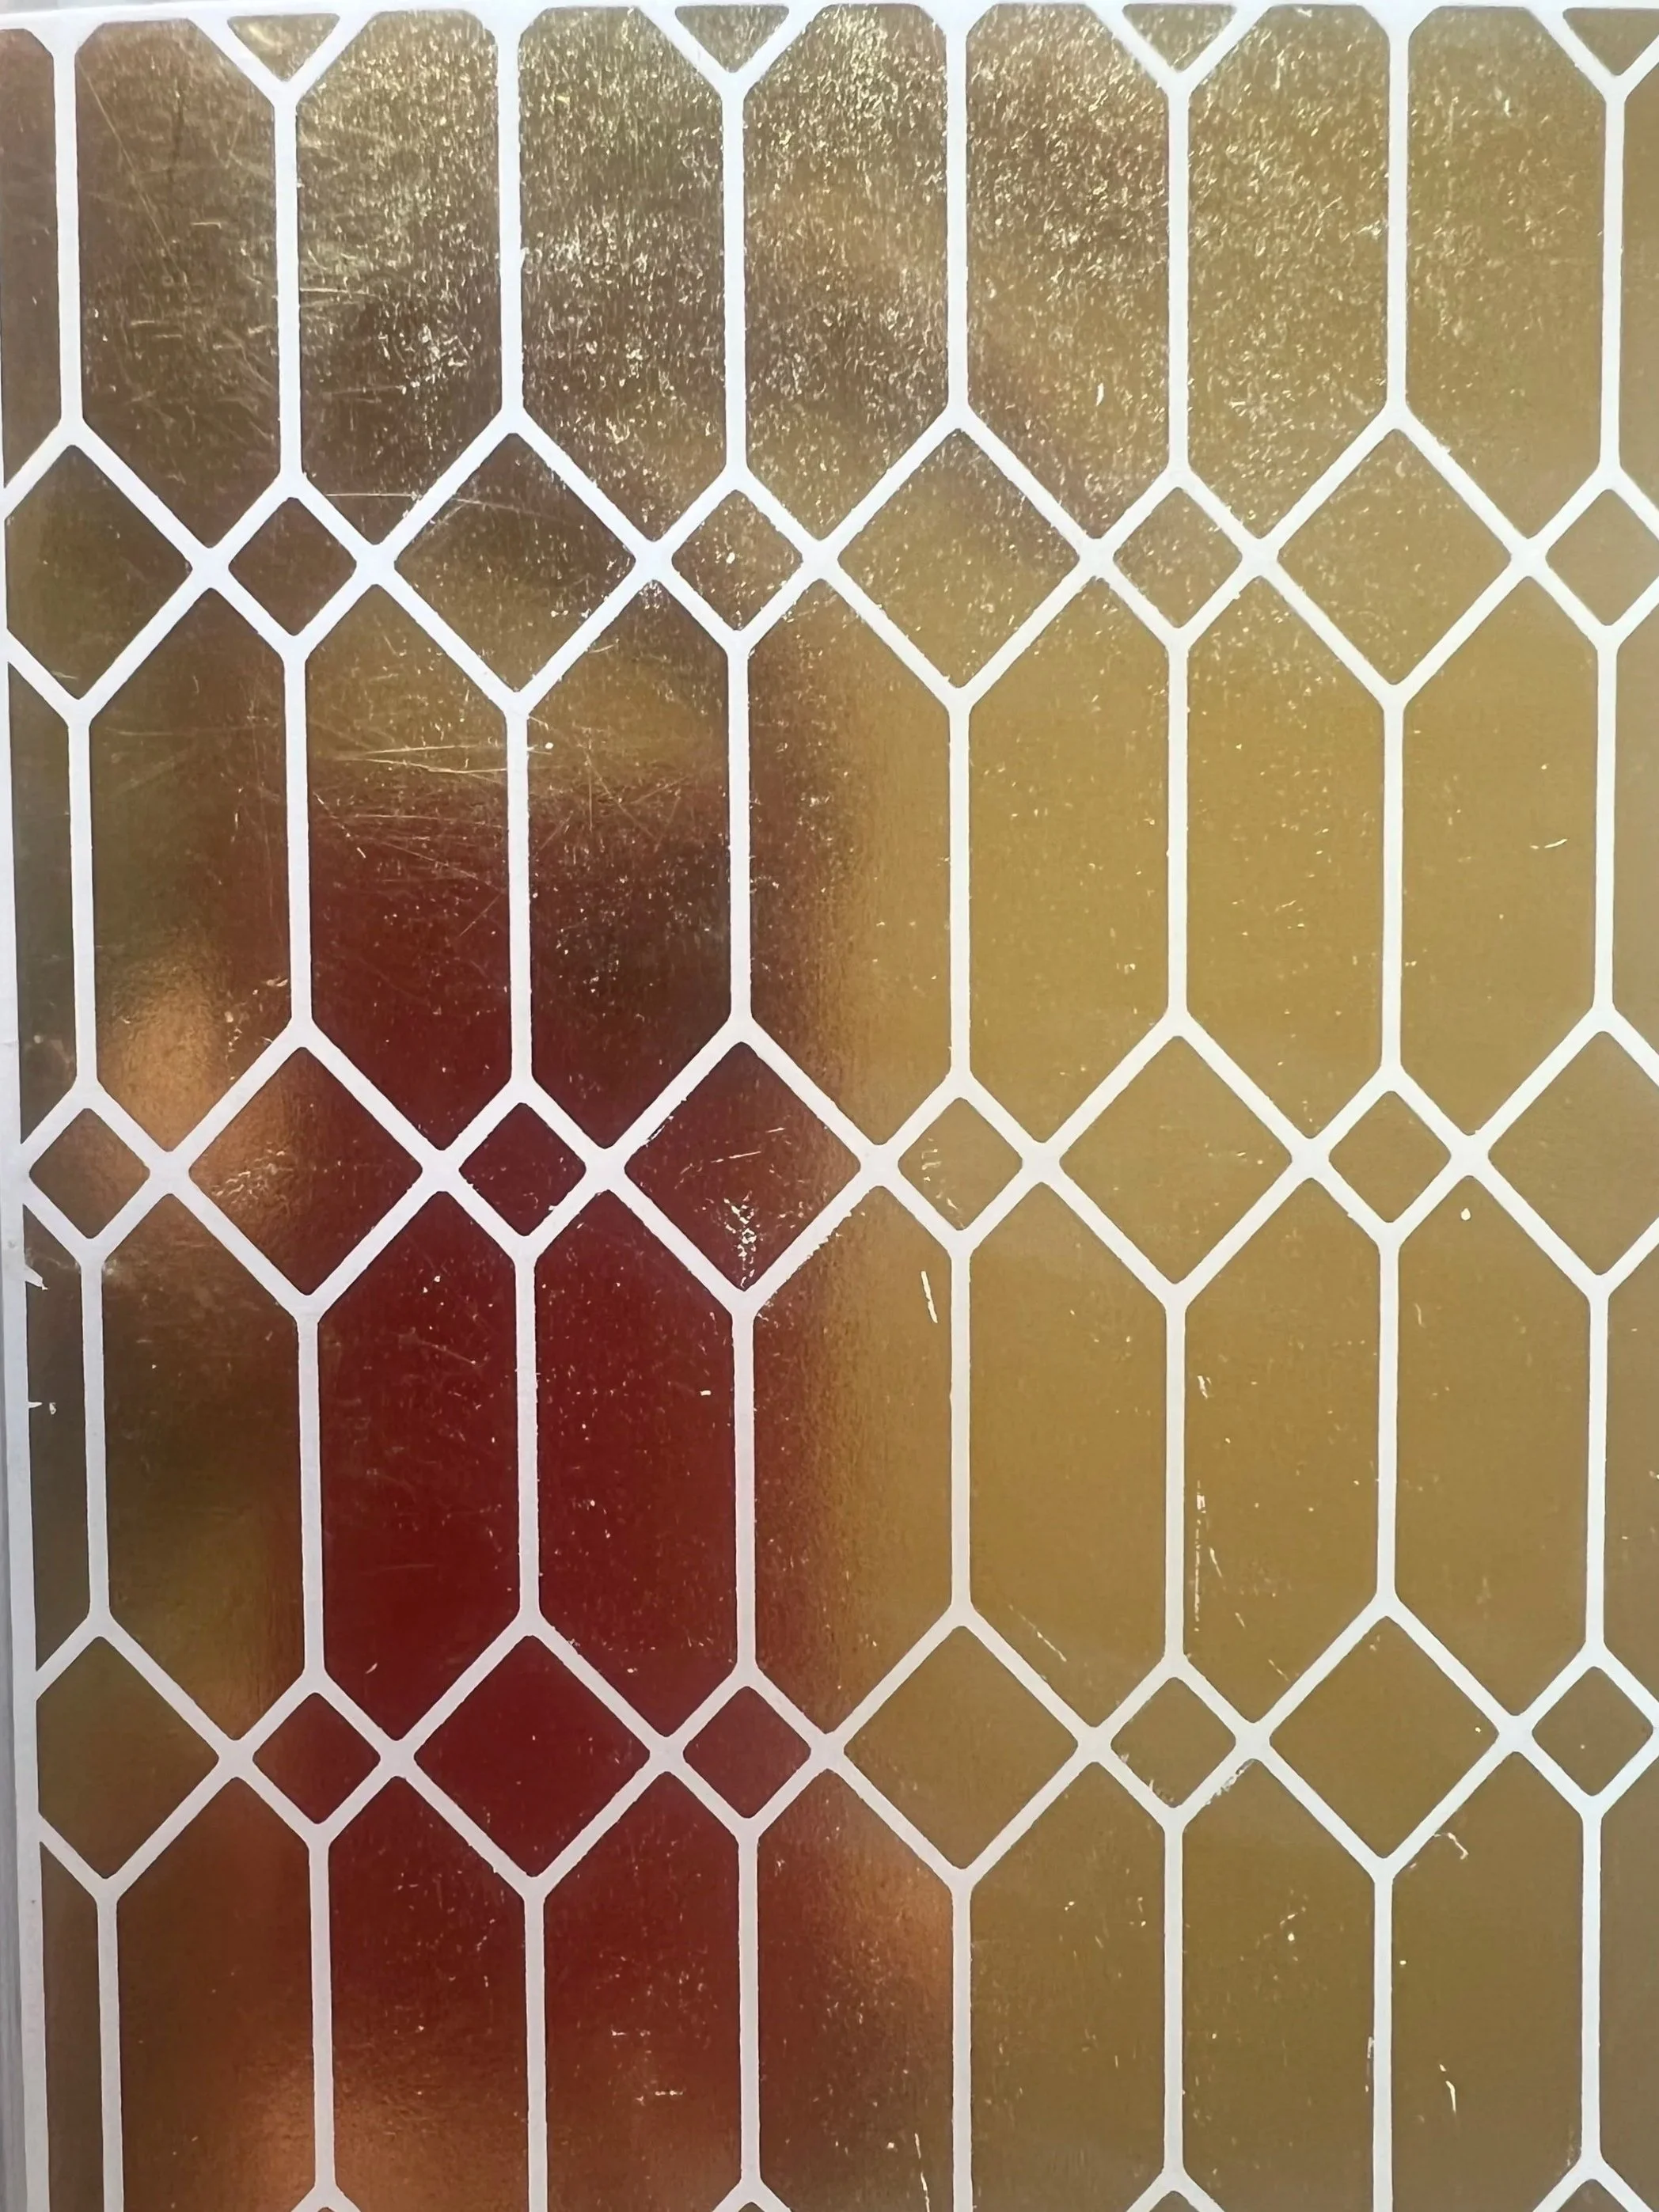
3. Foil the Stain-Glass onto the Hammermill Paper using the Gold Foil. (See Card Basics)
4. Save the used foil and using the solid plate to foil the negative image onto the second quarter of Hammermill paper. (See Card Basics). See image to the right for the result of the foiled negative image.
Stencil
5. The Stained-Glass Stencil is a three-layer stencil.
a. Place Layer 1 over the panel that has the window outline foiled. Align the stencil over the foiled image. Using the blending brush apply the Barely Banana (or a soft yellow), Boho Blue (or a soft blue), and Crisp Cantaloupe (or a soft peach) ink over the windows. Make sure the colors overlap but that there are areas of each color visible.
b. Remove Layer 1 and lay down layer 2 again aligning the stencil over the foiled image. I alternated the yellow and the blue colors die on each row of this stencil.
c. Remove layer 2 and lay down and align layer 3 over the foiled image. I put down the Pistachio Pudding (or soft green) ink into the smaller diamonds that align with the blue diamonds created in the last step. Then put down the soft peach ink onto the smaller diamonds that align with the yellow diamonds created in the last step.
d. You will now have a pretty stained-glass window.
Cut out gold pieces
6. With the negative foiled panel and the stained-glass die use the die cutting machine to cut out the gold pieces that align with the window shapes.
Assemble panel onto base card
7. For this card I only left a margin on the left and right side of the card, so I trimmed the panel to 5.5” X 4”, which gives you a ~ .12” frame on each side of the card.
8. Glue the panel on to the base card. Glue the gold pieces on to the matching panels.
Make the sentiment panel.
9. Use a blending brush, I applied the cantaloupe crisp (or light peach ) ink onto a piece of scrap hammermill paper. The paper scrap needs to be a bit larger than the stitched diamond die that you will be using for the sentiment.
10. Die cut the diamond from the Stitched diamond using the paper that you just inked in the previous step.
11. Foil the “Thanks” sentiment using gold foil onto the diamond you just cut out.
Assemble Sentiment onto card
12. Cut out two diamonds (using the same die used to make the sentiment) out of scrap paper.
13. Glue the two diamonds together and then glue the sentiment with the Thanks on top. This will give you a three-layered diamond that is very sturdy.
14. Glue this sentiment onto the front of the card and embellish with rhinestones.
List of products and tools
Non-Consumables
Stained Glass Foil Plate from Pink Fresh
Stained Glass Die from Pink Fresh
Stained Glass Layered Stencil from Pink Fresh
Stitched Diamond Die from Nina’s Thing
Fancy Script Words from Pink Fresh
Solid Hot Foil Plate from Pink Fresh
Blending brushes
Consumable
Gold Foil from Spellbinders
Crisp Cantaloupe Card Stock by Stampin Up
“white” Premium Color Copy Cover by Hammermill
Barely Banana Classic Ink from Stampin Up
Boho Blue Classic Ink from Stampin up
Crisp Cantaloupe Classic Ink from Stampin Up
Pistachio Pudding Classic Ink from Stampin Up
Pearls and Rhinestones for embellishing
Special Tools
Glimmer Hot Foil System by Spellbinders
Platinum Machine by Spellbinders