Dragonfly Skies
Years ago, I learned the technique where you apply ink to photo paper which results in a colorful glossy photo finish that is out of this world. A special Thanks to Katie, who was my Stampin up demonstrator at the time and introduced me to this technique.
I recently rediscovered this technique and thought I could make the perfect whimsical skies that would pair well with the Alt&New dragonflies.
I recently watched a video from Jennifer McGuire that is loaded with so many techniques to do with glossy cardstock, which inspired me to include the floral piece. The result was better than I imagined - a beautiful fun fantasy card.
This card is a 5.5” by 4.25” card (A2). The list of products used on this card are listed at the end of the page.
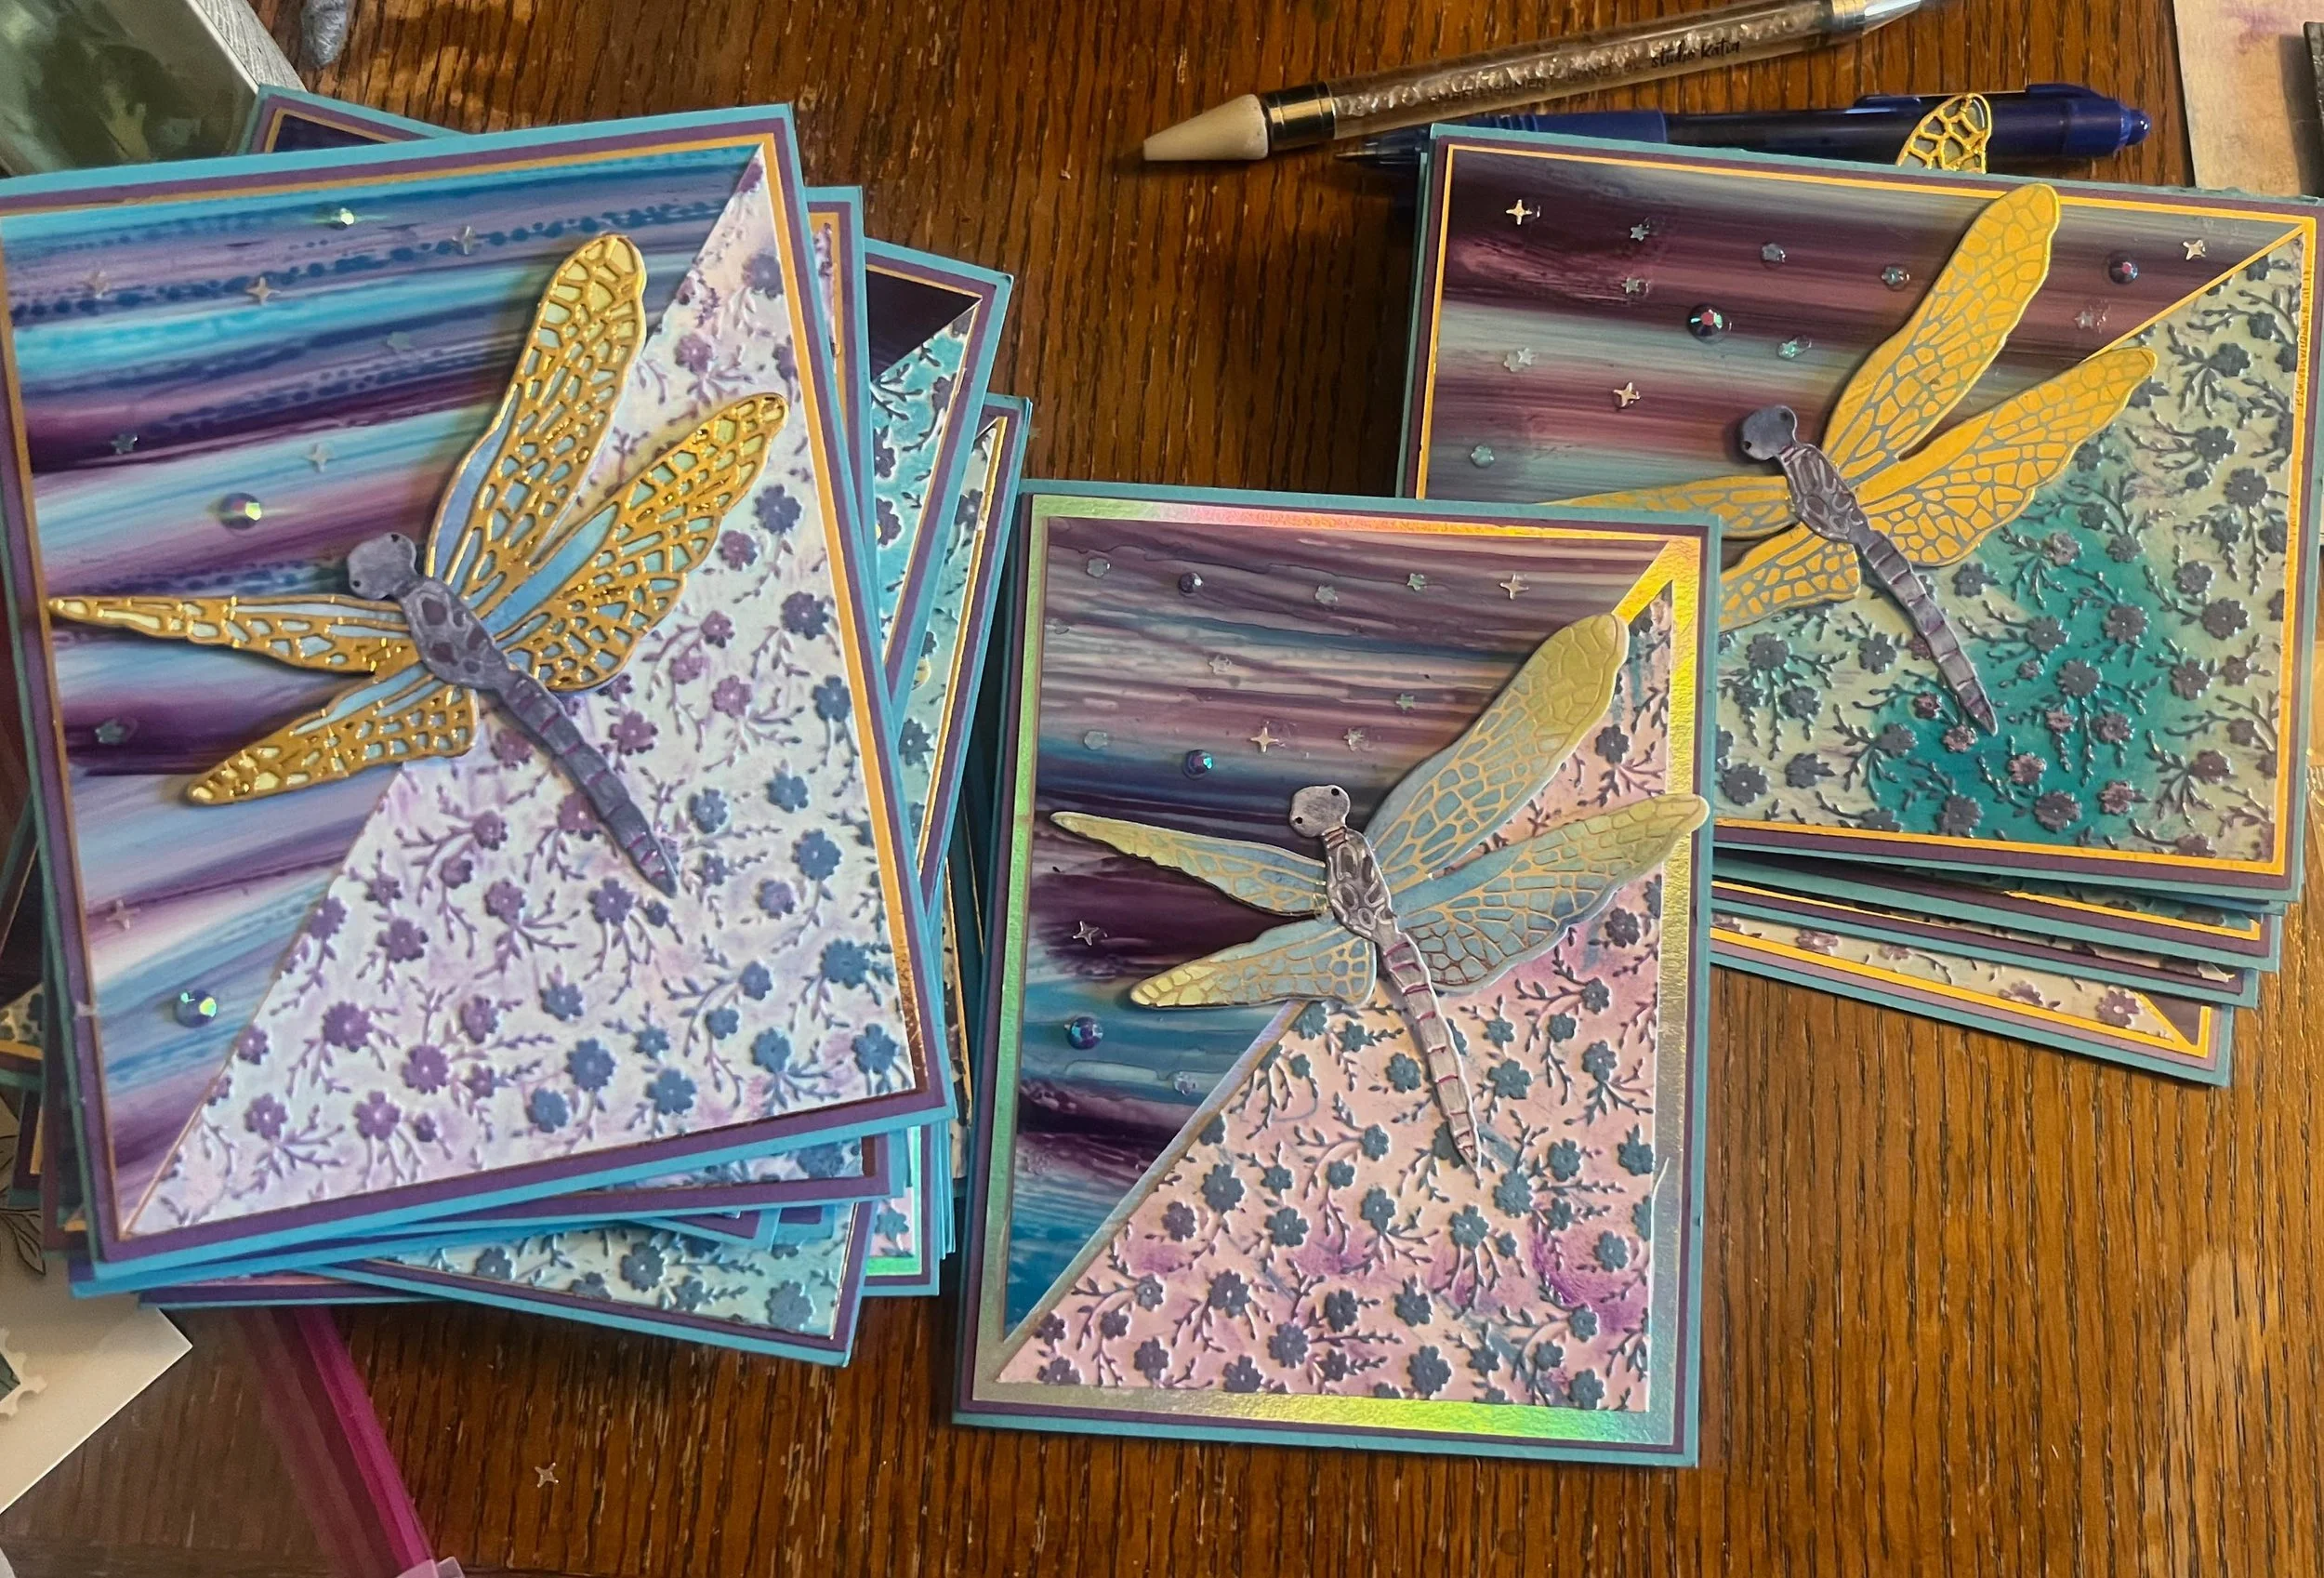
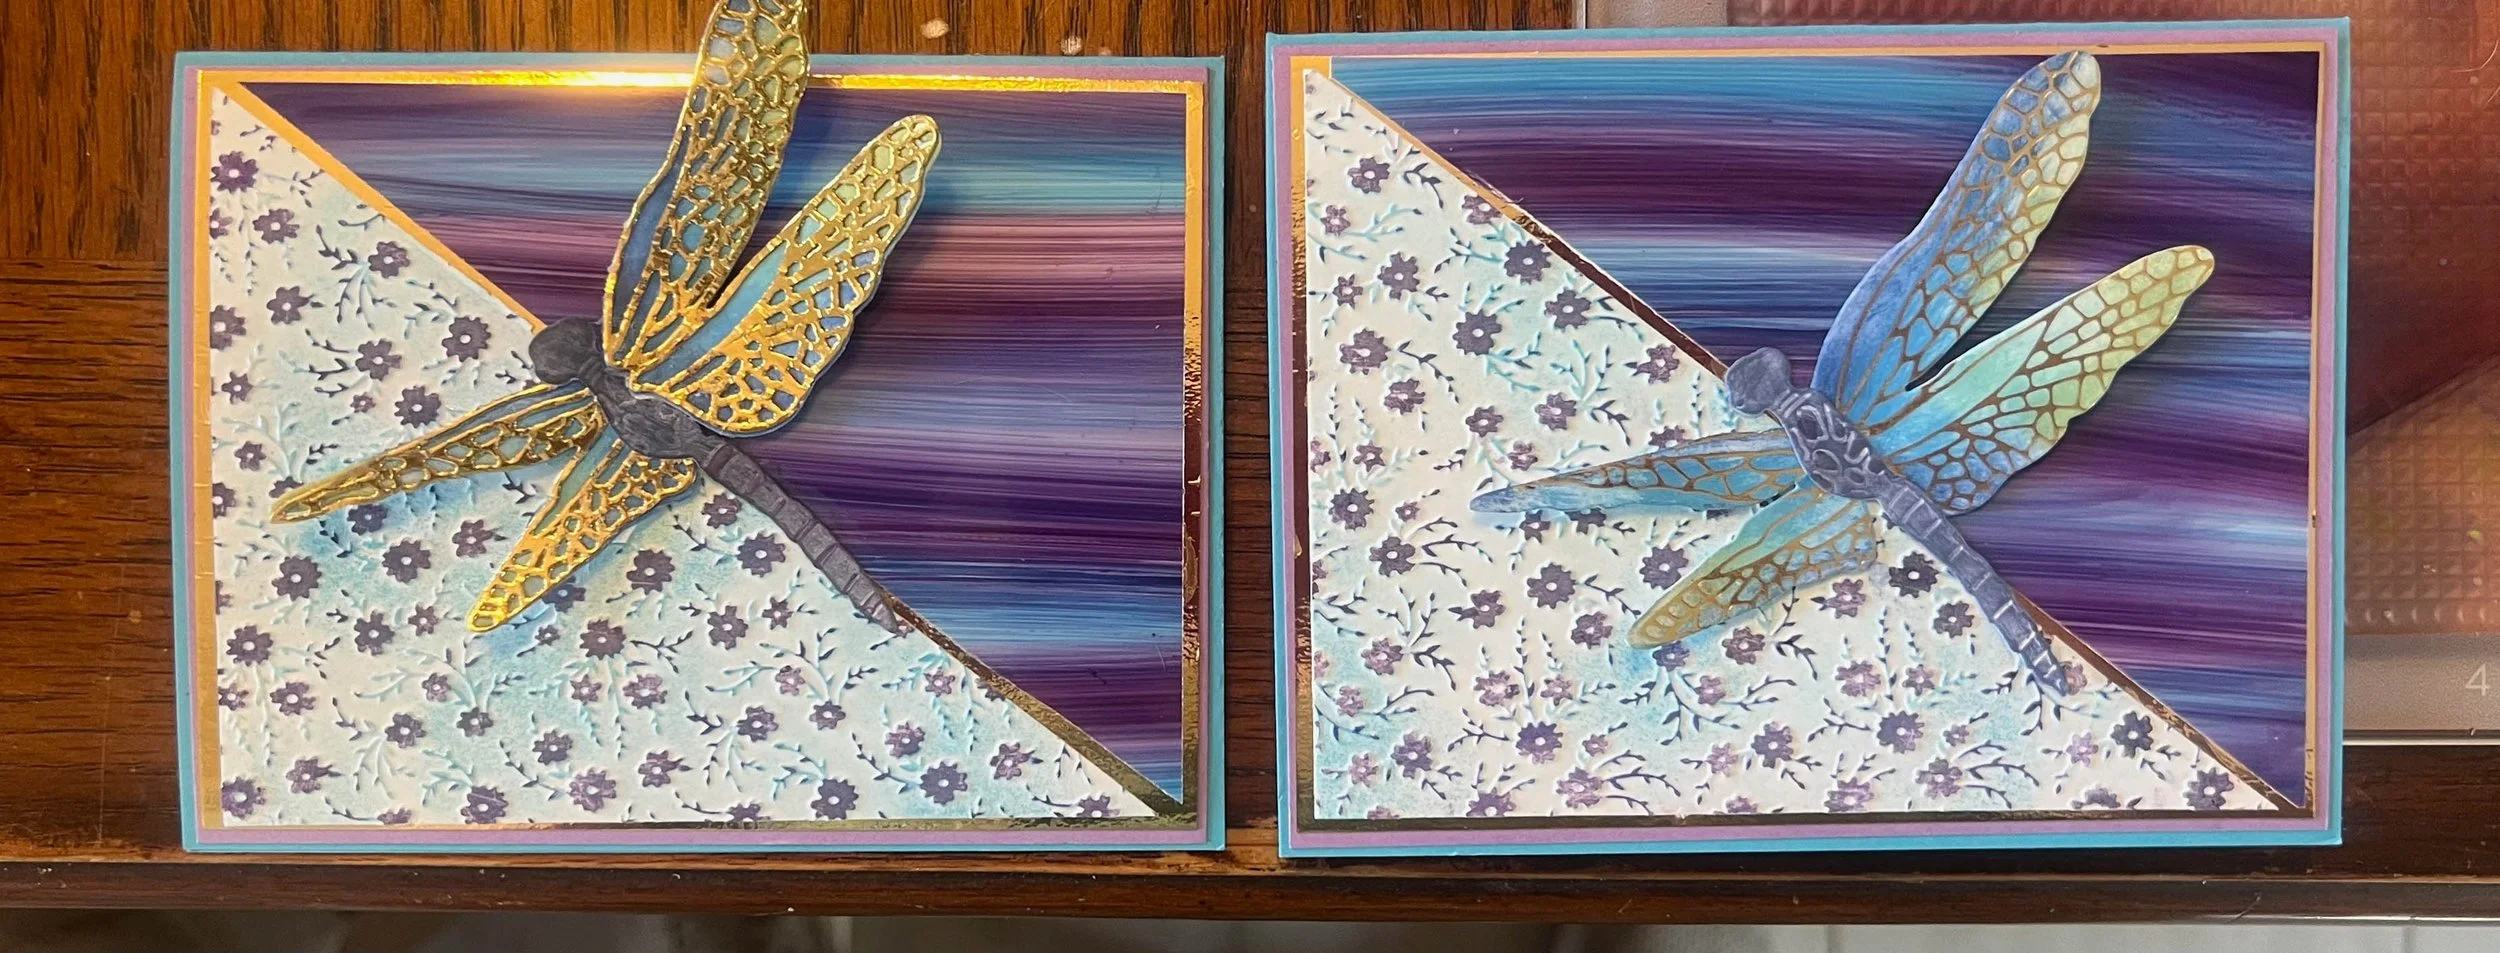
Alt & New has many different options in regard to the wings. I actually used all three:
1) Detailed die cut (Far left)
2) Glimmer Foil plate (Middle) and
3) Inverse foiling (far right)
Step by Step Instructions for making this Card.
Make the Card Base
Make the card base with Tempting Turquoise Card Stock for an A2 card. (See Card Basics).
Cut the Card Panels
There are five panels for this card:
Purple matting panel at 5-7/8” x 4-1/8”.
A gold or silver cardstock matting panel at 5-1/4” x 4”.
If using the die cut details for the wings, use this panel to cut out the wings. You will still use it as a matting panel but most of the card will be covered so you can use it to cut out the wings.
(2) Glossy or Photo paper cut to 5-1/2 x 4-1/4”
½ sheet of white cardstock (4-1/4 x 5-1/2) for dragonflies.
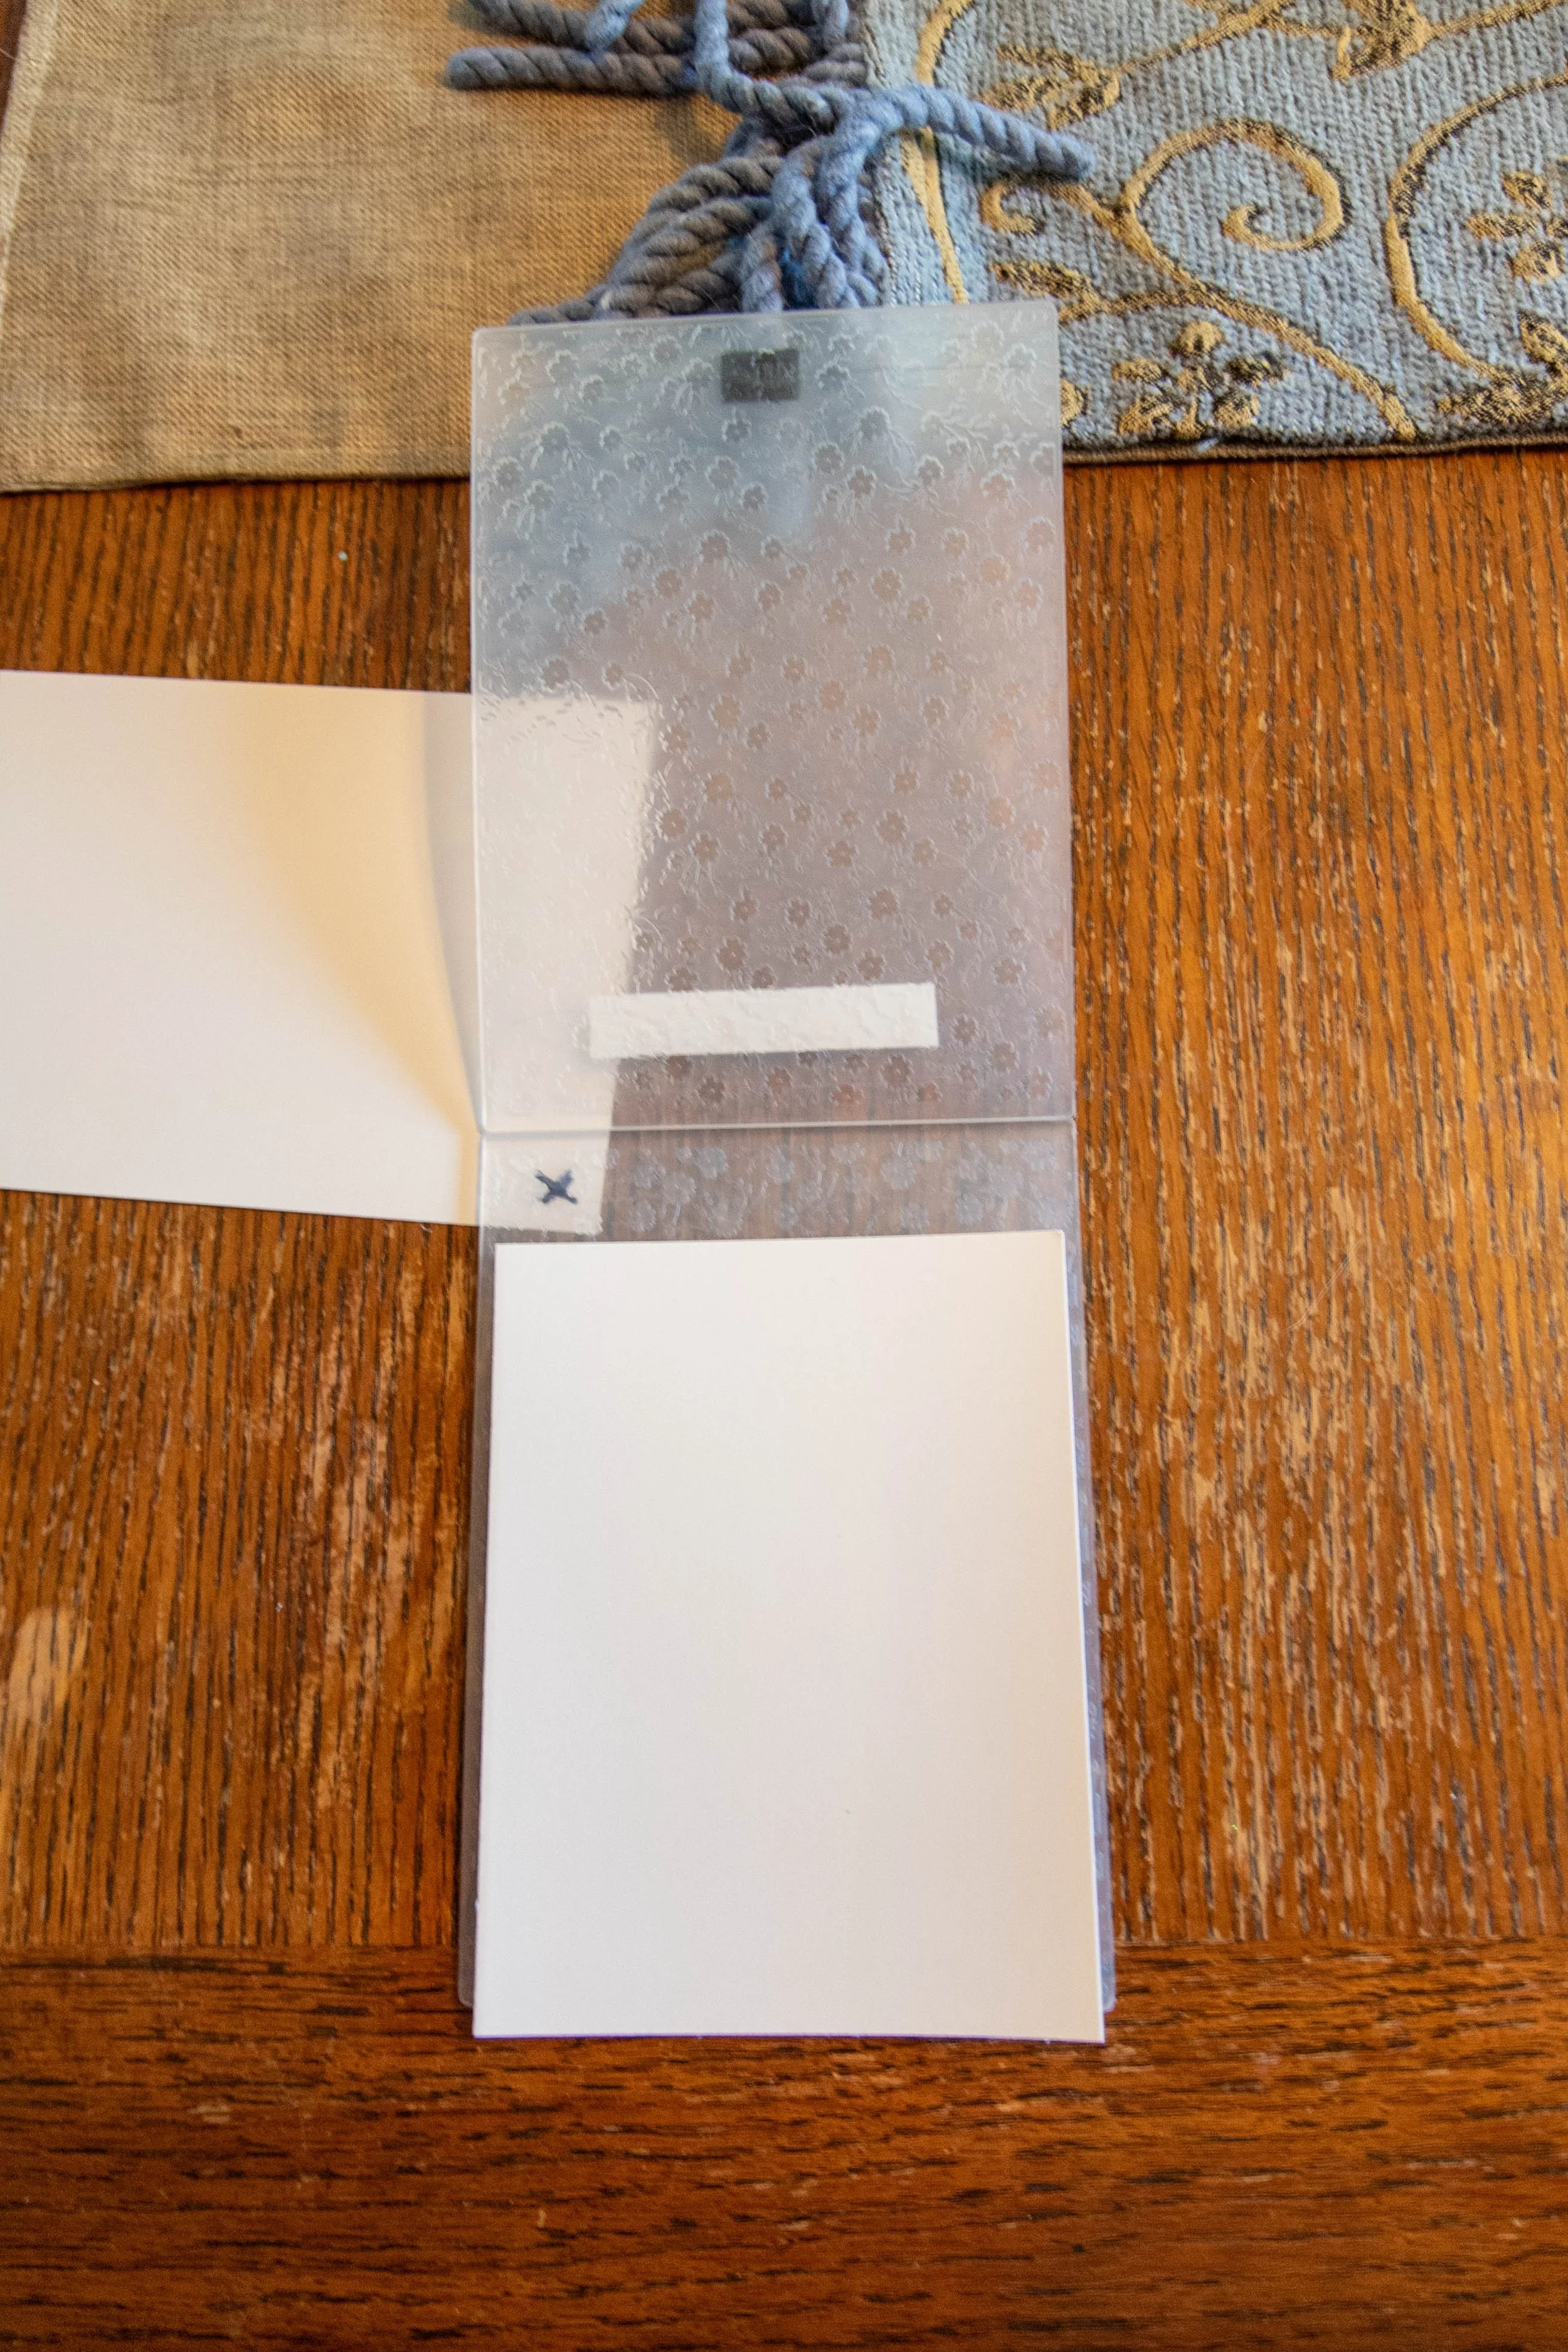
Emboss and Ink the Floral Panel
Identify the side of the embossing folder that is the embossed side. (An embossing folder has two sides: embossed (mountains), and debossed (valley)). Place an X using a sharpy on the embossed outside of the folder.
Take one of the glossy/photo panels and put the matte side down on the embossed side so the shiny card is face up. Run the panel through your embossing machine.
Using a dauber, work in the colors you want in the background of the floral print. I used turquoise and purple. Don’t worry about the flowers because any ink they get on this step will be removed,
Take a sanding block and sand off he gloss from the flowers and expose the core paper.
Going straight to paper, lightly apply the ink, by swiping the color pad over the flowers. The core will pick up the ink and pop.
Cut the panel down to 5-1/4 X 3-3/4”. Save scrapes.
Put the panel aside.
Ink the Sky
This step is messy. For these cards I took turquoise and eggplant ink re-inker and placed dots of ink on a cotton ball. For my card I had four dotted lines alternating between turquoise and eggplant. Saturated the cotton ball with rubbing alcohol.
For the sky, place the saturated cotton ball on the second photo/glossy panel and on the glossy side swipe the cotton ball from one side to the next. Move the cotton ball down below the streak you just did and streak again until you completely cover the card.
The alcohol will initiate a chemical reaction resulting in a glossy photo finish. Very cool!
Cut the panel down to 5-1/4 X 3-3/4”. Save scrapes.
Put the panel aside.

Create Dragonfly
If using the foiled wings, use the white cardstock to foil the dragonfly wings. Leave enough white space to cut out the dragonfly’s body.
Cut out wings and body using the dragonfly dies, using the white cardstock panel. (if you foiled the wings, you will cut out the foiled image.
Color Wings - Using the distress inks I blended the following on the wings starting at where the wings touch the body and move to the tips: Prized Ribbon (Blue), Salty Ocean (Turquoise), Salvaged Patina (Mint), and Shabby Shutters (Yellow-Green).
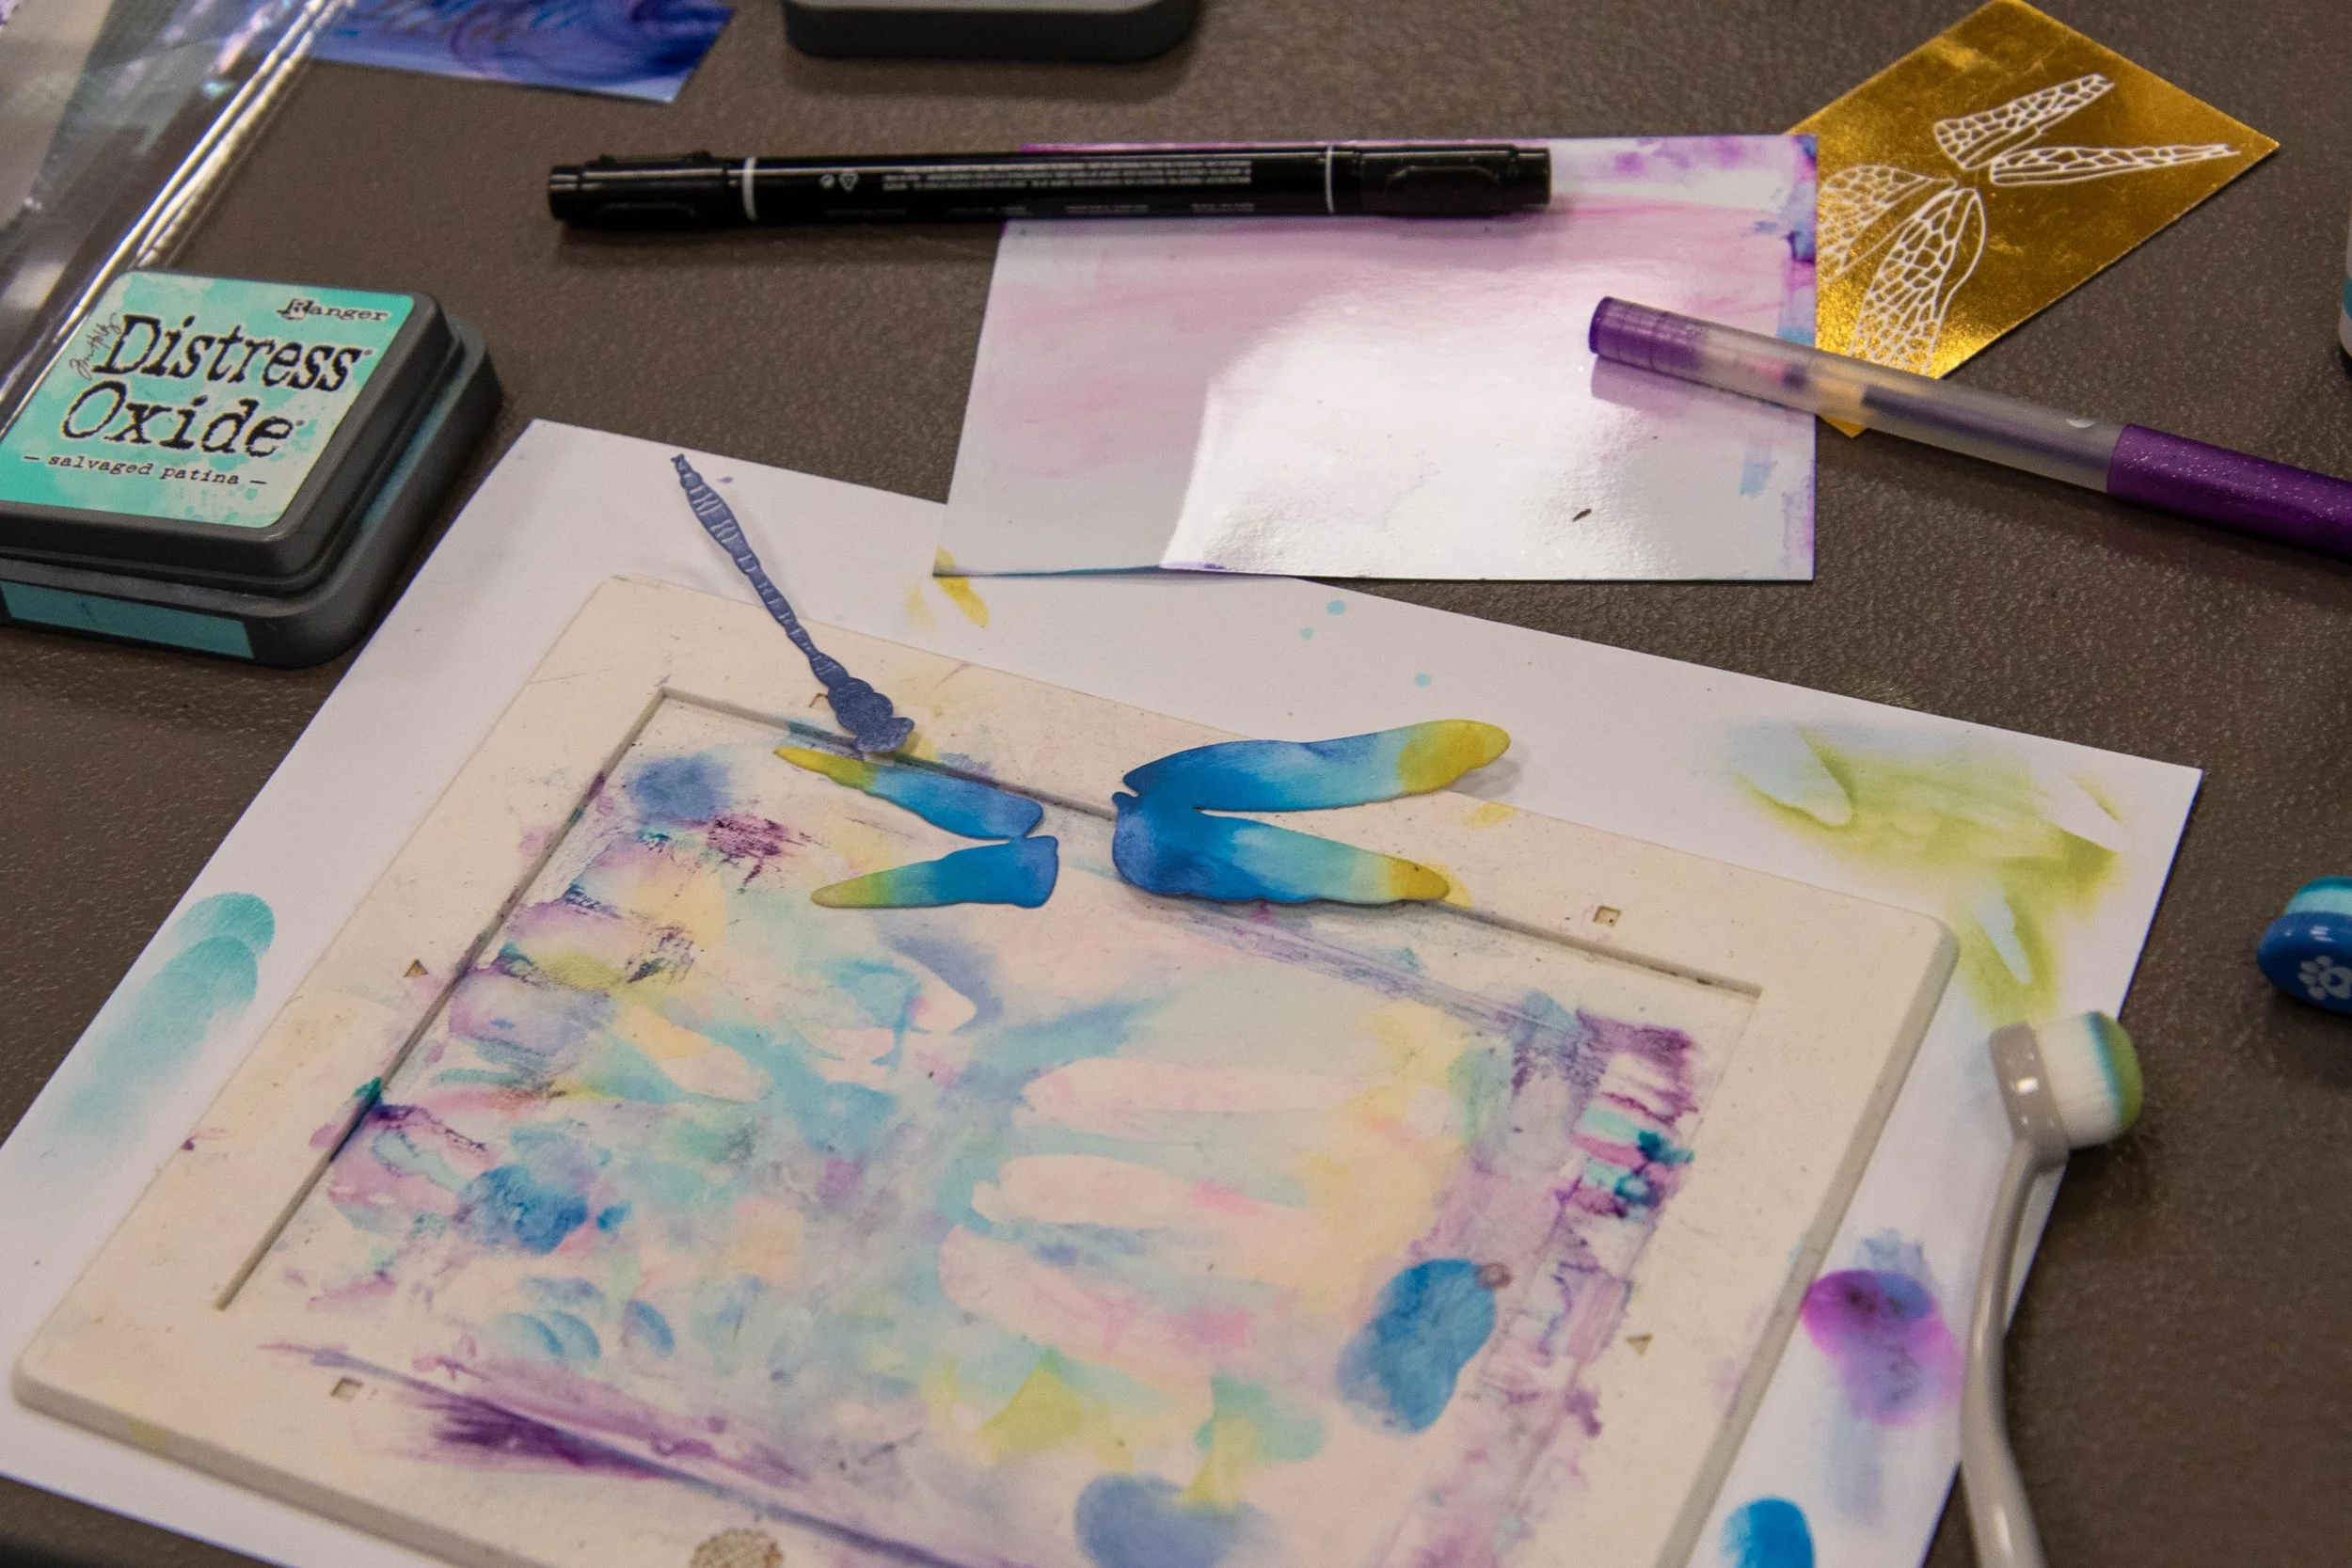
If you are using a foiled wing you will blend over the foil, then wipe it off. The foil will resist the ink, and the exposed paper will capture the inks.
If using the detailed wing die cut, then put small dots of glue on the back of the wings so you get full coverage. Place the die cut on the wings you just inked.
Color the body using the distress ink chipped sapphire distress ink. To add interest, I used a black marker to add eyes, a glimmer pen to enhance the body lines, and a darker marker to enhance the body marks.
To assemble the dragon fly. Place glue on the top of edge of each wing. Place the body on the wings. Put dragonfly aside to let dry.
Assemble card
Take the two glossy panels (sky and floral). Place the panel in a paper cutter so you cut a line from the top right corner the bottom left corner. VERY IMPORTANT - Both panels need to be cut the same way. You will have four pieces with a spare sky and spare floral piece.
Glue purple matting panels onto card base.
Glue the metallic matting panel onto the purple matt.
Position the sky/flower on the card to the position you desire (you may choose to expose the metallic cardstock on the diagonal)
Glue the sky on the top side of the card.
Glue the floral piece on the bottom side of the card.
Using foam dots attach the dragonfly wing base and place on the front of the card. Glue body down to card.
Ink the “spread your wings” sentiment on the interior panel
Glue a floral or sky scraps to the interior card.
Embellish
Bonus - I taught a class on this card. Double click to see other version of this card.
List of products and tools
Non-Consumables
“Delicate Dragonflies” Layering Dies Set by Alt&New.
“Delicate Dragonflies Details” Hot Foil Set by Alt&New.
“Little Ladybug” Stamp Set by Stampin Up; “Spread your wings and fly!”
“Ornate Floral” Embossing folder by Stampin’ Up
MISTI stamp positioner
Consumable
Tempting Turquoise Classic Ink by Stampin’ UP
Elegant Eggplant Classic Ink by Stampin’ Up
Shabby Shutters Distress Oxide Ink by Tim Holtz/Ranger
Salvaged Patina Distress Oxide Ink by Tim Holtz/Ranger
Salty Ocean Distress Oxide Ink by Tim Holtz/Ranger
Prized Ribbon Distress Oxide Ink by Tim Holtz/Ranger
Chipped Sapphire Distress Oxide Ink by Tim Holtz/Ranger
Basic Black Marker by Stampin’ Up
Purple Glitter Gel Marker from Cricut
Tempting Turquoise Cardstock by Stampin’ Up
Gorgeous Grape Cardstock by Stampin’ Up
Gold Metallic Cardstock
White Cardstock
Photo Paper or Glossy White Cardstock
Trinity Stars
Purple Rhinestones
Glue
Gold Foil by Spellbinders
Silver Foil by Spellbinders
Special Tools
Glimmer Machine by Spellbinders
Platinum Machine by Spellbinders