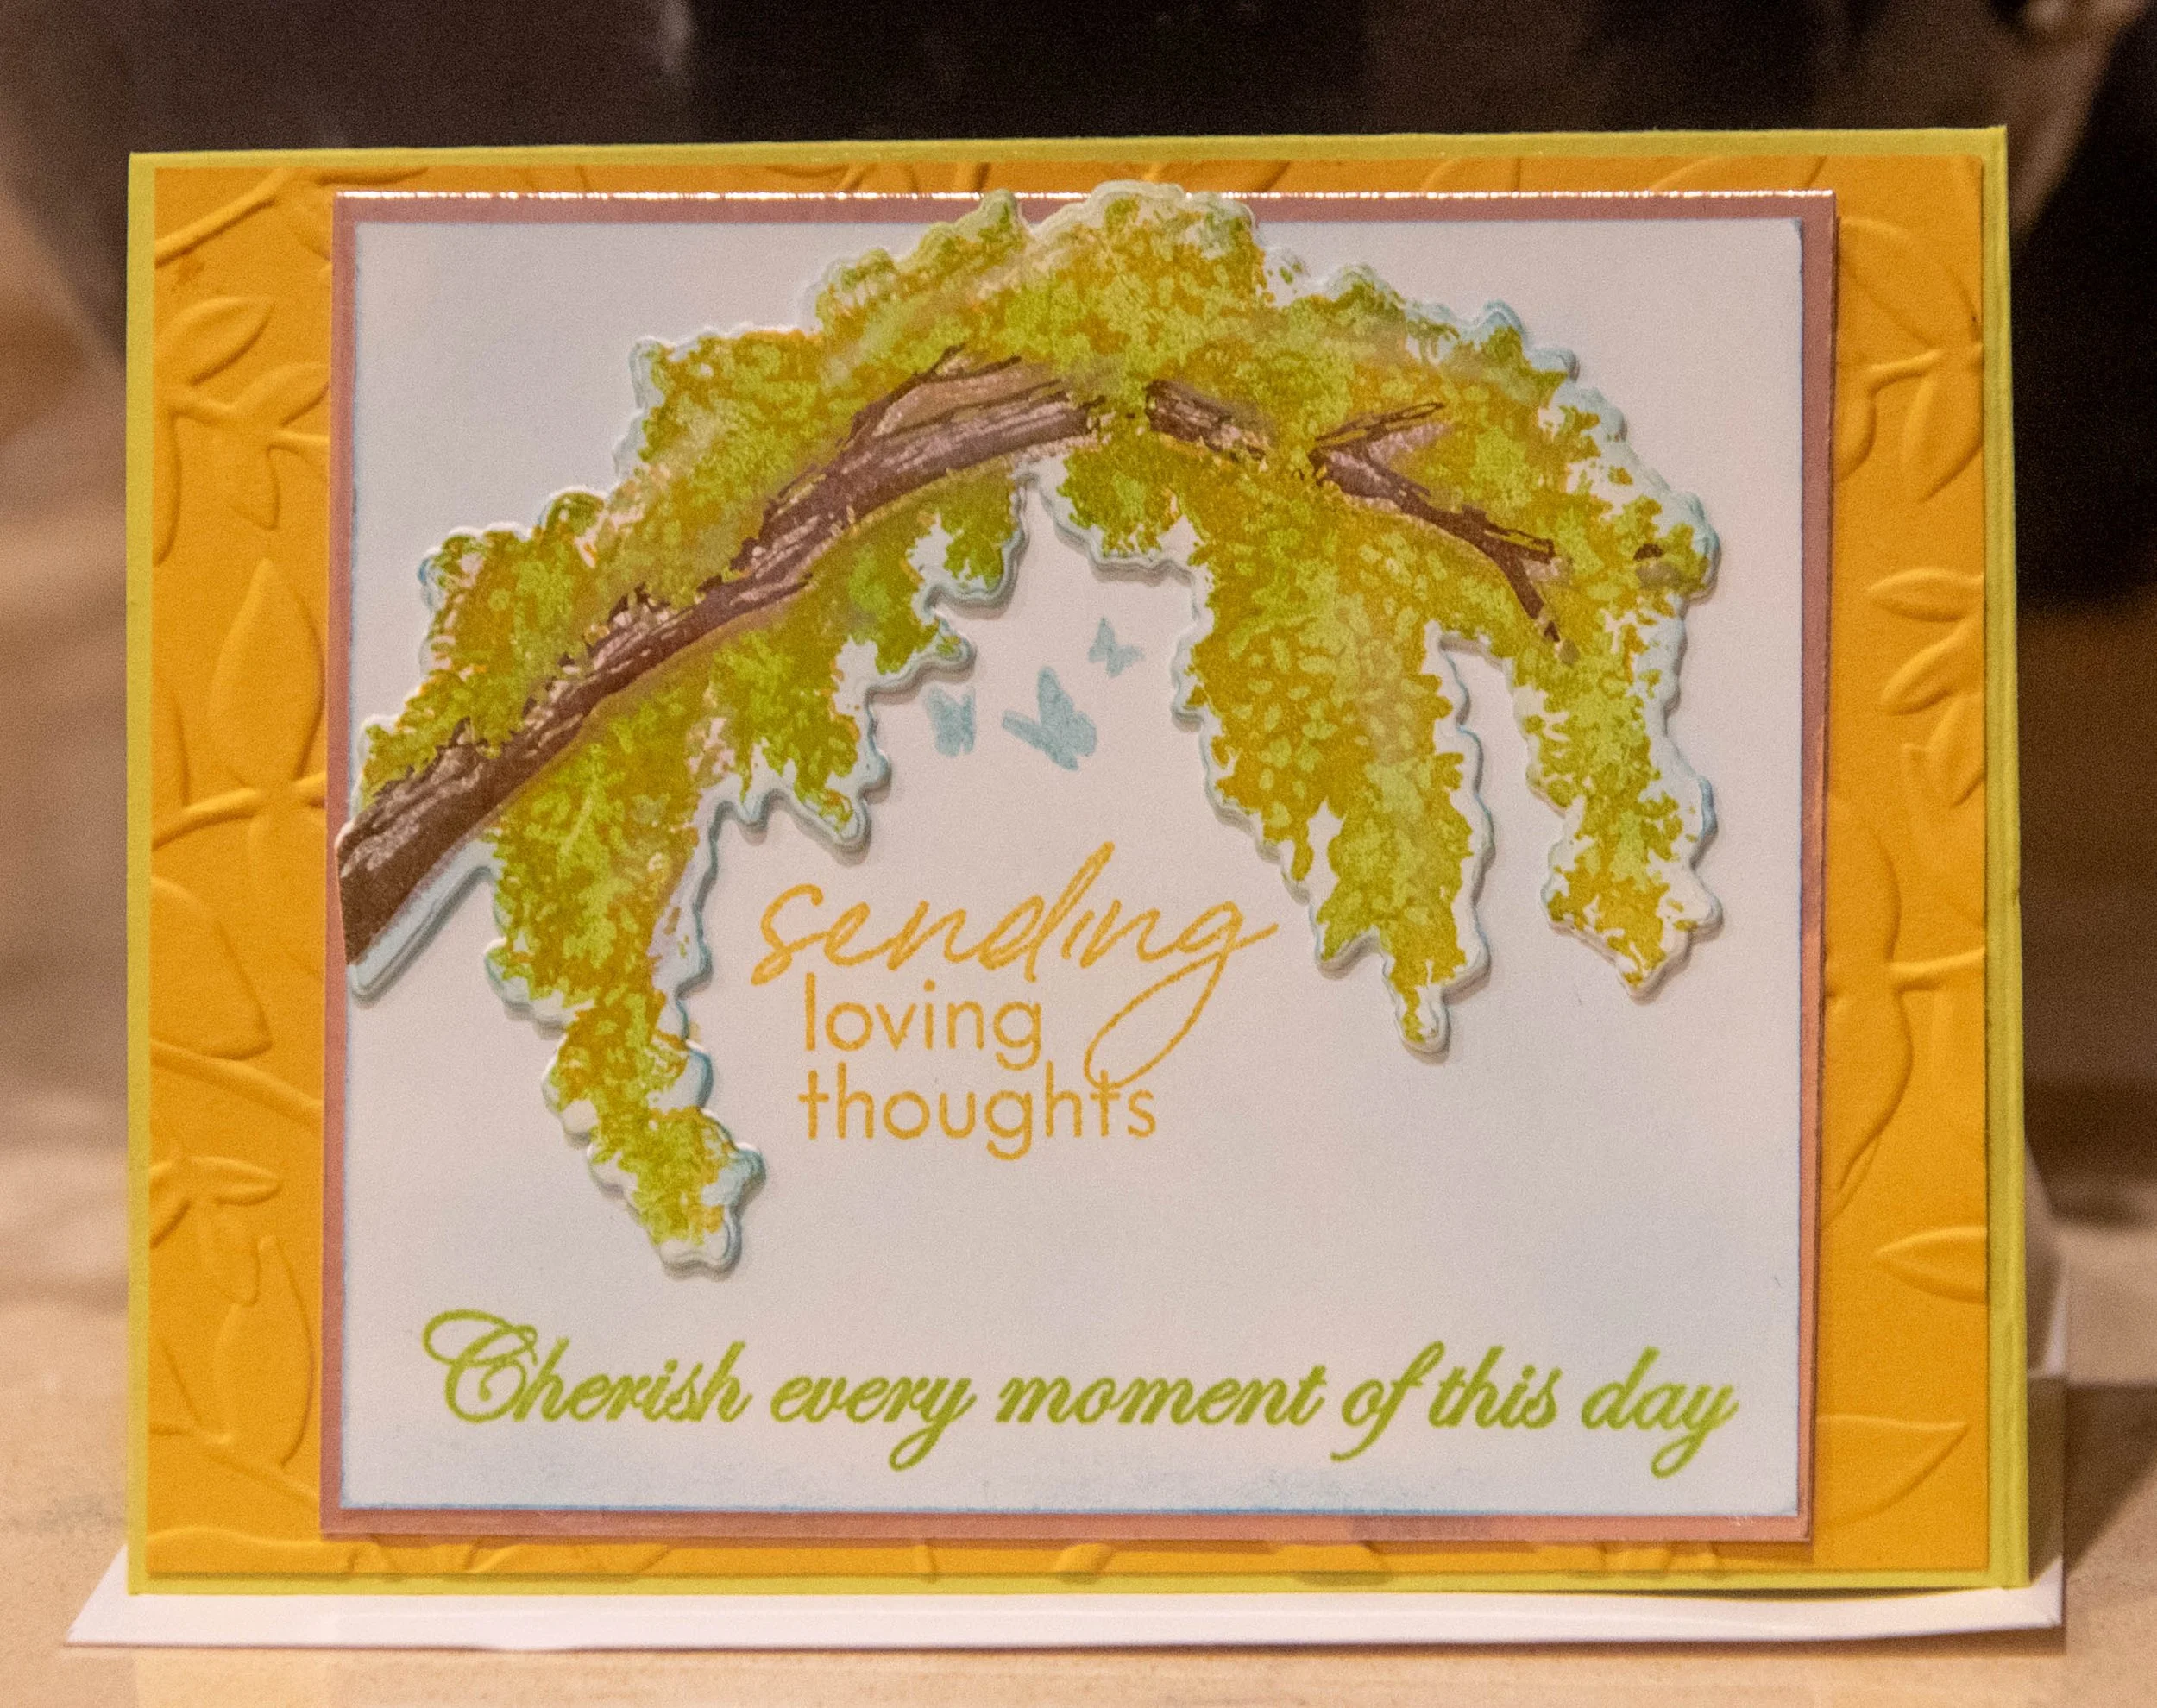
Sending loving thoughts
A special request for a Wedding Card for a friend’s nephew. His Save the Date Card showed him and his fiancé at a Redwood Forest under the bough of a redwood. When I originally saw the picture, I thought there were yellow flowers in the trees but upon a detailed look what I saw was that it was yellow sun light. My muses wouldn’t let me let go of the hanging flower idea but then I found a stamp that had hanging foliage from a tree branch. It was very close to what I imagined so I used this image as the focal for the wedding card.
I apologize as I didn’t take a lot of pictures.
Step by Step Instructions for making this Card.
Make the Card Base
1. Make the card base with Lemon-Lime Card Stock for an A2 card. (See Card Basics).
There are 5 panels for the front of the card and one panel for the interior.
Cut the Card Panels
2. Large Matting panel 5-3/8” X 4-1/8” in Crushed Curry cardstock.
3. Small Matting panel 4-5/8” x 4” in Rose Gold Cardstock
4. Focal Image Panel 4-1/2” X 3-7/8” White Cardstock
5. Tree Panel (2) – A scrap piece of white cardstock large enough to take the complete tree stamp image. You will need two pieces.
6. Interior Sentiment Panel 5-3/8” X 4-1/8” White Cardstock
Ink and cut out the Tree Branch and Bough
For this card I foiled a simple “I love you” on the interior of the card.
7. Using a stamp positioning system (I use the Alt-N-New Stamp wheel when using layering stamps) Position the smooth tree branch stamp on the positioner, ink with Crumb Cake ink and stamp on tree panel.
8. Position the layered tree brank ink so it aligns with the last stamped image. Ink with Soft suede and stamp on the tree panel right over the last image.
9. Position the smooth hanging leaves stamp onto the positioner. Align so the image is stamped around the tree branch. Stamp with Lemon-Lime ink. Stamp over the tree branch image.
10. Position the textured leave stamp onto the positioner. Align so the image is stamped over the last image. Stamp with Crushed Curry Ink. Stamp over the last image.
11. Use the branch die, align the die over the stamped branch image, and run through a die cutting machine. Run through to cut another image on un-inked white cardstock.
12. Glue the inked tree branch over the blank cut image.
13. Using a dauber – burnish the edges of the tree branch with Balmy Blue ink.
Ink the front panel
14. Using the cut tree branch to align the “Sending Loving Thoughts” stamp on the positioner. Stamp the image in crushed curry ink onto the focal panel.
15. Using the cut tree branch to align the “butterflies” stamp on the positioner. Stamp the image is Balmy Blue ink onto the focal panel.
16. Use the positioner to align the “Cherish every moment of this day” stamp to the bottom of the focal panel. Stamp the image in Lemon-Lime ink onto the focal panel.
17. Using a blending brush – lightly apply Balmy Blue ink onto the focal panel.
18. Using a dauber, burnish the edge of the focal panel with Balmy Blue ink.
Make the Interior
19. Using a dauber, burnish the edge of the interior panel.
20. Using a stamp positioner – align the sentiment onto the card. I like to keep the sentiment offsides to provide more room for the sender to write in the card.
Assemble card
21. Glue the focal panel onto the rose gold panel.
22. Run the yellow matting panel through the embossing machine using the layered leaves embossing folder.
23. Glue the yellow matting panel onto the card base.
24. Glue the Focal/Gold panel onto the yellow matting panel.
25. Glue the Tree bough onto the focal. Make sure you can see the butterflies.
26. Glue the interior panel on the inside of the card.
List of products and tools
Non-Consumables
“January 2022 Hero Arts Kit”, by Hero Arts - Stamps:” Layered Tree Branch”, “Layered Hanging Leaves”, “Butterflies”, “Sending Lovely Thought”; Die – Tree Bough
“Forever Blossoms” Stamp set by Stampin’ Up; “Cherish every moment of this day”
“God’s Blessing” Stamp set by Stampin’ Up; “May the God of love be the heart of your marriage, the light of your home, and the ever-present partner in your new life together”
“Layered Leaved” 3-D embossing Folder by Stampin’ Up
Consumable
“Crushed Curry” Classic Ink by Stampin’ up
“Lemon-Lime” Classic Ink by Stampin’ Up
“Balmy Blue” Classic Ink by Stampin’ Up
“Crushed Curry” Cardstock by Stampin’ Up
“Lemon-Lime” Cardstock by Stampin’ Up
“Soft Suede” Classic Ink by Stampin’ Up
“Crumb Cake” Classic Ink by Stampin’ Up
“White” Premium Color Copy Cover Paper by Hammermill
Rose Gold Cardstock by Simon Says
Special Tools
Glimmer Hot Foil System by Spellbinders
Platinum Machine by Spellbinders
MISTI stamp positioner
Stamp Wheel by Alt-N-New